 #### 1. Set up the server
> Before using `dstack`, ensure you've [installed](installation/index.md) the server, or signed up for [dstack Sky :material-arrow-top-right-thin:{ .external }](https://sky.dstack.ai){:target="_blank"}.
#### 2. Define configurations
`dstack` supports the following configurations:
* [Dev environments](concepts/dev-environments.md) — for interactive development using a desktop IDE
* [Tasks](concepts/tasks.md) — for scheduling jobs, incl. distributed ones (or running web apps)
* [Services](concepts/services.md) — for deploying models (or web apps)
* [Fleets](concepts/fleets.md) — for managing cloud and on-prem clusters
* [Volumes](concepts/volumes.md) — for managing network volumes (to persist data)
* [Gateways](concepts/gateways.md) — for publishing services with a custom domain and HTTPS
Configuration can be defined as YAML files within your repo.
#### 3. Apply configurations
Apply the configuration either via the `dstack apply` CLI command (or through a programmatic API.)
`dstack` automatically manages infrastructure provisioning and job scheduling, while also handling auto-scaling,
port-forwarding, ingress, and more.
!!! info "Where do I start?"
1. Proceed to [installation](installation/index.md)
2. See [quickstart](quickstart.md)
3. Browse [examples](/examples)
4. Join [Discord :material-arrow-top-right-thin:{ .external }](https://discord.gg/u8SmfwPpMd){:target="_blank"}
## Installation
# Installation
## Set up the server
### Configure backends
To orchestrate compute across cloud providers or existing Kubernetes clusters, you need to configure backends.
Backends can be set up in `~/.dstack/server/config.yml` or through the [project settings page](../concepts/projects.md#backends) in the UI.
For more details, see [Backends](../concepts/backends.md).
??? info "SSH fleets"
When using `dstack` with on-prem servers, backend configuration isn’t required. Simply create [SSH fleets](../concepts/fleets.md#ssh-fleets) once the server is up.
### Start the server
The server can run on your laptop or any environment with access to the cloud and on-prem clusters you plan to use.
=== "uv"
> The server can be set up via `uv` on Linux, macOS, and Windows (via WSL 2).
> It requires Git and OpenSSH.
#### 1. Set up the server
> Before using `dstack`, ensure you've [installed](installation/index.md) the server, or signed up for [dstack Sky :material-arrow-top-right-thin:{ .external }](https://sky.dstack.ai){:target="_blank"}.
#### 2. Define configurations
`dstack` supports the following configurations:
* [Dev environments](concepts/dev-environments.md) — for interactive development using a desktop IDE
* [Tasks](concepts/tasks.md) — for scheduling jobs, incl. distributed ones (or running web apps)
* [Services](concepts/services.md) — for deploying models (or web apps)
* [Fleets](concepts/fleets.md) — for managing cloud and on-prem clusters
* [Volumes](concepts/volumes.md) — for managing network volumes (to persist data)
* [Gateways](concepts/gateways.md) — for publishing services with a custom domain and HTTPS
Configuration can be defined as YAML files within your repo.
#### 3. Apply configurations
Apply the configuration either via the `dstack apply` CLI command (or through a programmatic API.)
`dstack` automatically manages infrastructure provisioning and job scheduling, while also handling auto-scaling,
port-forwarding, ingress, and more.
!!! info "Where do I start?"
1. Proceed to [installation](installation/index.md)
2. See [quickstart](quickstart.md)
3. Browse [examples](/examples)
4. Join [Discord :material-arrow-top-right-thin:{ .external }](https://discord.gg/u8SmfwPpMd){:target="_blank"}
## Installation
# Installation
## Set up the server
### Configure backends
To orchestrate compute across cloud providers or existing Kubernetes clusters, you need to configure backends.
Backends can be set up in `~/.dstack/server/config.yml` or through the [project settings page](../concepts/projects.md#backends) in the UI.
For more details, see [Backends](../concepts/backends.md).
??? info "SSH fleets"
When using `dstack` with on-prem servers, backend configuration isn’t required. Simply create [SSH fleets](../concepts/fleets.md#ssh-fleets) once the server is up.
### Start the server
The server can run on your laptop or any environment with access to the cloud and on-prem clusters you plan to use.
=== "uv"
> The server can be set up via `uv` on Linux, macOS, and Windows (via WSL 2).
> It requires Git and OpenSSH.
Define a configuration
Create the following run configuration inside your project folder:
```yaml
type: task
name: streamlit
# If `image` is not specified, dstack uses its default image
python: "3.11"
#image: dstackai/base:py3.13-0.7-cuda-12.1
# Commands of the task
commands:
- pip install streamlit
- streamlit hello
# Ports to forward
ports:
- 8501
# Uncomment to request resources
#resources:
# gpu: 24GB
```
By default, tasks run on a single instance. To run a distributed task, specify
[`nodes`](concepts/tasks.md#distributed-tasks), and `dstack` will run it on a cluster.
Apply the configuration
Run the configuration via [`dstack apply`](reference/cli/dstack/apply.md):
```shell
$ dstack apply -f task.dstack.yml
# BACKEND REGION RESOURCES SPOT PRICE
1 gcp us-west4 2xCPU, 8GB, 100GB (disk) yes $0.010052
2 azure westeurope 2xCPU, 8GB, 100GB (disk) yes $0.0132
3 gcp europe-central2 2xCPU, 8GB, 100GB (disk) yes $0.013248
Submit the run streamlit? [y/n]: y
Provisioning `streamlit`...
---> 100%
Welcome to Streamlit. Check out our demo in your browser.
Local URL: http://localhost:8501
```
If you specified `ports`, they will be automatically forwarded to `localhost` for convenient access.
=== "Service"
A [service](concepts/services.md) allows you to deploy a model or any web app as an endpoint.
Define a configuration
Create the following run configuration inside your project folder:
```yaml
type: service
name: llama31-service
# If `image` is not specified, dstack uses its default image
python: "3.11"
#image: dstackai/base:py3.13-0.7-cuda-12.1
# Required environment variables
env:
- HF_TOKEN
commands:
- pip install vllm
- vllm serve meta-llama/Meta-Llama-3.1-8B-Instruct --max-model-len 4096
# Expose the vllm server port
port: 8000
# Specify a name if it's an OpenAI-compatible model
model: meta-llama/Meta-Llama-3.1-8B-Instruct
# Required resources
resources:
gpu: 24GB
```
Apply the configuration
Run the configuration via [`dstack apply`](reference/cli/dstack/apply.md):
```shell
$ HF_TOKEN=...
$ dstack apply -f service.dstack.yml
# BACKEND REGION INSTANCE RESOURCES SPOT PRICE
1 aws us-west-2 g5.4xlarge 16xCPU, 64GB, 1xA10G (24GB) yes $0.22
2 aws us-east-2 g6.xlarge 4xCPU, 16GB, 1xL4 (24GB) yes $0.27
3 gcp us-west1 g2-standard-4 4xCPU, 16GB, 1xL4 (24GB) yes $0.27
Submit the run llama31-service? [y/n]: y
Provisioning `llama31-service`...
---> 100%
Service is published at:
http://localhost:3000/proxy/services/main/llama31-service/
Model meta-llama/Meta-Llama-3.1-8B-Instruct is published at:
http://localhost:3000/proxy/models/main/
```
!!! info "Gateway"
To enable [auto-scaling](concepts/services.md#replicas-and-scaling),
[rate limits](concepts/services.md#rate-limits),
or use a custom domain with HTTPS,
set up a [gateway](concepts/gateways.md) before running the service.
If you're using [dstack Sky :material-arrow-top-right-thin:{ .external }](https://sky.dstack.ai){:target="_blank"},
a gateway is pre-configured for you.
`dstack apply` automatically provisions instances and runs the workload according to the configuration.
## Troubleshooting
Something not working? See the [troubleshooting](guides/troubleshooting.md) guide.
!!! info "What's next?"
1. Read about [backends](concepts/backends.md), [dev environments](concepts/dev-environments.md), [tasks](concepts/tasks.md), [services](concepts/services.md), and [fleets](concepts/services.md)
2. Browse [examples](../examples.md)
3. Join [Discord :material-arrow-top-right-thin:{ .external }](https://discord.gg/u8SmfwPpMd)
# Concepts
## Backends
# Backends
Backends allow `dstack` to manage compute across various environments.
They can be configured via `~/.dstack/server/config.yml` or through the [project settings page](../concepts/projects.md#backends) in the UI.
`dstack` supports three types of backends:
* [VM-based](#vm-based) – use `dstack`'s native integration with cloud providers to provision VMs, manage clusters, and orchestrate container-based runs.
* [Container-based](#container-based) – use either `dstack`'s native integration with cloud providers or Kubernetes to orchestrate container-based runs; provisioning in this case is delegated to the cloud provider or Kubernetes.
* [On-prem](#on-prem) – use `dstack`'s native support for on-prem servers without needing Kubernetes.
!!! info "dstack Sky"
If you're using [dstack Sky :material-arrow-top-right-thin:{ .external }](https://sky.dstack.ai){:target="_blank"}, backend configuration is optional. dstack Sky lets you use pre-configured backends to access GPU marketplace.
See the examples of backend configuration below.
## VM-based
VM-based backends allow `dstack` users to manage clusters and orchestrate container-based runs across a wide range of cloud providers.
Under the hood, `dstack` uses native integrations with these providers to provision clusters on demand.
Compared to [container-based](#container-based) backends, this approach offers finer-grained, simpler control over cluster provisioning and eliminates the dependency on a Kubernetes layer.
### AWS
There are two ways to configure AWS: using an access key or using the default credentials.
=== "Default credentials"
If you have default credentials set up (e.g. in `~/.aws/credentials`), configure the backend like this:
```yaml
projects:
- name: main
backends:
- type: aws
creds:
type: default
```
=== "Access key"
Create an access key by following the [this guide :material-arrow-top-right-thin:{ .external }](https://docs.aws.amazon.com/cli/latest/userguide/cli-authentication-user.html#cli-authentication-user-get).
Once you've downloaded the `.csv` file with your IAM user's Access key ID and Secret access key, proceed to
configure the backend.
```yaml
projects:
- name: main
backends:
- type: aws
creds:
type: access_key
access_key: KKAAUKLIZ5EHKICAOASV
secret_key: pn158lMqSBJiySwpQ9ubwmI6VUU3/W2fdJdFwfgO
```
??? info "Required permissions"
The following AWS policy permissions are sufficient for `dstack` to work:
```
{
"Version": "2012-10-17",
"Statement": [
{
"Effect": "Allow",
"Action": [
"ec2:AttachVolume",
"ec2:AuthorizeSecurityGroupEgress",
"ec2:AuthorizeSecurityGroupIngress",
"ec2:CreatePlacementGroup",
"ec2:CancelSpotInstanceRequests",
"ec2:CreateSecurityGroup",
"ec2:CreateTags",
"ec2:CreateVolume",
"ec2:DeletePlacementGroup",
"ec2:DeleteVolume",
"ec2:DescribeAvailabilityZones",
"ec2:DescribeCapacityReservations"
"ec2:DescribeImages",
"ec2:DescribeInstances",
"ec2:DescribeInstanceAttribute",
"ec2:DescribeInstanceTypes",
"ec2:DescribeRouteTables",
"ec2:DescribeSecurityGroups",
"ec2:DescribeSubnets",
"ec2:DescribeVpcs",
"ec2:DescribeVolumes",
"ec2:DetachVolume",
"ec2:RunInstances",
"ec2:TerminateInstances"
],
"Resource": "*"
},
{
"Effect": "Allow",
"Action": [
"servicequotas:ListServiceQuotas",
"servicequotas:GetServiceQuota"
],
"Resource": "*"
},
{
"Effect": "Allow",
"Action": [
"elasticloadbalancing:CreateLoadBalancer",
"elasticloadbalancing:CreateTargetGroup",
"elasticloadbalancing:CreateListener",
"elasticloadbalancing:RegisterTargets",
"elasticloadbalancing:AddTags",
"elasticloadbalancing:DeleteLoadBalancer",
"elasticloadbalancing:DeleteTargetGroup",
"elasticloadbalancing:DeleteListener",
"elasticloadbalancing:DeregisterTargets"
],
"Resource": "*"
},
{
"Effect": "Allow",
"Action": [
"acm:DescribeCertificate",
"acm:ListCertificates"
],
"Resource": "*"
},
{
"Effect": "Allow",
"Action": [
"iam:GetInstanceProfile",
"iam:GetRole",
"iam:PassRole"
],
"Resource": "*"
}
]
}
```
The `elasticloadbalancing:*` and `acm:*` permissions are only needed for provisioning gateways with ACM (AWS Certificate Manager) certificates.
The `iam:*` permissions are only needed if you specify `iam_instance_profile` to assign to EC2 instances.
You can also limit permissions to specific resources in your account:
```
{
"Version": "2012-10-17",
"Statement": [
...
{
"Effect": "Allow",
"Action": [
"iam:GetInstanceProfile",
"iam:GetRole",
"iam:PassRole"
],
"Resource": "arn:aws:iam::account-id:role/EC2-roles-for-XYZ-*"
}
]
}
```
??? info "VPC"
By default, `dstack` uses the default VPC. It's possible to customize it:
=== "vpc_name"
```yaml
projects:
- name: main
backends:
- type: aws
creds:
type: default
vpc_name: my-vpc
```
=== "vpc_ids"
```yaml
projects:
- name: main
backends:
- type: aws
creds:
type: default
default_vpcs: true
vpc_ids:
us-east-1: vpc-0a2b3c4d5e6f7g8h
us-east-2: vpc-9i8h7g6f5e4d3c2b
us-west-1: vpc-4d3c2b1a0f9e8d7
```
For the regions without configured `vpc_ids`, enable default VPCs by setting `default_vpcs` to `true`.
??? info "Private subnets"
By default, `dstack` provisions instances with public IPs and permits inbound SSH traffic.
If you want `dstack` to use private subnets and provision instances without public IPs, set `public_ips` to `false`.
```yaml
projects:
- name: main
backends:
- type: aws
creds:
type: default
public_ips: false
```
Using private subnets assumes that both the `dstack` server and users can access the configured VPC's private subnets.
Additionally, private subnets must have outbound internet connectivity provided by NAT Gateway, Transit Gateway, or other mechanism.
??? info "OS images"
By default, `dstack` uses its own [AMI :material-arrow-top-right-thin:{ .external }](https://docs.aws.amazon.com/AWSEC2/latest/UserGuide/AMIs.html)
optimized for `dstack`.
To use your own or other third-party images, set the `os_images` property:
```yaml
projects:
- name: main
backends:
- type: aws
creds:
type: default
os_images:
cpu:
name: my-ami-for-cpu-instances
owner: self
user: dstack
nvidia:
name: 'Some ThirdParty CUDA image'
owner: 123456789012
user: ubuntu
```
Here, both `cpu` and `nvidia` properties are optional, but if the property is not set, you won´t be able to use the corresponding instance types.
The `name` is an AMI name.
The `owner` is either an AWS account ID (a 12-digit number) or a special value `self` indicating the current account.
The `user` specifies an OS user for instance provisioning.
!!! info "Image requirements"
* SSH server listening on port 22
* `user` with passwordless sudo access
* Docker is installed
* (For NVIDIA instances) NVIDIA/CUDA drivers and NVIDIA Container Toolkit are installed
* The firewall (`iptables`, `ufw`, etc.) must allow external traffic to port 22 and all traffic within the private subnet, and should forbid any other incoming external traffic.
### Azure
There are two ways to configure Azure: using a client secret or using the default credentials.
=== "Default credentials"
If you have default credentials set up, configure the backend like this:
```yaml
projects:
- name: main
backends:
- type: azure
subscription_id: 06c82ce3-28ff-4285-a146-c5e981a9d808
tenant_id: f84a7584-88e4-4fd2-8e97-623f0a715ee1
creds:
type: default
```
If you don't know your `subscription_id` and `tenant_id`, use [Azure CLI :material-arrow-top-right-thin:{ .external }](https://learn.microsoft.com/en-us/cli/azure/install-azure-cli):
```shell
az account show --query "{subscription_id: id, tenant_id: tenantId}"
```
=== "Client secret"
A client secret can be created using the [Azure CLI :material-arrow-top-right-thin:{ .external }](https://learn.microsoft.com/en-us/cli/azure/install-azure-cli):
```shell
SUBSCRIPTION_ID=...
az ad sp create-for-rbac
--name dstack-app \
--role $DSTACK_ROLE \
--scopes /subscriptions/$SUBSCRIPTION_ID \
--query "{ tenant_id: tenant, client_id: appId, client_secret: password }"
```
Once you have `tenant_id`, `client_id`, and `client_secret`, go ahead and configure the backend.
```yaml
projects:
- name: main
backends:
- type: azure
subscription_id: 06c82ce3-28ff-4285-a146-c5e981a9d808
tenant_id: f84a7584-88e4-4fd2-8e97-623f0a715ee1
creds:
type: client
client_id: acf3f73a-597b-46b6-98d9-748d75018ed0
client_secret: 1Kb8Q~o3Q2hdEvrul9yaj5DJDFkuL3RG7lger2VQ
```
If you don't know your `subscription_id`, use [Azure CLI :material-arrow-top-right-thin:{ .external }](https://learn.microsoft.com/en-us/cli/azure/install-azure-cli):
```shell
az account show --query "{subscription_id: id}"
```
??? info "Required permissions"
The following Azure permissions are sufficient for `dstack` to work:
```json
{
"properties": {
"roleName": "dstack-role",
"description": "Minimal required permissions for using Azure with dstack",
"assignableScopes": [
"/subscriptions/${YOUR_SUBSCRIPTION_ID}"
],
"permissions": [
{
"actions": [
"Microsoft.Authorization/*/read",
"Microsoft.Compute/availabilitySets/*",
"Microsoft.Compute/locations/*",
"Microsoft.Compute/virtualMachines/*",
"Microsoft.Compute/virtualMachineScaleSets/*",
"Microsoft.Compute/cloudServices/*",
"Microsoft.Compute/disks/write",
"Microsoft.Compute/disks/read",
"Microsoft.Compute/disks/delete",
"Microsoft.ManagedIdentity/userAssignedIdentities/assign/action",
"Microsoft.ManagedIdentity/userAssignedIdentities/read",
"Microsoft.Network/networkSecurityGroups/*",
"Microsoft.Network/locations/*",
"Microsoft.Network/virtualNetworks/*",
"Microsoft.Network/networkInterfaces/*",
"Microsoft.Network/publicIPAddresses/*",
"Microsoft.Resources/subscriptions/resourceGroups/read",
"Microsoft.Resources/subscriptions/resourceGroups/write",
"Microsoft.Resources/subscriptions/read"
],
"notActions": [],
"dataActions": [],
"notDataActions": []
}
]
}
}
```
The `"Microsoft.Resources/subscriptions/resourceGroups/write"` permission is not required
if [`resource_group`](/docs/reference/server/config.yml/#azure) is specified.
??? info "VPC"
By default, `dstack` creates new Azure networks and subnets for every configured region.
It's possible to use custom networks by specifying `vpc_ids`:
```yaml
projects:
- name: main
backends:
- type: azure
creds:
type: default
regions: [westeurope]
vpc_ids:
westeurope: myNetworkResourceGroup/myNetworkName
```
??? info "Private subnets"
By default, `dstack` provisions instances with public IPs and permits inbound SSH traffic.
If you want `dstack` to use private subnets and provision instances without public IPs,
specify custom networks using `vpc_ids` and set `public_ips` to `false`.
```yaml
projects:
- name: main
backends:
- type: azure
creds:
type: default
regions: [westeurope]
vpc_ids:
westeurope: myNetworkResourceGroup/myNetworkName
public_ips: false
```
Using private subnets assumes that both the `dstack` server and users can access the configured VPC's private subnets.
Additionally, private subnets must have outbound internet connectivity provided by [NAT Gateway or other mechanism](https://learn.microsoft.com/en-us/azure/nat-gateway/nat-overview).
### GCP
There are two ways to configure GCP: using a service account or using the default credentials.
=== "Default credentials"
Enable GCP application default credentials:
```shell
gcloud auth application-default login
```
Then configure the backend like this:
```yaml
projects:
- name: main
backends:
- type: gcp
project_id: gcp-project-id
creds:
type: default
```
=== "Service account"
To create a service account, follow [this guide :material-arrow-top-right-thin:{ .external }](https://cloud.google.com/iam/docs/service-accounts-create). After setting up the service account [create a key :material-arrow-top-right-thin:{ .external }](https://cloud.google.com/iam/docs/keys-create-delete) for it and download the corresponding JSON file.
Then go ahead and configure the backend by specifying the downloaded file path.
```yaml
projects:
- name: main
backends:
- type: gcp
project_id: my-gcp-project
creds:
type: service_account
filename: ~/.dstack/server/gcp-024ed630eab5.json
```
??? info "User interface"
If you are configuring the `gcp` backend on the [project settigns page](projects.md#backends),
specify the contents of the JSON file in `data`:
```yaml
type: gcp
project_id: my-gcp-project
creds:
type: service_account
data: |
{
"type": "service_account",
"project_id": "my-gcp-project",
"private_key_id": "abcd1234efgh5678ijkl9012mnop3456qrst7890",
"private_key": "-----BEGIN PRIVATE KEY-----\nMIIEv...rest_of_key...IDAQAB\n-----END PRIVATE KEY-----\n",
"client_email": "my-service-account@my-gcp-project.iam.gserviceaccount.com",
"client_id": "123456789012345678901",
"auth_uri": "https://accounts.google.com/o/oauth2/auth",
"token_uri": "https://oauth2.googleapis.com/token",
"auth_provider_x509_cert_url": "https://www.googleapis.com/oauth2/v1/certs",
"client_x509_cert_url": "https://www.googleapis.com/robot/v1/metadata/x509/my-service-account%40my-gcp-project.iam.gserviceaccount.com",
"universe_domain": "googleapis.com"
}
```
If you don't know your GCP project ID, use [Google Cloud CLI :material-arrow-top-right-thin:{ .external }](https://cloud.google.com/sdk/docs/install-sdk):
```shell
gcloud projects list --format="json(projectId)"
```
??? info "Required permissions"
The following GCP permissions are sufficient for `dstack` to work:
```
compute.disks.create
compute.disks.delete
compute.disks.get
compute.disks.list
compute.disks.setLabels
compute.disks.use
compute.firewalls.create
compute.images.useReadOnly
compute.instances.attachDisk
compute.instances.create
compute.instances.delete
compute.instances.detachDisk
compute.instances.get
compute.instances.setLabels
compute.instances.setMetadata
compute.instances.setServiceAccount
compute.instances.setTags
compute.networks.get
compute.networks.updatePolicy
compute.regions.get
compute.regions.list
compute.reservations.list
compute.resourcePolicies.create
compute.resourcePolicies.delete
compute.routers.list
compute.subnetworks.list
compute.subnetworks.use
compute.subnetworks.useExternalIp
compute.zoneOperations.get
```
If you plan to use TPUs, additional permissions are required:
```
tpu.nodes.create
tpu.nodes.get
tpu.nodes.update
tpu.nodes.delete
tpu.operations.get
tpu.operations.list
```
Also, the use of TPUs requires the `serviceAccountUser` role.
For TPU VMs, dstack will use the default service account.
If you plan to use shared reservations, the `compute.reservations.list`
permission is required in the project that owns the reservations.
??? info "Required APIs"
First, ensure the required APIs are enabled in your GCP `project_id`.
```shell
PROJECT_ID=...
gcloud config set project $PROJECT_ID
gcloud services enable cloudapis.googleapis.com
gcloud services enable compute.googleapis.com
```
??? info "VPC"
=== "VPC"
```yaml
projects:
- name: main
backends:
- type: gcp
project_id: gcp-project-id
creds:
type: default
vpc_name: my-custom-vpc
```
If you specify a non-default VPC, ensure it has a firewall rule
allowing all traffic within the VPC. This is needed for multi-node tasks to work.
The default VPC already permits traffic within the VPC.
=== "Shared VPC"
```yaml
projects:
- name: main
backends:
- type: gcp
project_id: gcp-project-id
creds:
type: default
vpc_name: my-custom-vpc
vpc_project_id: another-project-id
```
When using a Shared VPC, ensure there is a firewall rule allowing `INGRESS` traffic on port `22`.
You can limit this rule to `dstack` instances using the `dstack-runner-instance` target tag.
When using GCP gateways with a Shared VPC, also ensure there is a firewall rule allowing `INGRESS` traffic on ports `22`, `80`, `443`.
You can limit this rule to `dstack` gateway instances using the `dstack-gateway-instance` target tag.
To use TPUs with a Shared VPC, you need to grant the TPU Service Account in your service project permissions
to manage resources in the host project by granting the "TPU Shared VPC Agent" (roles/tpu.xpnAgent) role
([more in the GCP docs](https://cloud.google.com/tpu/docs/shared-vpc-networks#vpc-shared-vpc)).
??? info "Private subnets"
By default, `dstack` provisions instances with public IPs and permits inbound SSH traffic.
If you want `dstack` to use private subnets and provision instances without public IPs, set `public_ips` to `false`.
```yaml
projects:
- name: main
backends:
- type: gcp
creds:
type: default
public_ips: false
```
Using private subnets assumes that both the `dstack` server and users can access the configured VPC's private subnets.
Additionally, [Cloud NAT](https://cloud.google.com/nat/docs/overview) must be configured to provide access to external resources for provisioned instances.
### Lambda
Log into your [Lambda Cloud :material-arrow-top-right-thin:{ .external }](https://lambdalabs.com/service/gpu-cloud) account, click API keys in the sidebar, and then click the `Generate API key`
button to create a new API key.
Then, go ahead and configure the backend:
```yaml
projects:
- name: main
backends:
- type: lambda
creds:
type: api_key
api_key: eersct_yrpiey-naaeedst-tk-_cb6ba38e1128464aea9bcc619e4ba2a5.iijPMi07obgt6TZ87v5qAEj61RVxhd0p
```
### Nebius
Log into your [Nebius AI Cloud :material-arrow-top-right-thin:{ .external }](https://console.eu.nebius.com/) account, navigate to Access, and select Service Accounts. Create a service account, add it to the editors group, and upload its authorized key.
Then configure the backend:
```yaml
projects:
- name: main
backends:
- type: nebius
creds:
type: service_account
service_account_id: serviceaccount-e00dhnv9ftgb3cqmej
public_key_id: publickey-e00ngaex668htswqy4
private_key_file: ~/path/to/key.pem
```
??? info "Credentials file"
It's also possible to configure the `nebius` backend using a credentials file [generated :material-arrow-top-right-thin:{ .external }](https://docs.nebius.com/iam/service-accounts/authorized-keys#create){:target="_blank"} by the `nebius` CLI:
```shell
$ nebius iam auth-public-key generate \
--service-account-id \
--output ~/.nebius/sa-credentials.json
```
```yaml
projects:
- name: main
backends:
- type: nebius
creds:
type: service_account
filename: ~/.nebius/sa-credentials.json
```
??? info "User interface"
If you are configuring the `nebius` backend on the [project settigns page](projects.md#backends),
specify the contents of the private key file in `private_key_content`:
```yaml
type: nebius
creds:
type: service_account
service_account_id: serviceaccount-e00dhnv9ftgb3cqmej
public_key_id: publickey-e00ngaex668htswqy4
private_key_content: |
-----BEGIN PRIVATE KEY-----
MIIJQQIBADANBgkqhkiG9w0BAQEFAASCCSswggknAgEAAoICAQChwQ5OOhy60N7m
cPx/9M0oRUyJdRRv2nCALbdU/wSDOo8o5N7sP63zCaxXPeKwLNEzneMd/U0gWSv2
[...]
8y1qYDPKQ8LR+DPCUmyhM2I8t6673Vz3GrtEjkLhgQo/KqOVb3yiBFVfkA5Jov5s
kO7y4T0ynsI8b6wlhCukQTLpIYJ5
-----END PRIVATE KEY-----
```
??? info "Projects"
If you have multiple projects per region, specify which ones to use, at most one per region.
```yaml
type: nebius
projects:
- project-e00jt6t095t1ahrg4re30
- project-e01iahuh3cklave4ao1nv
creds:
type: service_account
service_account_id: serviceaccount-e00dhnv9ftgb3cqmej
public_key_id: publickey-e00ngaex668htswqy4
private_key_file: ~/path/to/key.pem
```
!!! info "Python version"
Nebius is only supported if `dstack server` is running on Python 3.10 or higher.
### Vultr
Log into your [Vultr :material-arrow-top-right-thin:{ .external }](https://www.vultr.com/) account, click `Account` in the sidebar, select `API`, find the `Personal Access Token` panel and click the `Enable API` button. In the `Access Control` panel, allow API requests from all addresses or from the subnet where your `dstack` server is deployed.
Then, go ahead and configure the backend:
```yaml
projects:
- name: main
backends:
- type: vultr
creds:
type: api_key
api_key: B57487240a466624b48de22865589
```
### CUDO
Log into your [CUDO Compute :material-arrow-top-right-thin:{ .external }](https://compute.cudo.org/) account, click API keys in the sidebar, and click the `Create an API key` button.
Ensure you've created a project with CUDO Compute, then proceed to configuring the backend.
```yaml
projects:
- name: main
backends:
- type: cudo
project_id: my-cudo-project
creds:
type: api_key
api_key: 7487240a466624b48de22865589
```
### OCI
There are two ways to configure OCI: using client credentials or using the default credentials.
=== "Default credentials"
If you have default credentials set up in `~/.oci/config`, configure the backend like this:
```yaml
projects:
- name: main
backends:
- type: oci
creds:
type: default
```
=== "Client credentials"
Log into the [OCI Console :material-arrow-top-right-thin:{ .external }](https://cloud.oracle.com), go to `My profile`,
select `API keys`, and click `Add API key`.
Once you add a key, you'll see the configuration file. Copy its values to configure the backend as follows:
```yaml
projects:
- name: main
backends:
- type: oci
creds:
type: client
user: ocid1.user.oc1..g5vlaeqfu47akmaafq665xsgmyaqjktyfxtacfxc4ftjxuca7aohnd2ev66m
tenancy: ocid1.tenancy.oc1..ajqsftvk4qarcfaak3ha4ycdsaahxmaita5frdwg3tqo2bcokpd3n7oizwai
region: eu-frankfurt-1
fingerprint: 77:32:77:00:49:7c:cb:56:84:75:8e:77:96:7d:53:17
key_file: ~/.oci/private_key.pem
```
Make sure to include either the path to your private key via `key_file` or the contents of the key via `key_content`.
??? info "Required permissions"
This is an example of a restrictive policy for a group of `dstack` users:
```
Allow group
```yaml
projects:
- name: main
backends:
- type: datacrunch
creds:
type: api_key
client_id: xfaHBqYEsArqhKWX-e52x3HH7w8T
client_secret: B5ZU5Qx9Nt8oGMlmMhNI3iglK8bjMhagTbylZy4WzncZe39995f7Vxh8
```
### AMD Developer Cloud
Log into your [AMD Developer Cloud :material-arrow-top-right-thin:{ .external }](https://amd.digitalocean.com/login) account. Click `API` in the sidebar and click the button `Generate New Token`.
Then, go ahead and configure the backend:
```yaml
projects:
- name: main
backends:
- type: amddevcloud
project_name: my-amd-project
creds:
type: api_key
api_key: ...
```
??? info "Project"
If `project_name` is not set, the default project will be used.
??? info "Required permissions"
The API key must have the following scopes assigned:
* `account` - read
* `droplet` - create, read, update, delete, admin
* `project` - create, read, update, delete
* `regions` - read
* `sizes` - read
* `ssh_key` - create, read, update, delete
### Digital Ocean
Log into your [Digital Ocean :material-arrow-top-right-thin:{ .external }](https://cloud.digitalocean.com/login) account. Click `API` in the sidebar and click the button `Generate New Token`.
Then, go ahead and configure the backend:
```yaml
projects:
- name: main
backends:
- type: digitalocean
project_name: my-digital-ocean-project
creds:
type: api_key
api_key: ...
```
??? info "Project"
If `project_name` is not set, the default project will be used.
??? info "Required permissions"
The API key must have the following scopes assigned:
* `account` - read
* `droplet` - create, read, update, delete, admin
* `project` - create, read, update, delete
* `regions` - read
* `sizes` - read
* `ssh_key` - create, read, update,delete
### Hot Aisle
Log in to the SSH TUI as described in the [Hot Aisle Quick Start :material-arrow-top-right-thin:{ .external }](https://hotaisle.xyz/quick-start/).
Create a new team and generate an API key for the member in the team.
Then, go ahead and configure the backend:
```yaml
projects:
- name: main
backends:
- type: hotaisle
team_handle: hotaisle-team-handle
creds:
type: api_key
api_key: 9c27a4bb7a8e472fae12ab34.3f2e3c1db75b9a0187fd2196c6b3e56d2b912e1c439ba08d89e7b6fcd4ef1d3f
```
??? info "Required permissions"
The API key must have the following roles assigned:
* **Owner role for the user** - Required for creating and managing SSH keys
* **Operator role for the team** - Required for managing virtual machines within the team
### CloudRift
Log into your [CloudRift :material-arrow-top-right-thin:{ .external }](https://console.cloudrift.ai/) console, click `API Keys` in the sidebar and click the button to create a new API key.
Ensure you've created a project with CloudRift.
Then proceed to configuring the backend.
```yaml
projects:
- name: main
backends:
- type: cloudrift
creds:
type: api_key
api_key: rift_2prgY1d0laOrf2BblTwx2B2d1zcf1zIp4tZYpj5j88qmNgz38pxNlpX3vAo
```
## Container-based
Container-based backends allow `dstack` to orchestrate container-based runs either directly on cloud providers that support containers or on Kubernetes.
In this case, `dstack` delegates provisioning to the cloud provider or Kubernetes.
Compared to [VM-based](#vm-based) backends, they offer less fine-grained control over provisioning but rely on the native logic of the underlying environment, whether that’s a cloud provider or Kubernetes.
### Kubernetes
Regardless of whether it’s on-prem Kubernetes or managed, `dstack` can orchestrate container-based runs across your clusters.
To use the `kubernetes` backend with `dstack`, you need to configure it with the path to the kubeconfig file, the IP address of any node in the cluster, and the port that `dstack` will use for proxying SSH traffic.
```yaml
projects:
- name: main
backends:
- type: kubernetes
kubeconfig:
filename: ~/.kube/config
proxy_jump:
hostname: 204.12.171.137
port: 32000
```
??? info "Proxy jump"
To allow the `dstack` server and CLI to access runs via SSH, `dstack` requires a node that acts as a jump host to proxy SSH traffic into containers.
To configure this node, specify `hostname` and `port` under the `proxy_jump` property:
- `hostname` — the IP address of any cluster node selected as the jump host. Both the `dstack` server and CLI must be able to reach it. This node can be either a GPU node or a CPU-only node — it makes no difference.
- `port` — any accessible port on that node, which `dstack` uses to forward SSH traffic.
No additional setup is required — `dstack` configures and manages the proxy automatically.
??? info "NVIDIA GPU Operator"
For `dstack` to correctly detect GPUs in your Kubernetes cluster, the cluster must have the
[NVIDIA GPU Operator :material-arrow-top-right-thin:{ .external }](https://docs.nvidia.com/datacenter/cloud-native/gpu-operator/latest/index.html){:target="_blank"} pre-installed.
??? info "Required permissions"
The following Kubernetes permissions are sufficient for `dstack` to work:
```yaml
apiVersion: rbac.authorization.k8s.io/v1
kind: ClusterRole
metadata:
name: dstack-backend
rules:
- apiGroups: [""]
resources: ["namespaces"]
verbs: ["get", "create"]
- apiGroups: [""]
resources: ["pods"]
verbs: ["get", "create", "delete"]
- apiGroups: [""]
resources: ["services"]
verbs: ["get", "create", "delete"]
- apiGroups: [""]
resources: ["nodes"]
verbs: ["list"]
```
Ensure you've created a ClusterRoleBinding to grant the role to the user or the service account you're using.
> To learn more, see the [Kubernetes](../guides/kubernetes.md) guide.
### RunPod
Log into your [RunPod :material-arrow-top-right-thin:{ .external }](https://www.runpod.io/console/) console, click Settings in the sidebar, expand the `API Keys` section, and click
the button to create a Read & Write key.
Then proceed to configuring the backend.
```yaml
projects:
- name: main
backends:
- type: runpod
creds:
type: api_key
api_key: US9XTPDIV8AR42MMINY8TCKRB8S4E7LNRQ6CAUQ9
```
??? info "Community Cloud"
By default, `dstack` considers instance offers from both the Secure Cloud and the
[Community Cloud :material-arrow-top-right-thin:{ .external }](https://docs.runpod.io/references/faq/#secure-cloud-vs-community-cloud).
You can tell them apart by their regions.
Secure Cloud regions contain datacenter IDs such as `CA-MTL-3`.
Community Cloud regions contain country codes such as `CA`.
```shell
$ dstack apply -f .dstack.yml -b runpod
# BACKEND REGION INSTANCE SPOT PRICE
1 runpod CA NVIDIA A100 80GB PCIe yes $0.6
2 runpod CA-MTL-3 NVIDIA A100 80GB PCIe yes $0.82
```
If you don't want to use the Community Cloud, set `community_cloud: false` in the backend settings.
```yaml
projects:
- name: main
backends:
- type: runpod
creds:
type: api_key
api_key: US9XTPDIV8AR42MMINY8TCKRB8S4E7LNRQ6CAUQ9
community_cloud: false
```
### Vast.ai
Log into your [Vast.ai :material-arrow-top-right-thin:{ .external }](https://cloud.vast.ai/) account, click Account in the sidebar, and copy your
API Key.
Then, go ahead and configure the backend:
```yaml
projects:
- name: main
backends:
- type: vastai
creds:
type: api_key
api_key: d75789f22f1908e0527c78a283b523dd73051c8c7d05456516fc91e9d4efd8c5
```
Also, the `vastai` backend supports on-demand instances only. Spot instance support coming soon.
## On-prem
In on-prem environments, the [Kubernetes](#kubernetes) backend can be used if a Kubernetes cluster is already set up and configured.
However, often [SSH fleets](../concepts/fleets.md#ssh-fleets) are a simpler and lighter alternative.
### SSH fleets
SSH fleets require no backend configuration.
All you need to do is [provide hostnames and SSH credentials](../concepts/fleets.md#ssh-fleets), and `dstack` sets up a fleet that can orchestrate container-based runs on your servers.
SSH fleets support the same features as [VM-based](#vm-based) backends.
!!! info "What's next"
1. See the [`~/.dstack/server/config.yml`](../reference/server/config.yml.md) reference
2. Check [Projects](../concepts/projects.md)
## Fleets
# Fleets
Fleets act both as pools of instances and as templates for how those instances are provisioned.
`dstack` supports two kinds of fleets:
* [Backend fleets](#backend-fleets) – dynamically provisioned through configured backends; they are supported with any type of backends: [VM-based](backends.md#vm-based) and [container-based](backends.md#container-based) (incl. [`kubernetes`](backends.md#kubernetes))
* [SSH fleets](#ssh-fleets) – created using on-prem servers; do not require backends
When you run `dstack apply` to start a dev environment, task, or service, `dstack` will reuse idle instances from an existing fleet whenever available.
## Backend fleets
If you configured [backends](backends.md), `dstack` can provision fleets on the fly.
However, it’s recommended to define fleets explicitly.
### Apply a configuration
To create a backend fleet, define a configuration as a YAML file in your project directory. The file must have a
`.dstack.yml` extension (e.g. `.dstack.yml` or `fleet.dstack.yml`).
```yaml
type: fleet
# The name is optional, if not specified, generated randomly
name: default-fleet
# Can be a range or a fixed number
# Allow to provision of up to 2 instances
nodes: 0..2
# Uncomment to ensure instances are inter-connected
#placement: cluster
# Deprovision instances above the minimum if they remain idle
idle_duration: 1h
resources:
# Allow to provision up to 8 GPUs
gpu: 0..8
```
To create or update the fleet, pass the fleet configuration to [`dstack apply`](../reference/cli/dstack/apply.md):
```shell
$ dstack apply -f examples/misc/fleets/.dstack.yml
Provisioning...
---> 100%
FLEET INSTANCE BACKEND GPU PRICE STATUS CREATED
my-fleet - - - - - -
```
`dstack` always keeps the minimum number of nodes provisioned. Additional instances, up to the maximum limit, are provisioned on demand.
!!! info "Container-based backends"
For [container-based](backends.md#container-based) backends (such as `kubernetes`, `runpod`, etc), `nodes` must be defined as a range starting with `0`. In these cases, instances are provisioned on demand as needed.
??? info "Target number of nodes"
If `nodes` is defined as a range, you can start with more than the minimum number of instances by using the `target` parameter when creating the fleet.
```yaml
type: fleet
name: my-fleet
nodes:
min: 0
max: 2
# Provision 2 instances initially
target: 2
# Deprovision instances above the minimum if they remain idle
idle_duration: 1h
```
By default, when you submit a [dev environment](dev-environments.md), [task](tasks.md), or [service](services.md), `dstack` tries all available fleets. However, you can explicitly specify the [`fleets`](../reference/dstack.yml/dev-environment.md#fleets) in your run configuration
or via [`--fleet`](../reference/cli/dstack/apply.md#fleet) with `dstack apply`.
### Configuration options
#### Placement { #backend-placement }
To ensure instances are interconnected (e.g., for
[distributed tasks](tasks.md#distributed-tasks)), set `placement` to `cluster`.
This ensures all instances are provisioned with optimal inter-node connectivity.
??? info "AWS"
When you create a fleet with AWS, [Elastic Fabric Adapter networking :material-arrow-top-right-thin:{ .external }](https://docs.aws.amazon.com/AWSEC2/latest/UserGuide/efa.html){:target="_blank"} is automatically configured if it’s supported for the corresponding instance type.
Note, EFA requires the `public_ips` to be set to `false` in the `aws` backend configuration.
Otherwise, instances are only connected by the default VPC subnet.
Refer to the [EFA](../../examples/clusters/efa/index.md) example for more details.
??? info "GCP"
When you create a fleet with GCP, `dstack` automatically configures [GPUDirect-TCPXO and GPUDirect-TCPX :material-arrow-top-right-thin:{ .external }](https://cloud.google.com/kubernetes-engine/docs/how-to/gpu-bandwidth-gpudirect-tcpx-autopilot){:target="_blank"} networking for the A3 Mega and A3 High instance types, as well as RoCE networking for the A4 instance type.
!!! info "Backend configuration"
You may need to configure `extra_vpcs` and `roce_vpcs` in the `gcp` backend configuration.
Refer to the [A4](../../examples/clusters/a4/index.md),
[A3 Mega](../../examples/clusters/a3mega/index.md), and
[A3 High](../../examples/clusters/a3high/index.md) examples for more details.
??? info "Nebius"
When you create a fleet with Nebius, [InfiniBand networking :material-arrow-top-right-thin:{ .external }](https://docs.nebius.com/compute/clusters/gpu){:target="_blank"} is automatically configured if it’s supported for the corresponding instance type.
Otherwise, instances are only connected by the default VPC subnet.
An InfiniBand fabric for the cluster is selected automatically. If you prefer to use some specific fabrics, configure them in the
[backend settings](../reference/server/config.yml.md#nebius).
The `cluster` placement is supported for `aws`, `azure`, `gcp`, `nebius`, `oci`, and `vultr`
backends.
> For more details on optimal inter-node connectivity, read the [Clusters](../guides/clusters.md) guide.
#### Resources
When you specify a resource value like `cpu` or `memory`,
you can either use an exact value (e.g. `24GB`) or a
range (e.g. `24GB..`, or `24GB..80GB`, or `..80GB`).
```yaml
type: fleet
# The name is optional, if not specified, generated randomly
name: my-fleet
nodes: 2
resources:
# 200GB or more RAM
memory: 200GB..
# 4 GPUs from 40GB to 80GB
gpu: 40GB..80GB:4
# Disk size
disk: 500GB
```
The `gpu` property allows specifying not only memory size but also GPU vendor, names
and their quantity. Examples: `nvidia` (one NVIDIA GPU), `A100` (one A100), `A10G,A100` (either A10G or A100),
`A100:80GB` (one A100 of 80GB), `A100:2` (two A100), `24GB..40GB:2` (two GPUs between 24GB and 40GB),
`A100:40GB:2` (two A100 GPUs of 40GB).
??? info "Google Cloud TPU"
To use TPUs, specify its architecture via the `gpu` property.
```yaml
type: fleet
# The name is optional, if not specified, generated randomly
name: my-fleet
nodes: 2
resources:
gpu: v2-8
```
Currently, only 8 TPU cores can be specified, supporting single TPU device workloads. Multi-TPU support is coming soon.
> If you’re unsure which offers (hardware configurations) are available from the configured backends, use the
> [`dstack offer`](../reference/cli/dstack/offer.md#list-gpu-offers) command to list them.
#### Blocks { #backend-blocks }
For backend fleets, `blocks` function the same way as in SSH fleets.
See the [`Blocks`](#ssh-blocks) section under SSH fleets for details on the blocks concept.
```yaml
type: fleet
name: my-fleet
resources:
gpu: NVIDIA:80GB:8
# Split into 4 blocks, each with 2 GPUs
blocks: 4
```
#### Idle duration
By default, fleet instances stay `idle` for 3 days and can be reused within that time.
If an instance is not reused within this period, it is automatically terminated.
To change the default idle duration, set
[`idle_duration`](../reference/dstack.yml/fleet.md#idle_duration) in the fleet configuration (e.g., `0s`, `1m`, or `off` for
unlimited).
```yaml
type: fleet
# The name is optional, if not specified, generated randomly
name: my-fleet
nodes: 2
# Terminate instances idle for more than 1 hour
idle_duration: 1h
resources:
gpu: 24GB
```
#### Spot policy
By default, `dstack` uses on-demand instances. However, you can change that
via the [`spot_policy`](../reference/dstack.yml/fleet.md#spot_policy) property. It accepts `spot`, `on-demand`, and `auto`.
#### Retry policy
By default, if `dstack` fails to provision an instance or an instance is interrupted, no retry is attempted.
If you'd like `dstack` to do it, configure the
[retry](../reference/dstack.yml/fleet.md#retry) property accordingly:
```yaml
type: fleet
# The name is optional, if not specified, generated randomly
name: my-fleet
nodes: 1
resources:
gpu: 24GB
retry:
# Retry on specific events
on_events: [no-capacity, interruption]
# Retry for up to 1 hour
duration: 1h
```
!!! info "Reference"
Backend fleets support many more configuration options,
incl. [`backends`](../reference/dstack.yml/fleet.md#backends),
[`regions`](../reference/dstack.yml/fleet.md#regions),
[`max_price`](../reference/dstack.yml/fleet.md#max_price), and
among [others](../reference/dstack.yml/fleet.md).
## SSH fleets
If you have a group of on-prem servers accessible via SSH, you can create an SSH fleet.
### Apply a configuration
Define a fleet configuration as a YAML file in your project directory. The file must have a
`.dstack.yml` extension (e.g. `.dstack.yml` or `fleet.dstack.yml`).
```yaml
type: fleet
# The name is optional, if not specified, generated randomly
name: my-fleet
# Uncomment if instances are interconnected
#placement: cluster
# SSH credentials for the on-prem servers
ssh_config:
user: ubuntu
identity_file: ~/.ssh/id_rsa
hosts:
- 3.255.177.51
- 3.255.177.52
```
??? info "Requirements"
1. Hosts must be pre-installed with Docker.
=== "NVIDIA"
2. Hosts with NVIDIA GPUs must also be pre-installed with CUDA 12.1 and
[NVIDIA Container Toolkit :material-arrow-top-right-thin:{ .external }](https://docs.nvidia.com/datacenter/cloud-native/container-toolkit/latest/install-guide.html).
=== "AMD"
2. Hosts with AMD GPUs must also be pre-installed with AMDGPU-DKMS kernel driver (e.g. via
[native package manager :material-arrow-top-right-thin:{ .external }](https://rocm.docs.amd.com/projects/install-on-linux/en/latest/install/native-install/index.html)
or [AMDGPU installer :material-arrow-top-right-thin:{ .external }](https://rocm.docs.amd.com/projects/install-on-linux/en/latest/install/amdgpu-install.html).)
=== "Intel Gaudi"
2. Hosts with Intel Gaudi accelerators must be pre-installed with [Gaudi software and drivers](https://docs.habana.ai/en/latest/Installation_Guide/Driver_Installation.html#driver-installation).
This must include the drivers, `hl-smi`, and Habana Container Runtime.
=== "Tenstorrent"
2. Hosts with Tenstorrent accelerators must be pre-installed with [Tenstorrent software](https://docs.tenstorrent.com/getting-started/README.html#software-installation).
This must include the drivers, `tt-smi`, and HugePages.
3. The user specified must have passwordless `sudo` access.
4. The SSH server must be running and configured with `AllowTcpForwarding yes` in `/etc/ssh/sshd_config`.
5. The firewall must allow SSH and should forbid any other connections from external networks. For `placement: cluster` fleets, it should also allow any communication between fleet nodes.
To create or update the fleet, pass the fleet configuration to [`dstack apply`](../reference/cli/dstack/apply.md):
```shell
$ dstack apply -f examples/misc/fleets/.dstack.yml
Provisioning...
---> 100%
FLEET INSTANCE GPU PRICE STATUS CREATED
my-fleet 0 L4:24GB (spot) $0 idle 3 mins ago
1 L4:24GB (spot) $0 idle 3 mins ago
```
When you apply, `dstack` connects to the specified hosts using the provided SSH credentials,
installs the dependencies, and configures these hosts as a fleet.
Once the status of instances changes to `idle`, they can be used by dev environments, tasks, and services.
### Configuration options
#### Placement { #ssh-placement }
If the hosts are interconnected (i.e. share the same network), set `placement` to `cluster`.
This is required if you'd like to use the fleet for [distributed tasks](tasks.md#distributed-tasks).
??? info "Network"
By default, `dstack` automatically detects the network shared by the hosts.
However, it's possible to configure it explicitly via
the [`network`](../reference/dstack.yml/fleet.md#network) property.
[//]: # (TODO: Provide an example and more detail)
> For more details on optimal inter-node connectivity, read the [Clusters](../guides/clusters.md) guide.
#### Blocks { #ssh-blocks }
By default, a job uses the entire instance—e.g., all 8 GPUs. To allow multiple jobs on the same instance, set the `blocks` property to divide the instance. Each job can then use one or more blocks, up to the full instance.
```yaml
type: fleet
name: my-fleet
ssh_config:
user: ubuntu
identity_file: ~/.ssh/id_rsa
hosts:
- hostname: 3.255.177.51
blocks: 4
- hostname: 3.255.177.52
# As many as possible, according to numbers of GPUs and CPUs
blocks: auto
- hostname: 3.255.177.53
# Do not slice. This is the default value, may be omitted
blocks: 1
```
All resources (GPU, CPU, memory) are split evenly across blocks, while disk is shared.
For example, with 8 GPUs, 128 CPUs, and 2TB RAM, setting `blocks` to `8` gives each block 1 GPU, 16 CPUs, and 256 GB RAM.
Set `blocks` to `auto` to match the number of blocks to the number of GPUs.
!!! info "Distributed tasks"
Distributed tasks require exclusive access to all host resources and therefore must use all blocks on each node.
#### Environment variables
If needed, you can specify environment variables that will be used by `dstack-shim` and passed to containers.
[//]: # (TODO: Explain what dstack-shim is)
For example, these variables can be used to configure a proxy:
```yaml
type: fleet
name: my-fleet
env:
- HTTP_PROXY=http://proxy.example.com:80
- HTTPS_PROXY=http://proxy.example.com:80
- NO_PROXY=localhost,127.0.0.1
ssh_config:
user: ubuntu
identity_file: ~/.ssh/id_rsa
hosts:
- 3.255.177.51
- 3.255.177.52
```
#### Proxy jump
If fleet hosts are behind a head node (aka "login node"), configure [`proxy_jump`](../reference/dstack.yml/fleet.md#proxy_jump):
```yaml
type: fleet
name: my-fleet
ssh_config:
user: ubuntu
identity_file: ~/.ssh/worker_node_key
hosts:
- 3.255.177.51
- 3.255.177.52
proxy_jump:
hostname: 3.255.177.50
user: ubuntu
identity_file: ~/.ssh/head_node_key
```
To be able to attach to runs, both explicitly with `dstack attach` and implicitly with `dstack apply`, you must either
add a front node key (`~/.ssh/head_node_key`) to an SSH agent or configure a key path in `~/.ssh/config`:
```
Host 3.255.177.50
IdentityFile ~/.ssh/head_node_key
```
where `Host` must match `ssh_config.proxy_jump.hostname` or `ssh_config.hosts[n].proxy_jump.hostname` if you configure head nodes
on a per-worker basis.
!!! info "Reference"
For all SSH fleet configuration options, refer to the [reference](../reference/dstack.yml/fleet.md).
#### Troubleshooting
!!! info "Resources"
Once the fleet is created, double-check that the GPU, memory, and disk are detected correctly.
If the status does not change to `idle` after a few minutes or the resources are not displayed correctly, ensure that
all host requirements are satisfied.
If the requirements are met but the fleet still fails to be created correctly, check the logs at
`/root/.dstack/shim.log` on the hosts for error details.
## Manage fleets
### List fleets
The [`dstack fleet`](../reference/cli/dstack/fleet.md#dstack-fleet-list) command lists fleet instances and their status:
```shell
$ dstack fleet
FLEET INSTANCE BACKEND GPU PRICE STATUS CREATED
my-fleet 0 gcp (europe-west-1) L4:24GB (spot) $0.1624 idle 3 mins ago
1 gcp (europe-west-1) L4:24GB (spot) $0.1624 idle 3 mins ago
```
### Delete fleets
When a fleet isn't used by a run, you can delete it by passing the fleet configuration to `dstack delete`:
```shell
$ dstack delete -f cluster.dstack.yaml
Delete the fleet my-gcp-fleet? [y/n]: y
Fleet my-gcp-fleet deleted
```
Alternatively, you can delete a fleet by passing the fleet name to `dstack fleet delete`.
To terminate and delete specific instances from a fleet, pass `-i INSTANCE_NUM`.
!!! info "What's next?"
1. Check [dev environments](dev-environments.md), [tasks](tasks.md), and
[services](services.md)
2. Read the [Clusters](../guides/clusters.md) guide
## Dev environments
# Dev environments
A dev environment lets you provision an instance and access it with your desktop IDE.
## Apply a configuration
First, define a dev environment configuration as a YAML file in your project folder.
The filename must end with `.dstack.yml` (e.g. `.dstack.yml` or `dev.dstack.yml` are both acceptable).
```yaml
type: dev-environment
# The name is optional, if not specified, generated randomly
name: vscode
python: "3.11"
# Uncomment to use a custom Docker image
#image: huggingface/trl-latest-gpu
ide: vscode
# Uncomment to leverage spot instances
#spot_policy: auto
resources:
gpu: 24GB
```
To run a dev environment, pass the configuration to [`dstack apply`](../reference/cli/dstack/apply.md):
```shell
$ dstack apply -f examples/.dstack.yml
# BACKEND REGION RESOURCES SPOT PRICE
1 runpod CA-MTL-1 9xCPU, 48GB, A5000:24GB yes $0.11
2 runpod EU-SE-1 9xCPU, 43GB, A5000:24GB yes $0.11
3 gcp us-west4 4xCPU, 16GB, L4:24GB yes $0.214516
Submit the run vscode? [y/n]: y
Launching `vscode`...
---> 100%
To open in VS Code Desktop, use this link:
vscode://vscode-remote/ssh-remote+vscode/workflow
```
`dstack apply` automatically provisions an instance and sets up an IDE on it.
??? info "Windows"
On Windows, `dstack` works both natively and inside WSL. But, for dev environments,
it's recommended _not to use_ `dstack apply` _inside WSL_ due to a [VS Code issue :material-arrow-top-right-thin:{ .external }](https://github.com/microsoft/vscode-remote-release/issues/937){:target="_blank"}.
To open the dev environment in your desktop IDE, use the link from the output
(such as `vscode://vscode-remote/ssh-remote+fast-moth-1/workflow`).
{ width=800 }
??? info "SSH"
Alternatively, while the CLI is attached to the run, you can connect to the dev environment via SSH:
```shell
$ ssh vscode
```
## Configuration options
### Initialization
If you want to pre-configure the dev environment, specify the [`init`](../reference/dstack.yml/dev-environment.md#init)
property with a list of commands to run at startup:
```yaml
type: dev-environment
name: vscode
python: "3.11"
ide: vscode
init:
- pip install wandb
```
### Resources
When you specify a resource value like `cpu` or `memory`,
you can either use an exact value (e.g. `24GB`) or a
range (e.g. `24GB..`, or `24GB..80GB`, or `..80GB`).
```yaml
type: dev-environment
# The name is optional, if not specified, generated randomly
name: vscode
ide: vscode
resources:
# 16 or more x86_64 cores
cpu: 16..
# 200GB or more RAM
memory: 200GB..
# 4 GPUs from 40GB to 80GB
gpu: 40GB..80GB:4
# Shared memory (required by multi-gpu)
shm_size: 16GB
# Disk size
disk: 500GB
```
The `cpu` property lets you set the architecture (`x86` or `arm`) and core count — e.g., `x86:16` (16 x86 cores), `arm:8..` (at least 8 ARM cores).
If not set, `dstack` infers it from the GPU or defaults to `x86`.
The `gpu` property lets you specify vendor, model, memory, and count — e.g., `nvidia` (one NVIDIA GPU), `A100` (one A100), `A10G,A100` (either), `A100:80GB` (one 80GB A100), `A100:2` (two A100), `24GB..40GB:2` (two GPUs with 24–40GB), `A100:40GB:2` (two 40GB A100s).
If vendor is omitted, `dstack` infers it from the model or defaults to `nvidia`.
??? info "Shared memory"
If you are using parallel communicating processes (e.g., dataloaders in PyTorch), you may need to configure
`shm_size`, e.g. set it to `16GB`.
> If you’re unsure which offers (hardware configurations) are available from the configured backends, use the
> [`dstack offer`](../reference/cli/dstack/offer.md#list-gpu-offers) command to list them.
### Docker
#### Default image
If you don't specify `image`, `dstack` uses its [base :material-arrow-top-right-thin:{ .external }](https://github.com/dstackai/dstack/tree/master/docker/base){:target="_blank"} Docker image pre-configured with
`uv`, `python`, `pip`, essential CUDA drivers, `mpirun`, and NCCL tests (under `/opt/nccl-tests/build`).
Set the `python` property to pre-install a specific version of Python.
```yaml
type: dev-environment
name: vscode
python: 3.12
ide: vscode
```
#### NVCC
By default, the base Docker image doesn’t include `nvcc`, which is required for building custom CUDA kernels.
If you need `nvcc`, set the [`nvcc`](../reference/dstack.yml/dev-environment.md#nvcc) property to true.
```yaml
type: dev-environment
name: vscode
python: 3.12
nvcc: true
ide: vscode
init:
- uv pip install flash_attn --no-build-isolation
```
#### Custom image
If you want, you can specify your own Docker image via `image`.
```yaml
type: dev-environment
name: vscode
image: huggingface/trl-latest-gpu
ide: vscode
```
#### Docker in Docker
Set `docker` to `true` to enable the `docker` CLI in your dev environment, e.g., to run or build Docker images, or use Docker Compose.
```yaml
type: dev-environment
name: vscode
docker: true
ide: vscode
init:
- docker run --gpus all nvidia/cuda:12.3.0-base-ubuntu22.04 nvidia-smi
```
Cannot be used with `python` or `image`. Not supported on `runpod`, `vastai`, or `kubernetes`.
#### Privileged mode
To enable privileged mode, set [`privileged`](../reference/dstack.yml/dev-environment.md#privileged) to `true`.
Not supported with `runpod`, `vastai`, and `kubernetes`.
#### Private registry
Use the [`registry_auth`](../reference/dstack.yml/dev-environment.md#registry_auth) property to provide credentials for a private Docker registry.
```yaml
type: dev-environment
name: vscode
env:
- NGC_API_KEY
image: nvcr.io/nim/deepseek-ai/deepseek-r1-distill-llama-8b
registry_auth:
username: $oauthtoken
password: ${{ env.NGC_API_KEY }}
ide: vscode
```
### Environment variables
```yaml
type: dev-environment
name: vscode
env:
- HF_TOKEN
- HF_HUB_ENABLE_HF_TRANSFER=1
ide: vscode
```
If you don't assign a value to an environment variable (see `HF_TOKEN` above),
`dstack` will require the value to be passed via the CLI or set in the current process.
??? info "System environment variables"
The following environment variables are available in any run by default:
| Name | Description |
|-------------------------|--------------------------------------------------|
| `DSTACK_RUN_NAME` | The name of the run |
| `DSTACK_REPO_ID` | The ID of the repo |
| `DSTACK_GPUS_NUM` | The total number of GPUs in the run |
| `DSTACK_WORKING_DIR` | The working directory of the run |
| `DSTACK_REPO_DIR` | The directory where the repo is mounted (if any) |
### Working directory
If `working_dir` is not specified, it defaults to `/workflow`.
The `working_dir` must be an absolute path. The tilde (`~`) is supported (e.g., `~/my-working-dir`).
### Files
Sometimes, when you run a dev environment, you may want to mount local files. This is possible via the [`files`](../reference/dstack.yml/task.md#_files) property. Each entry maps a local directory or file to a path inside the container.
```yaml
type: dev-environment
name: vscode
files:
- .:examples # Maps the directory where `.dstack.yml` to `/workflow/examples`
- ~/.ssh/id_rsa:/root/.ssh/id_rsa # Maps `~/.ssh/id_rsa` to `/root/.ssh/id_rsa`
ide: vscode
```
If the local path is relative, it’s resolved relative to the configuration file.
If the container path is relative, it’s resolved relative to `/workflow`.
The container path is optional. If not specified, it will be automatically calculated:
```yaml
type: dev-environment
name: vscode
files:
- ../examples # Maps `examples` (the parent directory of `.dstack.yml`) to `/workflow/examples`
- ~/.ssh/id_rsa # Maps `~/.ssh/id_rsa` to `/root/.ssh/id_rsa`
ide: vscode
```
??? info "File size"
Whether its a file or folder, each entry is limited to 2MB. To avoid exceeding this limit, make sure to exclude unnecessary files
by listing it via `.gitignore` or `.dstackignore`.
The 2MB upload limit can be increased by setting the `DSTACK_SERVER_CODE_UPLOAD_LIMIT` environment variable.
### Repos
Sometimes, you may want to mount an entire Git repo inside the container.
Imagine you have a cloned Git repo containing an `examples` subdirectory with a `.dstack.yml` file:
```yaml
type: dev-environment
name: vscode
repos:
# Mounts the parent directory of `examples` (must be a Git repo)
# to `/workflow` (the default working directory)
- ..
ide: vscode
```
When you run it, `dstack` fetches the repo on the instance, applies your local changes, and mounts it—so the container matches your local repo.
The local path can be either relative to the configuration file or absolute.
??? info "Repo directory"
By default, `dstack` mounts the repo to `/workflow` (the default working directory).
You can override the repo directory using either a relative or an absolute path:
```yaml
type: dev-environment
name: vscode
repos:
# Mounts the parent directory of `examples` (must be a Git repo)
# to `/my-repo`
- ..:/my-repo
ide: vscode
```
If the path is relative, it is resolved against [working directory](#working-directory).
??? info "Repo size"
The repo size is not limited. However, local changes are limited to 2MB.
To avoid exceeding this limit, exclude unnecessary files using `.gitignore` or `.dstackignore`.
You can increase the 2MB limit by setting the `DSTACK_SERVER_CODE_UPLOAD_LIMIT` environment variable.
??? info "Repo URL"
Sometimes you may want to mount a Git repo without cloning it locally. In this case, simply provide a URL in `repos`:
```yaml
type: dev-environment
name: vscode
repos:
# Clone the specified repo to `/workflow` (the default working directory)
- https://github.com/dstackai/dstack
ide: vscode
```
??? info "Private repos"
If a Git repo is private, `dstack` will automatically try to use your default Git credentials (from
`~/.ssh/config` or `~/.config/gh/hosts.yml`).
If you want to use custom credentials, you can provide them with [`dstack init`](../reference/cli/dstack/init.md).
> Currently, you can configure up to one repo per run configuration.
### Retry policy
By default, if `dstack` can't find capacity or the instance is interrupted, the run will fail.
If you'd like `dstack` to automatically retry, configure the
[retry](../reference/dstack.yml/dev-environment.md#retry) property accordingly:
```yaml
type: dev-environment
# The name is optional, if not specified, generated randomly
name: vscode
ide: vscode
retry:
# Retry on specific events
on_events: [no-capacity, error, interruption]
# Retry for up to 1 hour
duration: 1h
```
!!! info "Retry duration"
The duration period is calculated as a run age for `no-capacity` event
and as a time passed since the last `interruption` and `error` for `interruption` and `error` events.
### Inactivity duration
Set [`inactivity_duration`](../reference/dstack.yml/dev-environment.md#inactivity_duration)
to automatically stop the dev environment after a configured period of inactivity.
```yaml
type: dev-environment
name: vscode
ide: vscode
# Stop if inactive for 2 hours
inactivity_duration: 2h
```
The dev environment becomes inactive when you close the remote VS Code window,
close any `ssh
```shell
$ dstack ps -v
NAME BACKEND RESOURCES PRICE STATUS SUBMITTED
vscode cudo 2xCPU, 8GB, $0.0286 running 8 mins ago
100.0GB (disk) (inactive for 2m 34s)
```
If you reattach to the dev environment using [`dstack attach`](../reference/cli/dstack/attach.md),
the inactivity timer will be reset within a few seconds.
??? info "In-place update"
As long as the configuration defines the `name` property, the value of `inactivity_duration`
can be changed for a running dev environment without a restart.
Just change the value in the configuration and run `dstack apply` again.
```shell
$ dstack apply -f .dstack.yml
Detected configuration changes that can be updated in-place: ['inactivity_duration']
Update the run? [y/n]:
```
> `inactivity_duration` is not to be confused with [`idle_duration`](#idle-duration).
> The latter determines how soon the underlying cloud instance will be terminated
> _after_ the dev environment is stopped.
### Utilization policy
Sometimes it’s useful to track whether a dev environment is fully utilizing all GPUs. While you can check this with
[`dstack metrics`](../reference/cli/dstack/metrics.md), `dstack` also lets you set a policy to auto-terminate the run if any GPU is underutilized.
Below is an example of a dev environment that auto-terminate if any GPU stays below 10% utilization for 1 hour.
```yaml
type: dev-environment
name: my-dev
python: 3.12
ide: cursor
resources:
gpu: H100:8
utilization_policy:
min_gpu_utilization: 10
time_window: 1h
```
### Schedule
Specify `schedule` to start a dev environment periodically at specific UTC times using the cron syntax:
```yaml
type: dev-environment
ide: vscode
schedule:
cron: "0 8 * * mon-fri" # at 8:00 UTC from Monday through Friday
```
The `schedule` property can be combined with `max_duration` or `utilization_policy` to shutdown the dev environment automatically when it's not needed.
??? info "Cron syntax"
`dstack` supports [POSIX cron syntax](https://pubs.opengroup.org/onlinepubs/9699919799/utilities/crontab.html#tag_20_25_07). One exception is that days of the week are started from Monday instead of Sunday so `0` corresponds to Monday.
The month and day of week fields accept abbreviated English month and weekday names (`jan–dec` and `mon–sun`) respectively.
A cron expression consists of five fields:
```
┌───────────── minute (0-59)
│ ┌───────────── hour (0-23)
│ │ ┌───────────── day of the month (1-31)
│ │ │ ┌───────────── month (1-12 or jan-dec)
│ │ │ │ ┌───────────── day of the week (0-6 or mon-sun)
│ │ │ │ │
│ │ │ │ │
│ │ │ │ │
* * * * *
```
The following operators can be used in any of the fields:
| Operator | Description | Example |
|----------|-----------------------|-------------------------------------------------------------------------|
| `*` | Any value | `0 * * * *` runs every hour at minute 0 |
| `,` | Value list separator | `15,45 10 * * *` runs at 10:15 and 10:45 every day. |
| `-` | Range of values | `0 1-3 * * *` runs at 1:00, 2:00, and 3:00 every day. |
| `/` | Step values | `*/10 8-10 * * *` runs every 10 minutes during the hours 8:00 to 10:59. |
### Spot policy
By default, `dstack` uses on-demand instances. However, you can change that
via the [`spot_policy`](../reference/dstack.yml/dev-environment.md#spot_policy) property. It accepts `spot`, `on-demand`, and `auto`.
--8<-- "docs/concepts/snippets/manage-fleets.ext"
!!! info "Reference"
Dev environments support many more configuration options,
incl. [`backends`](../reference/dstack.yml/dev-environment.md#backends),
[`regions`](../reference/dstack.yml/dev-environment.md#regions),
[`max_price`](../reference/dstack.yml/dev-environment.md#max_price), and
[`max_duration`](../reference/dstack.yml/dev-environment.md#max_duration),
among [others](../reference/dstack.yml/dev-environment.md).
--8<-- "docs/concepts/snippets/manage-runs.ext"
!!! info "What's next?"
1. Read about [tasks](tasks.md) and [services](services.md)
2. Learn how to manage [fleets](fleets.md)
## Tasks
# Tasks
A task allows you to run arbitrary commands on one or more nodes.
They are best suited for jobs like training or batch processing.
## Apply a configuration
First, define a task configuration as a YAML file in your project folder.
The filename must end with `.dstack.yml` (e.g. `.dstack.yml` or `dev.dstack.yml` are both acceptable).
[//]: # (TODO: Make tabs - single machine & distributed tasks & web app)
```yaml
type: task
# The name is optional, if not specified, generated randomly
name: trl-sft
python: 3.12
# Uncomment to use a custom Docker image
#image: huggingface/trl-latest-gpu
env:
- MODEL=Qwen/Qwen2.5-0.5B
- DATASET=stanfordnlp/imdb
commands:
- uv pip install trl
- |
trl sft \
--model_name_or_path $MODEL --dataset_name $DATASET
--num_processes $DSTACK_GPUS_PER_NODE
resources:
# One to two H100 GPUs
gpu: H100:1..2
shm_size: 24GB
```
To run a task, pass the configuration to [`dstack apply`](../reference/cli/dstack/apply.md):
```shell
$ dstack apply -f .dstack.yml
# BACKEND REGION RESOURCES SPOT PRICE
1 runpod CA-MTL-1 18xCPU, 100GB, A5000:24GB:2 yes $0.22
2 runpod EU-SE-1 18xCPU, 100GB, A5000:24GB:2 yes $0.22
3 gcp us-west4 27xCPU, 150GB, A5000:24GB:3 yes $0.33
Submit the run trl-sft? [y/n]: y
Launching `axolotl-train`...
---> 100%
{'loss': 1.4967, 'grad_norm': 1.2734375, 'learning_rate': 1.0000000000000002e-06, 'epoch': 0.0}
0% 1/24680 [00:13<95:34:17, 13.94s/it]
6% 73/1300 [00:48<13:57, 1.47it/s]
```
`dstack apply` automatically provisions instances and runs the task.
## Configuration options
!!! info "No commands"
If `commands` are not specified, `dstack` runs `image`’s entrypoint (or fails if none is set).
### Ports
A task can configure ports. In this case, if the task is running an application on a port, `dstack apply`
will securely allow you to access this port from your local machine through port forwarding.
```yaml
type: task
name: streamlit-hello
python: 3.12
commands:
- uv pip install streamlit
- streamlit hello
ports:
- 8501
```
When running it, `dstack apply` forwards `8501` port to `localhost:8501`, enabling secure access to the running
application.
### Distributed tasks
By default, a task runs on a single node.
However, you can run it on a cluster of nodes by specifying `nodes`.
```yaml
type: task
name: train-distrib
nodes: 2
python: 3.12
env:
- NCCL_DEBUG=INFO
commands:
- git clone https://github.com/pytorch/examples.git pytorch-examples
- cd pytorch-examples/distributed/ddp-tutorial-series
- uv pip install -r requirements.txt
- |
torchrun \
--nproc-per-node=$DSTACK_GPUS_PER_NODE \
--node-rank=$DSTACK_NODE_RANK \
--nnodes=$DSTACK_NODES_NUM \
--master-addr=$DSTACK_MASTER_NODE_IP \
--master-port=12345 \
multinode.py 50 10
resources:
gpu: 24GB:1..2
shm_size: 24GB
```
Nodes can communicate using their private IP addresses.
Use `DSTACK_MASTER_NODE_IP`, `DSTACK_NODES_IPS`, `DSTACK_NODE_RANK`, and other
[System environment variables](#system-environment-variables) for inter-node communication.
`dstack` is easy to use with `accelerate`, `torchrun`, Ray, Spark, and any other distributed frameworks.
!!! info "MPI"
If want to use MPI, you can set `startup_order` to `workers-first` and `stop_criteria` to `master-done`, and use `DSTACK_MPI_HOSTFILE`.
See the [NCCL](../../examples/clusters/nccl-tests/index.md) or [RCCL](../../examples/clusters/rccl-tests/index.md) examples.
> For detailed examples, see [distributed training](../../examples.md#distributed-training) examples.
??? info "Network interface"
Distributed frameworks usually detect the correct network interface automatically,
but sometimes you need to specify it explicitly.
For example, with PyTorch and the NCCL backend, you may need
to add these commands to tell NCCL to use the private interface:
```yaml
commands:
- apt-get install -y iproute2
- >
if [[ $DSTACK_NODE_RANK == 0 ]]; then
export NCCL_SOCKET_IFNAME=$(ip -4 -o addr show | fgrep $DSTACK_MASTER_NODE_IP | awk '{print $2}')
else
export NCCL_SOCKET_IFNAME=$(ip route get $DSTACK_MASTER_NODE_IP | sed -E 's/.*?dev (\S+) .*/\1/;t;d')
fi
# ... The rest of the commands
```
??? info "SSH"
You can log in to any node from any node via SSH on port 10022 using the `~/.ssh/dstack_job` private key.
For convenience, `~/.ssh/config` is preconfigured with these options, so a simple `ssh
```yaml
type: task
name: trl-sft
python: 3.12
env:
- MODEL=Qwen/Qwen2.5-0.5B
- DATASET=stanfordnlp/imdb
commands:
- uv pip install trl
- |
trl sft \
--model_name_or_path $MODEL --dataset_name $DATASET
--num_processes $DSTACK_GPUS_PER_NODE
resources:
# 16 or more x86_64 cores
cpu: 16..
# 200GB or more RAM
memory: 200GB..
# 4 GPUs from 40GB to 80GB
gpu: 40GB..80GB:4
# Shared memory (required by multi-gpu)
shm_size: 24GB
# Disk size
disk: 500GB
```
The `cpu` property lets you set the architecture (`x86` or `arm`) and core count — e.g., `x86:16` (16 x86 cores), `arm:8..` (at least 8 ARM cores).
If not set, `dstack` infers it from the GPU or defaults to `x86`.
The `gpu` property lets you specify vendor, model, memory, and count — e.g., `nvidia` (one NVIDIA GPU), `A100` (one A100), `A10G,A100` (either), `A100:80GB` (one 80GB A100), `A100:2` (two A100), `24GB..40GB:2` (two GPUs with 24–40GB), `A100:40GB:2` (two 40GB A100s).
If vendor is omitted, `dstack` infers it from the model or defaults to `nvidia`.
??? info "Shared memory"
If you are using parallel communicating processes (e.g., dataloaders in PyTorch), you may need to configure
`shm_size`, e.g. set it to `24GB`.
> If you’re unsure which offers (hardware configurations) are available from the configured backends, use the
> [`dstack offer`](../reference/cli/dstack/offer.md#list-gpu-offers) command to list them.
### Docker
#### Default image
If you don't specify `image`, `dstack` uses its [base :material-arrow-top-right-thin:{ .external }](https://github.com/dstackai/dstack/tree/master/docker/base){:target="_blank"} Docker image pre-configured with
`uv`, `python`, `pip`, essential CUDA drivers, `mpirun`, and NCCL tests (under `/opt/nccl-tests/build`).
Set the `python` property to pre-install a specific version of Python.
```yaml
type: task
name: train
python: 3.12
env:
- MODEL=Qwen/Qwen2.5-0.5B
- DATASET=stanfordnlp/imdb
commands:
- uv pip install trl
- |
trl sft \
--model_name_or_path $MODEL --dataset_name $DATASET
--num_processes $DSTACK_GPUS_PER_NODE
resources:
gpu: H100:1..2
shm_size: 24GB
```
#### NVCC
By default, the base Docker image doesn’t include `nvcc`, which is required for building custom CUDA kernels.
If you need `nvcc`, set the [`nvcc`](../reference/dstack.yml/dev-environment.md#nvcc) property to true.
```yaml
type: task
name: train
python: 3.12
nvcc: true
env:
- MODEL=Qwen/Qwen2.5-0.5B
- DATASET=stanfordnlp/imdb
commands:
- uv pip install trl
- uv pip install flash_attn --no-build-isolation
- |
trl sft \
--model_name_or_path $MODEL --dataset_name $DATASET \
--attn_implementation=flash_attention_2 \
--num_processes $DSTACK_GPUS_PER_NODE
resources:
gpu: H100:1
```
#### Custom image
If you want, you can specify your own Docker image via `image`.
```yaml
type: task
name: trl-sft
image: huggingface/trl-latest-gpu
env:
- MODEL=Qwen/Qwen2.5-0.5B
- DATASET=stanfordnlp/imdb
# if shell is not specified, `sh` is used for custom images
shell: bash
commands:
- source activate trl
- |
trl sft --model_name_or_path $MODEL \
--dataset_name $DATASET \
--output_dir /output \
--torch_dtype bfloat16 \
--use_peft true
resources:
gpu: H100:1
```
#### Docker in Docker
Set `docker` to `true` to enable the `docker` CLI in your task, e.g., to run or build Docker images, or use Docker Compose.
```yaml
type: task
name: docker-nvidia-smi
docker: true
commands:
- docker run --gpus all nvidia/cuda:12.3.0-base-ubuntu22.04 nvidia-smi
resources:
gpu: 1
```
Cannot be used with `python` or `image`. Not supported on `runpod`, `vastai`, or `kubernetes`.
#### Privileged mode
To enable privileged mode, set [`privileged`](../reference/dstack.yml/dev-environment.md#privileged) to `true`.
Not supported with `runpod`, `vastai`, and `kubernetes`.
#### Private registry
Use the [`registry_auth`](../reference/dstack.yml/dev-environment.md#registry_auth) property to provide credentials for a private Docker registry.
```yaml
type: task
name: train
env:
- NGC_API_KEY
image: nvcr.io/nvidia/pytorch:25.05-py3
registry_auth:
username: $oauthtoken
password: ${{ env.NGC_API_KEY }}
commands:
- git clone https://github.com/pytorch/examples.git pytorch-examples
- cd pytorch-examples/distributed/ddp-tutorial-series
- pip install -r requirements.txt
- |
torchrun \
--nproc-per-node=$DSTACK_GPUS_PER_NODE \
--nnodes=$DSTACK_NODES_NUM \
multinode.py 50 10
resources:
gpu: H100:1..2
shm_size: 24GB
```
### Environment variables
```yaml
type: task
name: trl-sft
python: 3.12
env:
- HF_TOKEN
- HF_HUB_ENABLE_HF_TRANSFER=1
- MODEL=Qwen/Qwen2.5-0.5B
- DATASET=stanfordnlp/imdb
commands:
- uv pip install trl
- |
trl sft \
--model_name_or_path $MODEL --dataset_name $DATASET
--num_processes $DSTACK_GPUS_PER_NODE
resources:
gpu: H100:1
```
If you don't assign a value to an environment variable (see `HF_TOKEN` above),
`dstack` will require the value to be passed via the CLI or set in the current process.
??? info "System environment variables"
The following environment variables are available in any run by default:
| Name | Description |
|-------------------------|------------------------------------------------------------------|
| `DSTACK_RUN_NAME` | The name of the run |
| `DSTACK_REPO_ID` | The ID of the repo |
| `DSTACK_GPUS_NUM` | The total number of GPUs in the run |
| `DSTACK_NODES_NUM` | The number of nodes in the run |
| `DSTACK_GPUS_PER_NODE` | The number of GPUs per node |
| `DSTACK_NODE_RANK` | The rank of the node |
| `DSTACK_MASTER_NODE_IP` | The internal IP address of the master node |
| `DSTACK_NODES_IPS` | The list of internal IP addresses of all nodes delimited by "\n" |
| `DSTACK_MPI_HOSTFILE` | The path to a pre-populated MPI hostfile |
| `DSTACK_WORKING_DIR` | The working directory of the run |
| `DSTACK_REPO_DIR` | The directory where the repo is mounted (if any) |
### Working directory
If `working_dir` is not specified, it defaults to `/workflow`.
!!! info "No commands"
If you’re using a custom `image` without `commands`, then `working_dir` is taken from `image`.
The `working_dir` must be an absolute path. The tilde (`~`) is supported (e.g., `~/my-working-dir`).
### Files
Sometimes, when you run a task, you may want to mount local files. This is possible via the [`files`](../reference/dstack.yml/task.md#_files) property. Each entry maps a local directory or file to a path inside the container.
```yaml
type: task
name: trl-sft
files:
- .:examples # Maps the directory where `.dstack.yml` to `/workflow/examples`
- ~/.ssh/id_rsa:/root/.ssh/id_rsa # Maps `~/.ssh/id_rsa` to `/root/.ssh/id_rs
python: 3.12
env:
- HF_TOKEN
- HF_HUB_ENABLE_HF_TRANSFER=1
- MODEL=Qwen/Qwen2.5-0.5B
- DATASET=stanfordnlp/imdb
commands:
- uv pip install trl
- |
trl sft \
--model_name_or_path $MODEL --dataset_name $DATASET
--num_processes $DSTACK_GPUS_PER_NODE
resources:
gpu: H100:1
```
Each entry maps a local directory or file to a path inside the container. Both local and container paths can be relative or absolute.
If the local path is relative, it’s resolved relative to the configuration file. If the container path is relative, it’s resolved relative to `/workflow`.
The container path is optional. If not specified, it will be automatically calculated.
```yaml
type: task
name: trl-sft
files:
- ../examples # Maps `examples` (the parent directory of `.dstack.yml`) to `/workflow/examples`
- ~/.cache/huggingface/token # Maps `~/.cache/huggingface/token` to `/root/~/.cache/huggingface/token`
python: 3.12
env:
- HF_TOKEN
- HF_HUB_ENABLE_HF_TRANSFER=1
- MODEL=Qwen/Qwen2.5-0.5B
- DATASET=stanfordnlp/imdb
commands:
- uv pip install trl
- |
trl sft \
--model_name_or_path $MODEL --dataset_name $DATASET
--num_processes $DSTACK_GPUS_PER_NODE
resources:
gpu: H100:1
```
??? info "File size"
Whether its a file or folder, each entry is limited to 2MB. To avoid exceeding this limit, make sure to exclude unnecessary files
by listing it via `.gitignore` or `.dstackignore`.
The 2MB upload limit can be increased by setting the `DSTACK_SERVER_CODE_UPLOAD_LIMIT` environment variable.
### Repos
Sometimes, you may want to mount an entire Git repo inside the container.
Imagine you have a cloned Git repo containing an `examples` subdirectory with a `.dstack.yml` file:
```yaml
type: task
name: trl-sft
repos:
# Mounts the parent directory of `examples` (must be a Git repo)
# to `/workflow` (the default working directory)
- ..
python: 3.12
env:
- HF_TOKEN
- HF_HUB_ENABLE_HF_TRANSFER=1
- MODEL=Qwen/Qwen2.5-0.5B
- DATASET=stanfordnlp/imdb
commands:
- uv pip install trl
- |
trl sft \
--model_name_or_path $MODEL --dataset_name $DATASET
--num_processes $DSTACK_GPUS_PER_NODE
resources:
gpu: H100:1
```
When you run it, `dstack` fetches the repo on the instance, applies your local changes, and mounts it—so the container matches your local repo.
The local path can be either relative to the configuration file or absolute.
??? info "Repo directory"
By default, `dstack` mounts the repo to `/workflow` (the default working directory).
You can override the repo directory using either a relative or an absolute path:
```yaml
type: task
name: trl-sft
repos:
# Mounts the parent directory of `examples` (must be a Git repo)
# to `/my-repo`
- ..:/my-repo
python: 3.12
env:
- HF_TOKEN
- HF_HUB_ENABLE_HF_TRANSFER=1
- MODEL=Qwen/Qwen2.5-0.5B
- DATASET=stanfordnlp/imdb
commands:
- uv pip install trl
- |
trl sft \
--model_name_or_path $MODEL --dataset_name $DATASET
--num_processes $DSTACK_GPUS_PER_NODE
resources:
gpu: H100:1
```
If the path is relative, it is resolved against [working directory](#working-directory).
??? info "Repo size"
The repo size is not limited. However, local changes are limited to 2MB.
To avoid exceeding this limit, exclude unnecessary files using `.gitignore` or `.dstackignore`.
You can increase the 2MB limit by setting the `DSTACK_SERVER_CODE_UPLOAD_LIMIT` environment variable.
??? info "Repo URL"
Sometimes you may want to mount a Git repo without cloning it locally. In this case, simply provide a URL in `repos`:
```yaml
type: task
name: trl-sft
repos:
# Clone the specified repo to `/workflow` (the default working directory)
- https://github.com/dstackai/dstack
python: 3.12
env:
- HF_TOKEN
- HF_HUB_ENABLE_HF_TRANSFER=1
- MODEL=Qwen/Qwen2.5-0.5B
- DATASET=stanfordnlp/imdb
commands:
- uv pip install trl
- |
trl sft \
--model_name_or_path $MODEL --dataset_name $DATASET
--num_processes $DSTACK_GPUS_PER_NODE
resources:
gpu: H100:1
```
??? info "Private repos"
If a Git repo is private, `dstack` will automatically try to use your default Git credentials (from
`~/.ssh/config` or `~/.config/gh/hosts.yml`).
If you want to use custom credentials, you can provide them with [`dstack init`](../reference/cli/dstack/init.md).
> Currently, you can configure up to one repo per run configuration.
### Retry policy
By default, if `dstack` can't find capacity, or the task exits with an error, or the instance is interrupted,
the run will fail.
If you'd like `dstack` to automatically retry, configure the
[retry](../reference/dstack.yml/task.md#retry) property accordingly:
```yaml
type: task
name: train
python: 3.12
commands:
- uv pip install -r fine-tuning/qlora/requirements.txt
- python fine-tuning/qlora/train.py
retry:
on_events: [no-capacity, error, interruption]
# Retry for up to 1 hour
duration: 1h
```
If one job of a multi-node task fails with retry enabled,
`dstack` will stop all the jobs and resubmit the run.
!!! info "Retry duration"
The duration period is calculated as a run age for `no-capacity` event and as a time passed since the last `interruption` and `error` for `interruption` and `error` events.
### Priority
Be default, submitted runs are scheduled in the order they were submitted.
When compute resources are limited, you may want to prioritize some runs over others.
This can be done by specifying the [`priority`](../reference/dstack.yml/task.md) property in the run configuration:
```yaml
type: task
name: train
python: 3.12
commands:
- uv pip install -r fine-tuning/qlora/requirements.txt
- python fine-tuning/qlora/train.py
priority: 50
```
`dstack` tries to provision runs with higher priority first.
Note that if a high priority run cannot be scheduled,
it does not block other runs with lower priority from scheduling.
### Utilization policy
Sometimes it’s useful to track whether a task is fully utilizing all GPUs. While you can check this with
[`dstack metrics`](../reference/cli/dstack/metrics.md), `dstack` also lets you set a policy to auto-terminate the run if any GPU is underutilized.
Below is an example of a task that auto-terminate if any GPU stays below 10% utilization for 1 hour.
```yaml
type: task
name: train
python: 3.12
commands:
- uv pip install -r fine-tuning/qlora/requirements.txt
- python fine-tuning/qlora/train.py
resources:
gpu: H100:8
utilization_policy:
min_gpu_utilization: 10
time_window: 1h
```
### Schedule
Specify `schedule` to start a task periodically at specific UTC times using the cron syntax:
```yaml
type: task
name: train
python: 3.12
commands:
- uv pip install -r fine-tuning/qlora/requirements.txt
- python fine-tuning/qlora/train.py
resources:
gpu: H100:8
schedule:
cron: "15 23 * * *" # everyday at 23:15 UTC
```
??? info "Cron syntax"
`dstack` supports [POSIX cron syntax](https://pubs.opengroup.org/onlinepubs/9699919799/utilities/crontab.html#tag_20_25_07). One exception is that days of the week are started from Monday instead of Sunday so `0` corresponds to Monday.
The month and day of week fields accept abbreviated English month and weekday names (`jan–dec` and `mon–sun`) respectively.
A cron expression consists of five fields:
```
┌───────────── minute (0-59)
│ ┌───────────── hour (0-23)
│ │ ┌───────────── day of the month (1-31)
│ │ │ ┌───────────── month (1-12 or jan-dec)
│ │ │ │ ┌───────────── day of the week (0-6 or mon-sun)
│ │ │ │ │
│ │ │ │ │
│ │ │ │ │
* * * * *
```
The following operators can be used in any of the fields:
| Operator | Description | Example |
|----------|-----------------------|-------------------------------------------------------------------------|
| `*` | Any value | `0 * * * *` runs every hour at minute 0 |
| `,` | Value list separator | `15,45 10 * * *` runs at 10:15 and 10:45 every day. |
| `-` | Range of values | `0 1-3 * * *` runs at 1:00, 2:00, and 3:00 every day. |
| `/` | Step values | `*/10 8-10 * * *` runs every 10 minutes during the hours 8:00 to 10:59. |
### Spot policy
By default, `dstack` uses on-demand instances. However, you can change that
via the [`spot_policy`](../reference/dstack.yml/task.md#spot_policy) property. It accepts `spot`, `on-demand`, and `auto`.
--8<-- "docs/concepts/snippets/manage-fleets.ext"
!!! info "Reference"
Tasks support many more configuration options,
incl. [`backends`](../reference/dstack.yml/task.md#backends),
[`regions`](../reference/dstack.yml/task.md#regions),
[`max_price`](../reference/dstack.yml/task.md#max_price), and
[`max_duration`](../reference/dstack.yml/task.md#max_duration),
among [others](../reference/dstack.yml/task.md).
--8<-- "docs/concepts/snippets/manage-runs.ext"
!!! info "What's next?"
1. Read about [dev environments](dev-environments.md) and [services](services.md)
2. Learn how to manage [fleets](fleets.md)
3. Check the [Axolotl](/examples/single-node-training/axolotl) example
## Services
# Services
Services allow you to deploy models or web apps as secure and scalable endpoints.
## Apply a configuration
First, define a service configuration as a YAML file in your project folder.
The filename must end with `.dstack.yml` (e.g. `.dstack.yml` or `dev.dstack.yml` are both acceptable).
```yaml
type: service
name: llama31
# If `image` is not specified, dstack uses its default image
python: 3.12
env:
- HF_TOKEN
- MODEL_ID=meta-llama/Meta-Llama-3.1-8B-Instruct
- MAX_MODEL_LEN=4096
commands:
- uv pip install vllm
- vllm serve $MODEL_ID
--max-model-len $MAX_MODEL_LEN
--tensor-parallel-size $DSTACK_GPUS_NUM
port: 8000
# (Optional) Register the model
model: meta-llama/Meta-Llama-3.1-8B-Instruct
# Uncomment to leverage spot instances
#spot_policy: auto
resources:
gpu: 24GB
```
To run a service, pass the configuration to [`dstack apply`](../reference/cli/dstack/apply.md):
```shell
$ HF_TOKEN=...
$ dstack apply -f .dstack.yml
# BACKEND REGION RESOURCES SPOT PRICE
1 runpod CA-MTL-1 18xCPU, 100GB, A5000:24GB:2 yes $0.22
2 runpod EU-SE-1 18xCPU, 100GB, A5000:24GB:2 yes $0.22
3 gcp us-west4 27xCPU, 150GB, A5000:24GB:3 yes $0.33
Submit the run llama31? [y/n]: y
Provisioning...
---> 100%
Service is published at:
http://localhost:3000/proxy/services/main/llama31/
Model meta-llama/Meta-Llama-3.1-8B-Instruct is published at:
http://localhost:3000/proxy/models/main/
```
`dstack apply` automatically provisions instances and runs the service.
If a [gateway](gateways.md) is not configured, the service’s endpoint will be accessible at
`
```shell
$ curl http://localhost:3000/proxy/services/main/llama31/v1/chat/completions \
-H 'Content-Type: application/json' \
-H 'Authorization: Bearer <dstack token>' \
-d '{
"model": "meta-llama/Meta-Llama-3.1-8B-Instruct",
"messages": [
{
"role": "user",
"content": "Compose a poem that explains the concept of recursion in programming."
}
]
}'
```
If the service defines the [`model`](#model) property, the model can be accessed with
the global OpenAI-compatible endpoint at `
```yaml
type: service
name: llama31-service
python: 3.12
env:
- HF_TOKEN
commands:
- uv pip install vllm
- vllm serve meta-llama/Meta-Llama-3.1-8B-Instruct --max-model-len 4096
port: 8000
resources:
gpu: 24GB
replicas: 1..4
scaling:
# Requests per seconds
metric: rps
# Target metric value
target: 10
```
The [`replicas`](../reference/dstack.yml/service.md#replicas) property can be a number or a range.
The [`metric`](../reference/dstack.yml/service.md#metric) property of [`scaling`](../reference/dstack.yml/service.md#scaling) only supports the `rps` metric (requests per second). In this
case `dstack` adjusts the number of replicas (scales up or down) automatically based on the load.
Setting the minimum number of replicas to `0` allows the service to scale down to zero when there are no requests.
> The `scaling` property requires creating a [gateway](gateways.md).
### Model
If the service is running a chat model with an OpenAI-compatible interface,
set the [`model`](#model) property to make the model accessible via `dstack`'s
global OpenAI-compatible endpoint, and also accessible via `dstack`'s UI.
### Authorization
By default, the service enables authorization, meaning the service endpoint requires a `dstack` user token.
This can be disabled by setting `auth` to `false`.
```yaml
type: service
name: http-server-service
# Disable authorization
auth: false
python: 3.12
commands:
- python3 -m http.server
port: 8000
```
### Probes
Configure one or more HTTP probes to periodically check the health of the service.
```yaml
type: service
name: my-service
port: 80
image: my-app:latest
probes:
- type: http
url: /health
interval: 15s
```
You can track probe statuses in `dstack ps --verbose`.
```shell
$ dstack ps --verbose
NAME BACKEND STATUS PROBES SUBMITTED
my-service deployment=1 running 11 mins ago
replica=0 job=0 deployment=0 aws (us-west-2) running ✓ 11 mins ago
replica=1 job=0 deployment=1 aws (us-west-2) running × 1 min ago
```
??? info "Probe statuses"
The following symbols are used for probe statuses:
- `×` — the last probe execution failed.
- `~` — the last probe execution succeeded, but the [`ready_after`](../reference/dstack.yml/service.md#ready_after) threshold is not yet reached.
- `✓` — the last `ready_after` probe executions succeeded.
If multiple probes are configured for the service, their statuses are displayed in the order in which the probes appear in the configuration.
Probes are executed for each service replica while the replica is `running`. A probe execution is considered successful if the replica responds with a `2xx` status code. Probe statuses do not affect how `dstack` handles replicas, except during [rolling deployments](#rolling-deployment).
??? info "HTTP request configuration"
You can configure the HTTP request method, headers, and other properties. To include secret values in probe requests, use environment variable interpolation, which is enabled for the `url`, `headers[i].value`, and `body` properties.
```yaml
type: service
name: my-service
port: 80
image: my-app:latest
env:
- PROBES_API_KEY
probes:
- type: http
method: post
url: /check-health
headers:
- name: X-API-Key
value: ${{ env.PROBES_API_KEY }}
- name: Content-Type
value: application/json
body: '{"level": 2}'
timeout: 20s
```
See the [reference](../reference/dstack.yml/service.md#probes) for more probe configuration options.
### Path prefix { #path-prefix }
If your `dstack` project doesn't have a [gateway](gateways.md), services are hosted with the
`/proxy/services/
```yaml
type: service
name: dash
gateway: false
auth: false
# Do not strip the path prefix
strip_prefix: false
env:
# Configure Dash to work with a path prefix
# Replace `main` with your dstack project name
- DASH_ROUTES_PATHNAME_PREFIX=/proxy/services/main/dash/
commands:
- uv pip install dash
# Assuming the Dash app is in your repo at app.py
- python app.py
port: 8050
```
By default, `dstack` strips the prefix before forwarding requests to your service,
so to the service it appears as if the prefix isn't there. This allows some apps
to work out of the box. If your app doesn't expect the prefix to be stripped,
set [`strip_prefix`](../reference/dstack.yml/service.md#strip_prefix) to `false`.
If your app cannot be configured to work with a path prefix, you can host it
on a dedicated domain name by setting up a [gateway](gateways.md).
### Rate limits { #rate-limits }
If you have a [gateway](gateways.md), you can configure rate limits for your service
using the [`rate_limits`](../reference/dstack.yml/service.md#rate_limits) property.
```yaml
type: service
image: my-app:latest
port: 80
rate_limits:
# For /api/auth/* - 1 request per second, no bursts
- prefix: /api/auth/
rps: 1
# For other URLs - 4 requests per second + bursts of up to 9 requests
- rps: 4
burst: 9
```
The rps limit sets the max requests per second, tracked in milliseconds (e.g., `rps: 4` means 1 request every 250 ms). Use `burst` to allow short spikes while keeping the average within `rps`.
Limits apply to the whole service (all replicas) and per client (by IP). Clients exceeding the limit get a 429 error.
??? info "Partitioning key"
Instead of partitioning requests by client IP address,
you can choose to partition by the value of a header.
```yaml
type: service
image: my-app:latest
port: 80
rate_limits:
- rps: 4
burst: 9
# Apply to each user, as determined by the `Authorization` header
key:
type: header
header: Authorization
```
### Resources
If you specify memory size, you can either specify an explicit size (e.g. `24GB`) or a
range (e.g. `24GB..`, or `24GB..80GB`, or `..80GB`).
```yaml
type: service
name: llama31-service
python: 3.12
env:
- HF_TOKEN
- MODEL_ID=meta-llama/Meta-Llama-3.1-8B-Instruct
- MAX_MODEL_LEN=4096
commands:
- uv pip install vllm
- |
vllm serve $MODEL_ID
--max-model-len $MAX_MODEL_LEN
--tensor-parallel-size $DSTACK_GPUS_NUM
port: 8000
resources:
# 16 or more x86_64 cores
cpu: 16..
# 2 GPUs of 80GB
gpu: 80GB:2
# Minimum disk size
disk: 200GB
```
The `cpu` property lets you set the architecture (`x86` or `arm`) and core count — e.g., `x86:16` (16 x86 cores), `arm:8..` (at least 8 ARM cores).
If not set, `dstack` infers it from the GPU or defaults to `x86`.
The `gpu` property lets you specify vendor, model, memory, and count — e.g., `nvidia` (one NVIDIA GPU), `A100` (one A100), `A10G,A100` (either), `A100:80GB` (one 80GB A100), `A100:2` (two A100), `24GB..40GB:2` (two GPUs with 24–40GB), `A100:40GB:2` (two 40GB A100s).
If vendor is omitted, `dstack` infers it from the model or defaults to `nvidia`.
??? info "Shared memory"
If you are using parallel communicating processes (e.g., dataloaders in PyTorch), you may need to configure
`shm_size`, e.g. set it to `16GB`.
> If you’re unsure which offers (hardware configurations) are available from the configured backends, use the
> [`dstack offer`](../reference/cli/dstack/offer.md#list-gpu-offers) command to list them.
### Docker
#### Default image
If you don't specify `image`, `dstack` uses its [base :material-arrow-top-right-thin:{ .external }](https://github.com/dstackai/dstack/tree/master/docker/base){:target="_blank"} Docker image pre-configured with
`uv`, `python`, `pip`, essential CUDA drivers, `mpirun`, and NCCL tests (under `/opt/nccl-tests/build`).
Set the `python` property to pre-install a specific version of Python.
```yaml
type: service
name: http-server-service
python: 3.12
commands:
- python3 -m http.server
port: 8000
```
#### NVCC
By default, the base Docker image doesn’t include `nvcc`, which is required for building custom CUDA kernels.
If you need `nvcc`, set the [`nvcc`](../reference/dstack.yml/dev-environment.md#nvcc) property to true.
```yaml
type: service
name: http-server-service
python: 3.12
nvcc: true
commands:
- python3 -m http.server
port: 8000
```
#### Custom image
If you want, you can specify your own Docker image via `image`.
```yaml
type: service
name: http-server-service
image: python
commands:
- python3 -m http.server
port: 8000
```
#### Docker in Docker
Set `docker` to `true` to enable the `docker` CLI in your service, e.g., to run Docker images or use Docker Compose.
```yaml
type: service
name: chat-ui-task
auth: false
docker: true
working_dir: examples/misc/docker-compose
commands:
- docker compose up
port: 9000
```
Cannot be used with `python` or `image`. Not supported on `runpod`, `vastai`, or `kubernetes`.
#### Privileged mode
To enable privileged mode, set [`privileged`](../reference/dstack.yml/dev-environment.md#privileged) to `true`.
Not supported with `runpod`, `vastai`, and `kubernetes`.
#### Private registry
Use the [`registry_auth`](../reference/dstack.yml/dev-environment.md#registry_auth) property to provide credentials for a private Docker registry.
```yaml
type: service
name: serve-distill-deepseek
env:
- NGC_API_KEY
- NIM_MAX_MODEL_LEN=4096
image: nvcr.io/nim/deepseek-ai/deepseek-r1-distill-llama-8b
registry_auth:
username: $oauthtoken
password: ${{ env.NGC_API_KEY }}
port: 8000
model: deepseek-ai/deepseek-r1-distill-llama-8b
resources:
gpu: H100:1
```
### Environment variables
```yaml
type: service
name: llama-2-7b-service
python: 3.12
env:
- HF_TOKEN
- MODEL=NousResearch/Llama-2-7b-chat-hf
commands:
- uv pip install vllm
- python -m vllm.entrypoints.openai.api_server --model $MODEL --port 8000
port: 8000
resources:
gpu: 24GB
```
> If you don't assign a value to an environment variable (see `HF_TOKEN` above),
`dstack` will require the value to be passed via the CLI or set in the current process.
??? info "System environment variables"
The following environment variables are available in any run by default:
| Name | Description |
|-------------------------|--------------------------------------------------|
| `DSTACK_RUN_NAME` | The name of the run |
| `DSTACK_REPO_ID` | The ID of the repo |
| `DSTACK_GPUS_NUM` | The total number of GPUs in the run |
| `DSTACK_WORKING_DIR` | The working directory of the run |
| `DSTACK_REPO_DIR` | The directory where the repo is mounted (if any) |
### Working directory
If `working_dir` is not specified, it defaults to `/workflow`.
!!! info "No commands"
If you’re using a custom `image` without `commands`, then `working_dir` is taken from `image`.
The `working_dir` must be an absolute path. The tilde (`~`) is supported (e.g., `~/my-working-dir`).
### Files
Sometimes, when you run a service, you may want to mount local files. This is possible via the [`files`](../reference/dstack.yml/task.md#_files) property. Each entry maps a local directory or file to a path inside the container.
```yaml
type: service
name: llama-2-7b-service
files:
- .:examples # Maps the directory where `.dstack.yml` to `/workflow/examples`
- ~/.ssh/id_rsa:/root/.ssh/id_rsa # Maps `~/.ssh/id_rsa` to `/root/.ssh/id_rsa`
python: 3.12
env:
- HF_TOKEN
- MODEL=NousResearch/Llama-2-7b-chat-hf
commands:
- uv pip install vllm
- python -m vllm.entrypoints.openai.api_server --model $MODEL --port 8000
port: 8000
resources:
gpu: 24GB
```
Each entry maps a local directory or file to a path inside the container. Both local and container paths can be relative or absolute.
If the local path is relative, it’s resolved relative to the configuration file. If the container path is relative, it’s resolved relative to `/workflow`.
The container path is optional. If not specified, it will be automatically calculated.
```yaml
type: service
name: llama-2-7b-service
files:
- ../examples # Maps `examples` (the parent directory of `.dstack.yml`) to `/workflow/examples`
- ~/.ssh/id_rsa # Maps `~/.ssh/id_rsa` to `/root/.ssh/id_rsa`
python: 3.12
env:
- HF_TOKEN
- MODEL=NousResearch/Llama-2-7b-chat-hf
commands:
- uv pip install vllm
- python -m vllm.entrypoints.openai.api_server --model $MODEL --port 8000
port: 8000
resources:
gpu: 24GB
```
??? info "File size"
Whether its a file or folder, each entry is limited to 2MB. To avoid exceeding this limit, make sure to exclude unnecessary files
by listing it via `.gitignore` or `.dstackignore`.
The 2MB upload limit can be increased by setting the `DSTACK_SERVER_CODE_UPLOAD_LIMIT` environment variable.
### Repos
Sometimes, you may want to mount an entire Git repo inside the container.
Imagine you have a cloned Git repo containing an `examples` subdirectory with a `.dstack.yml` file:
```yaml
type: service
name: llama-2-7b-service
repos:
# Mounts the parent directory of `examples` (must be a Git repo)
# to `/workflow` (the default working directory)
- ..
python: 3.12
env:
- HF_TOKEN
- MODEL=NousResearch/Llama-2-7b-chat-hf
commands:
- uv pip install vllm
- python -m vllm.entrypoints.openai.api_server --model $MODEL --port 8000
port: 8000
resources:
gpu: 24GB
```
When you run it, `dstack` fetches the repo on the instance, applies your local changes, and mounts it—so the container matches your local repo.
The local path can be either relative to the configuration file or absolute.
??? info "Repo directory"
By default, `dstack` mounts the repo to `/workflow` (the default working directory).
You can override the repo directory using either a relative or an absolute path:
```yaml
type: service
name: llama-2-7b-service
repos:
# Mounts the parent directory of `examples` (must be a Git repo)
# to `/my-repo`
- ..:/my-repo
python: 3.12
env:
- HF_TOKEN
- MODEL=NousResearch/Llama-2-7b-chat-hf
commands:
- uv pip install vllm
- python -m vllm.entrypoints.openai.api_server --model $MODEL --port 8000
port: 8000
resources:
gpu: 24GB
```
If the path is relative, it is resolved against `working_dir`.
??? info "Repo size"
The repo size is not limited. However, local changes are limited to 2MB.
To avoid exceeding this limit, exclude unnecessary files using `.gitignore` or `.dstackignore`.
You can increase the 2MB limit by setting the `DSTACK_SERVER_CODE_UPLOAD_LIMIT` environment variable.
??? info "Repo URL"
Sometimes you may want to mount a Git repo without cloning it locally. In this case, simply provide a URL in `repos`:
```yaml
type: service
name: llama-2-7b-service
repos:
# Clone the specified repo to `/workflow` (the default working directory)
- https://github.com/dstackai/dstack
python: 3.12
env:
- HF_TOKEN
- MODEL=NousResearch/Llama-2-7b-chat-hf
commands:
- uv pip install vllm
- python -m vllm.entrypoints.openai.api_server --model $MODEL --port 8000
port: 8000
resources:
gpu: 24GB
```
??? info "Private repos"
If a Git repo is private, `dstack` will automatically try to use your default Git credentials (from
`~/.ssh/config` or `~/.config/gh/hosts.yml`).
If you want to use custom credentials, you can provide them with [`dstack init`](../reference/cli/dstack/init.md).
> Currently, you can configure up to one repo per run configuration.
### Retry policy
By default, if `dstack` can't find capacity, or the service exits with an error, or the instance is interrupted, the run will fail.
If you'd like `dstack` to automatically retry, configure the
[retry](../reference/dstack.yml/service.md#retry) property accordingly:
```yaml
type: service
image: my-app:latest
port: 80
retry:
on_events: [no-capacity, error, interruption]
# Retry for up to 1 hour
duration: 1h
```
If one replica of a multi-replica service fails with retry enabled,
`dstack` will resubmit only the failed replica while keeping active replicas running.
!!! info "Retry duration"
The duration period is calculated as a run age for `no-capacity` event and as a time passed since the last `interruption` and `error` for `interruption` and `error` events.
### Spot policy
By default, `dstack` uses on-demand instances. However, you can change that
via the [`spot_policy`](../reference/dstack.yml/service.md#spot_policy) property. It accepts `spot`, `on-demand`, and `auto`.
### Utilization policy
Sometimes it’s useful to track whether a service is fully utilizing all GPUs. While you can check this with
[`dstack metrics`](../reference/cli/dstack/metrics.md), `dstack` also lets you set a policy to auto-terminate the run if any GPU is underutilized.
Below is an example of a service that auto-terminate if any GPU stays below 10% utilization for 1 hour.
```yaml
type: service
name: llama-2-7b-service
python: 3.12
env:
- HF_TOKEN
- MODEL=NousResearch/Llama-2-7b-chat-hf
commands:
- uv pip install vllm
- python -m vllm.entrypoints.openai.api_server --model $MODEL --port 8000
port: 8000
resources:
gpu: 24GB
utilization_policy:
min_gpu_utilization: 10
time_window: 1h
```
### Schedule
Specify `schedule` to start a service periodically at specific UTC times using the cron syntax:
```yaml
type: service
name: llama-2-7b-service
python: 3.12
env:
- HF_TOKEN
- MODEL=NousResearch/Llama-2-7b-chat-hf
commands:
- uv pip install vllm
- python -m vllm.entrypoints.openai.api_server --model $MODEL --port 8000
port: 8000
resources:
gpu: 24GB
schedule:
cron: "0 8 * * mon-fri" # at 8:00 UTC from Monday through Friday
```
The `schedule` property can be combined with `max_duration` or `utilization_policy` to shutdown the service automatically when it's not needed.
??? info "Cron syntax"
`dstack` supports [POSIX cron syntax](https://pubs.opengroup.org/onlinepubs/9699919799/utilities/crontab.html#tag_20_25_07). One exception is that days of the week are started from Monday instead of Sunday so `0` corresponds to Monday.
The month and day of week fields accept abbreviated English month and weekday names (`jan–dec` and `mon–sun`) respectively.
A cron expression consists of five fields:
```
┌───────────── minute (0-59)
│ ┌───────────── hour (0-23)
│ │ ┌───────────── day of the month (1-31)
│ │ │ ┌───────────── month (1-12 or jan-dec)
│ │ │ │ ┌───────────── day of the week (0-6 or mon-sun)
│ │ │ │ │
│ │ │ │ │
│ │ │ │ │
* * * * *
```
The following operators can be used in any of the fields:
| Operator | Description | Example |
|----------|-----------------------|-------------------------------------------------------------------------|
| `*` | Any value | `0 * * * *` runs every hour at minute 0 |
| `,` | Value list separator | `15,45 10 * * *` runs at 10:15 and 10:45 every day. |
| `-` | Range of values | `0 1-3 * * *` runs at 1:00, 2:00, and 3:00 every day. |
| `/` | Step values | `*/10 8-10 * * *` runs every 10 minutes during the hours 8:00 to 10:59. |
--8<-- "docs/concepts/snippets/manage-fleets.ext"
!!! info "Reference"
Services support many more configuration options,
incl. [`backends`](../reference/dstack.yml/service.md#backends),
[`regions`](../reference/dstack.yml/service.md#regions),
[`max_price`](../reference/dstack.yml/service.md#max_price), and
among [others](../reference/dstack.yml/service.md).
## Rolling deployment
To deploy a new version of a service that is already `running`, use `dstack apply`. `dstack` will automatically detect changes and suggest a rolling deployment update.
```shell
$ dstack apply -f my-service.dstack.yml
Active run my-service already exists. Detected changes that can be updated in-place:
- Repo state (branch, commit, or other)
- File archives
- Configuration properties:
- env
- files
Update the run? [y/n]:
```
If approved, `dstack` gradually updates the service replicas. To update a replica, `dstack` starts a new replica, waits for it to become `running` and for all of its [probes](#probes) to pass, then terminates the old replica. This process is repeated for each replica, one at a time.
You can track the progress of rolling deployment in both `dstack apply` or `dstack ps`.
Older replicas have lower `deployment` numbers; newer ones have higher.
```shell
$ dstack apply -f my-service.dstack.yml
⠋ Launching my-service...
NAME BACKEND PRICE STATUS SUBMITTED
my-service deployment=1 running 11 mins ago
replica=0 job=0 deployment=0 aws (us-west-2) $0.0026 terminating 11 mins ago
replica=1 job=0 deployment=1 aws (us-west-2) $0.0026 running 1 min ago
```
The rolling deployment stops when all replicas are updated or when a new deployment is submitted.
??? info "Supported properties"
Rolling deployment supports changes to the following properties: `port`, `probes`, `resources`, `volumes`, `docker`, `files`, `image`, `user`, `privileged`, `entrypoint`, `working_dir`, `python`, `nvcc`, `single_branch`, `env`, `shell`, `commands`, as well as changes to [repo](#repos) or [file](#files) contents.
Changes to `replicas` and `scaling` can be applied without redeploying replicas.
Changes to other properties require a full service restart.
To trigger a rolling deployment when no properties have changed (e.g., after updating [secrets](secrets.md) or to restart all replicas),
make a minor config change, such as adding a dummy [environment variable](#environment-variables).
--8<-- "docs/concepts/snippets/manage-runs.ext"
!!! info "What's next?"
1. Read about [dev environments](dev-environments.md) and [tasks](tasks.md)
2. Learn how to manage [fleets](fleets.md)
3. See how to set up [gateways](gateways.md)
4. Check the [TGI :material-arrow-top-right-thin:{ .external }](../../examples/inference/tgi/index.md){:target="_blank"},
[vLLM :material-arrow-top-right-thin:{ .external }](../../examples/inference/vllm/index.md){:target="_blank"}, and
[NIM :material-arrow-top-right-thin:{ .external }](../../examples/inference/nim/index.md){:target="_blank"} examples
## Volumes
# Volumes
Volumes enable data persistence between runs of dev environments, tasks, and services.
`dstack` supports two kinds of volumes:
* [Network volumes](#network-volumes) — provisioned via backends and mounted to specific container directories.
Ideal for persistent storage.
* [Instance volumes](#instance-volumes) — bind directories on the host instance to container directories.
Useful as a cache for cloud fleets or for persistent storage with SSH fleets.
## Network volumes
Network volumes are currently supported for the `aws`, `gcp`, and `runpod` backends.
### Apply a configuration
First, define a volume configuration as a YAML file in your project folder.
The filename must end with `.dstack.yml` (e.g. `.dstack.yml` or `volume.dstack.yml` are both acceptable).
```yaml
type: volume
# A name of the volume
name: my-volume
# Volumes are bound to a specific backend and region
backend: aws
region: eu-central-1
# Required size
size: 100GB
```
If you use this configuration, `dstack` will create a new volume based on the specified options.
To create, update, or register the volume, pass the volume configuration to `dstack apply`:
```shell
$ dstack apply -f volume.dstack.yml
Volume my-volume does not exist yet. Create the volume? [y/n]: y
NAME BACKEND REGION STATUS CREATED
my-volume aws eu-central-1 submitted now
```
Once created, the volume can be attached to dev environments, tasks, and services.
> When creating a new network volume, `dstack` automatically creates an `ext4` filesystem on it.
??? info "Register existing volumes"
If you prefer not to create a new volume but to reuse an existing one (e.g., created manually), you can
specify its ID via [`volume_id`](../reference/dstack.yml/volume.md#volume_id). In this case, `dstack` will register the specified volume so that you can use it with dev environments, tasks, and services.
```yaml
type: volume
# The name of the volume
name: my-volume
# Volumes are bound to a specific backend and region
backend: aws
region: eu-central-1
# The ID of the volume in AWS
volume_id: vol1235
```
!!! info "Filesystem"
If you register an existing volume, you must ensure the volume already has a filesystem.
!!! info "Reference"
For all volume configuration options, refer to the [reference](../reference/dstack.yml/volume.md).
### Attach a volume { #attach-network-volume }
Dev environments, tasks, and services let you attach any number of network volumes.
To attach a network volume, simply specify its name using the `volumes` property
and specify where to mount its contents:
```yaml
type: dev-environment
# A name of the dev environment
name: vscode-vol
ide: vscode
# Map the name of the volume to any path
volumes:
- name: my-volume
path: /volume_data
# You can also use the short syntax in the `name:path` form
# volumes:
# - my-volume:/volume_data
```
Once you run this configuration, the contents of the volume will be attached to `/volume_data` inside the dev environment,
and its contents will persist across runs.
??? info "Multiple regions or backends"
If you're unsure in advance which region or backend you'd like to use (or which is available),
you can specify multiple volumes for the same path.
```yaml
volumes:
- name: [my-aws-eu-west-1-volume, my-aws-us-east-1-volume]
path: /volume_data
```
`dstack` will attach one of the volumes based on the region and backend of the run.
??? info "Distributed tasks"
When using single-attach volumes such as AWS EBS with distributed tasks,
you can attach different volumes to different nodes using `dstack` variable interpolation:
```yaml
type: task
nodes: 8
commands:
- ...
volumes:
- name: data-volume-${{ dstack.node_rank }}
path: /volume_data
```
This way, every node will use its own volume.
Tip: To create volumes for all nodes using one volume configuration, specify volume name with `-n`:
```shell
$ for i in {0..7}; do dstack apply -f vol.dstack.yml -n data-volume-$i -y; done
```
### Detach a volume { #detach-network-volume }
`dstack` automatically detaches volumes from instances when a run stops.
!!! info "Force detach"
In some clouds such as AWS a volume may stuck in the detaching state.
To fix this, you can abort the run, and `dstack` will force detach the volume.
`dstack` will also force detach the stuck volume automatically after `stop_duration`.
Note that force detaching a volume is a last resort measure and may corrupt the file system.
Contact your cloud support if you experience volumes getting stuck in the detaching state.
### Manage volumes { #manage-network-volumes }
#### List volumes
The [`dstack volume list`](../reference/cli/dstack/volume.md#dstack-volume-list) command lists created and registered volumes:
```shell
$ dstack volume list
NAME BACKEND REGION STATUS CREATED
my-volume aws eu-central-1 active 3 weeks ago
```
#### Delete volumes
When the volume isn't attached to any active dev environment, task, or service,
you can delete it by passing the volume configuration to `dstack delete`:
```shell
$ dstack delete -f vol.dstack.yaml
```
Alternatively, you can delete a volume by passing the volume name to `dstack volume delete`.
If the volume was created using `dstack`, it will be physically destroyed along with the data.
If you've registered an existing volume, it will be de-registered with `dstack` but will keep the data.
### FAQs
??? info "Can I use network volumes across backends?"
Since volumes are backed up by cloud network disks, you can only use them within the same cloud. If you need to access
data across different backends, you should either use object storage or replicate the data across multiple volumes.
??? info "Can I use network volumes across regions?"
Typically, network volumes are associated with specific regions, so you can't use them in other regions. Often,
volumes are also linked to availability zones, but some providers support volumes that can be used across different
availability zones within the same region.
If you don't want to limit a run to one particular region, you can create different volumes for different regions
and specify them for the same mount point as [documented above](#attach-network-volume).
??? info "Can I attach network volumes to multiple runs or instances?"
You can mount a volume in multiple runs. This feature is currently supported only by the `runpod` backend.
## Instance volumes
Instance volumes allow mapping any directory on the instance where the run is executed to any path inside the container.
This means that the data in instance volumes is persisted only if the run is executed on the same instance.
### Attach a volume
A run can configure any number of instance volumes. To attach an instance volume,
specify the `instance_path` and `path` in the `volumes` property:
```yaml
type: dev-environment
# A name of the dev environment
name: vscode-vol
ide: vscode
# Map the instance path to any container path
volumes:
- instance_path: /mnt/volume
path: /volume_data
# You can also use the short syntax in the `instance_path:path` form
# volumes:
# - /mnt/volume:/volume_data
```
Since persistence isn't guaranteed (instances may be interrupted or runs may occur on different instances), use instance
volumes only for caching or with directories manually mounted to network storage.
!!! info "Backends"
Instance volumes are currently supported for all backends except `runpod`, `vastai` and `kubernetes`, and can also be used with [SSH fleets](fleets.md#ssh-fleets).
??? info "Optional volumes"
If the volume is not critical for your workload, you can mark it as `optional`.
```yaml
type: task
volumes:
- instance_path: /dstack-cache
path: /root/.cache/
optional: true
```
Configurations with optional volumes can run in any backend, but the volume is only mounted
if the selected backend supports it.
### Use instance volumes for caching
For example, if a run regularly installs packages with `pip install`,
you can mount the `/root/.cache/pip` folder inside the container to a folder on the instance for
reuse.
```yaml
type: task
volumes:
- /dstack-cache/pip:/root/.cache/pip
```
### Use instance volumes with SSH fleets
If you control the instances (e.g. they are on-prem servers configured via [SSH fleets](fleets.md#ssh-fleets)),
you can mount network storage (e.g., NFS or SMB) and use the mount points as instance volumes.
For example, if you mount a network storage to `/mnt/nfs-storage` on all hosts of your SSH fleet,
you can map this directory via instance volumes and be sure the data is persisted.
```yaml
type: task
volumes:
- /mnt/nfs-storage:/storage
```
## Secrets
# Secrets
Secrets allow centralized management of sensitive values such as API keys and credentials. They are project-scoped, managed by project admins, and can be referenced in run configurations to pass sensitive values to runs in a secure manner.
!!! info "Secrets encryption"
By default, secrets are stored in plaintext in the DB.
Configure [server encryption](../guides/server-deployment.md#encryption) to store secrets encrypted.
## Manage secrets
### Set
Use the `dstack secret set` command to create a new secret:
```shell
$ dstack secret set my_secret some_secret_value
OK
```
The same command can be used to update an existing secret:
```shell
$ dstack secret set my_secret another_secret_value
OK
```
### List
Use the `dstack secret list` command to list all secrets set in a project:
```shell
$ dstack secret
NAME VALUE
hf_token ******
my_secret ******
```
### Get
The `dstack secret list` does not show secret values. To see a secret value, use the `dstack secret get` command:
```shell
$ dstack secret get my_secret
NAME VALUE
my_secret some_secret_value
```
### Delete
Secrets can be deleted using the `dstack secret delete` command:
```shell
$ dstack secret delete my_secret
Delete the secret my_secret? [y/n]: y
OK
```
## Use secrets
You can use the `${{ secrets.
```shell
$ dstack secret set hf_token {hf_token_value}
OK
```
and then reference the secret in `env`:
```yaml
type: service
env:
- HF_TOKEN=${{ secrets.hf_token }}
commands:
...
```
### `registry_auth`
If you need to pull a private Docker image, you can store registry credentials as secrets and reference them in `registry_auth`:
```yaml
type: service
image: nvcr.io/nim/deepseek-ai/deepseek-r1-distill-llama-8b
registry_auth:
username: $oauthtoken
password: ${{ secrets.ngc_api_key }}
```
## Projects
# Projects
Projects enable the isolation of different teams and their resources. Each project can configure its own backends and
control which users have access to it.
> While project backends can be configured via [`~/.dstack/server/config.yml`](../reference/server/config.yml.md),
> use the UI to fully manage projects, users, and user permissions.
## Project backends { #backends }
In addition to [`~/.dstack/server/config.yml`](../reference/server/config.yml.md),
a global admin or a project admin can configure backends on the project settings page.
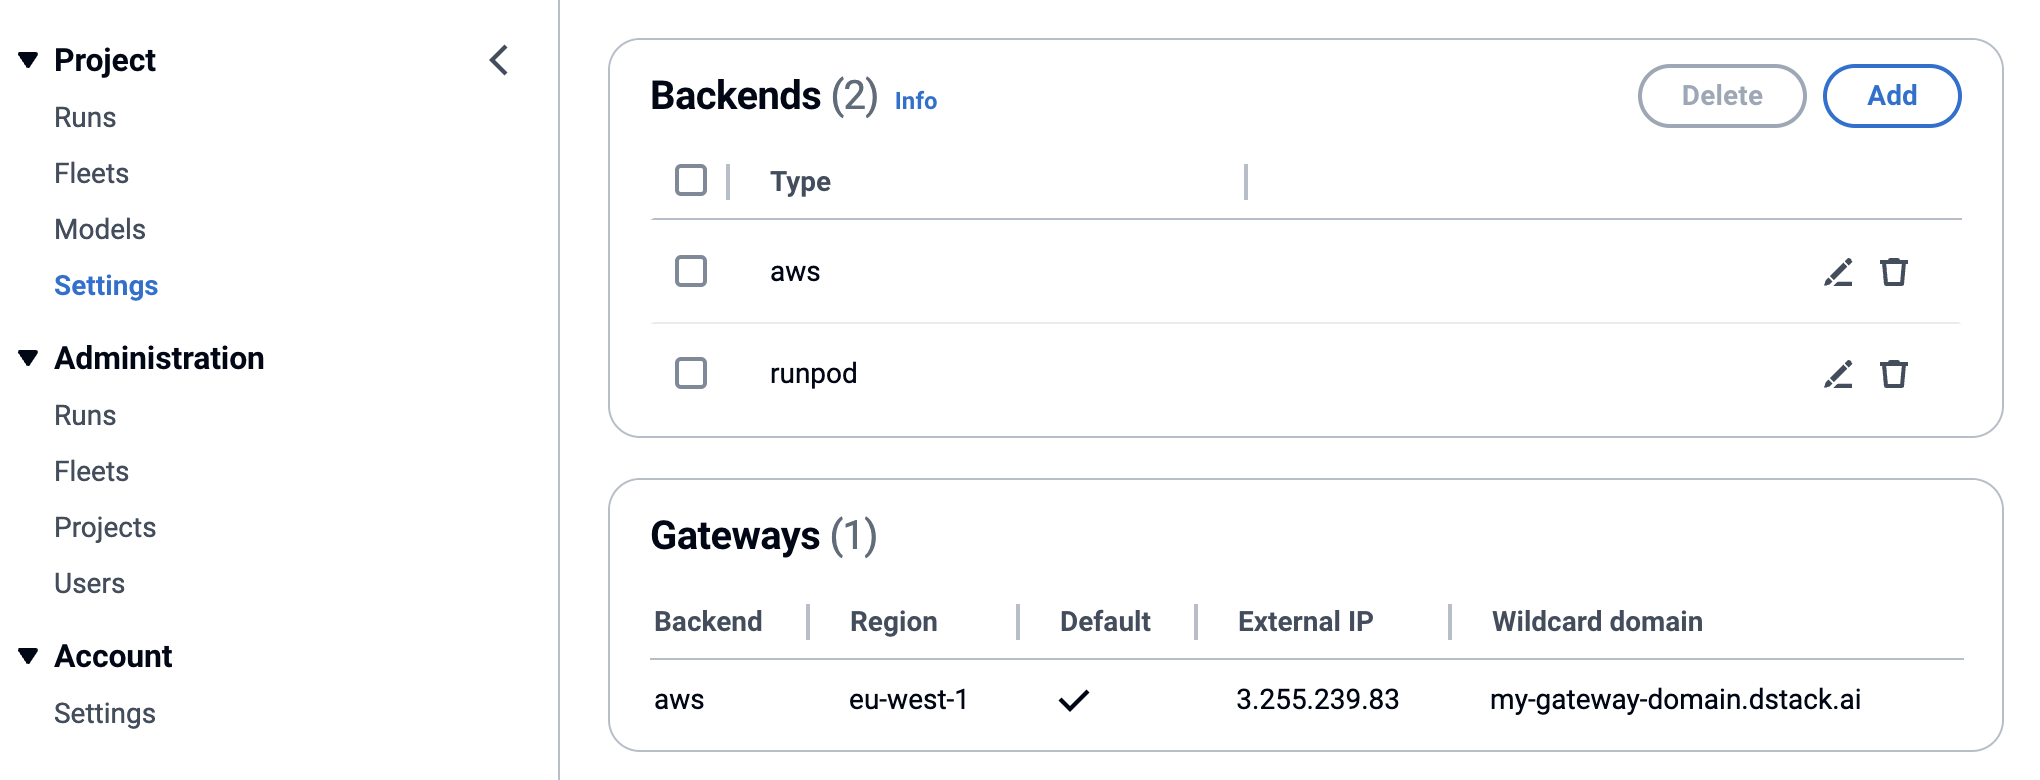 ## Global admins
A user can be assigned or unassigned a global admin role on the user account settings page. This can only be done by
another global admin.
## Global admins
A user can be assigned or unassigned a global admin role on the user account settings page. This can only be done by
another global admin.
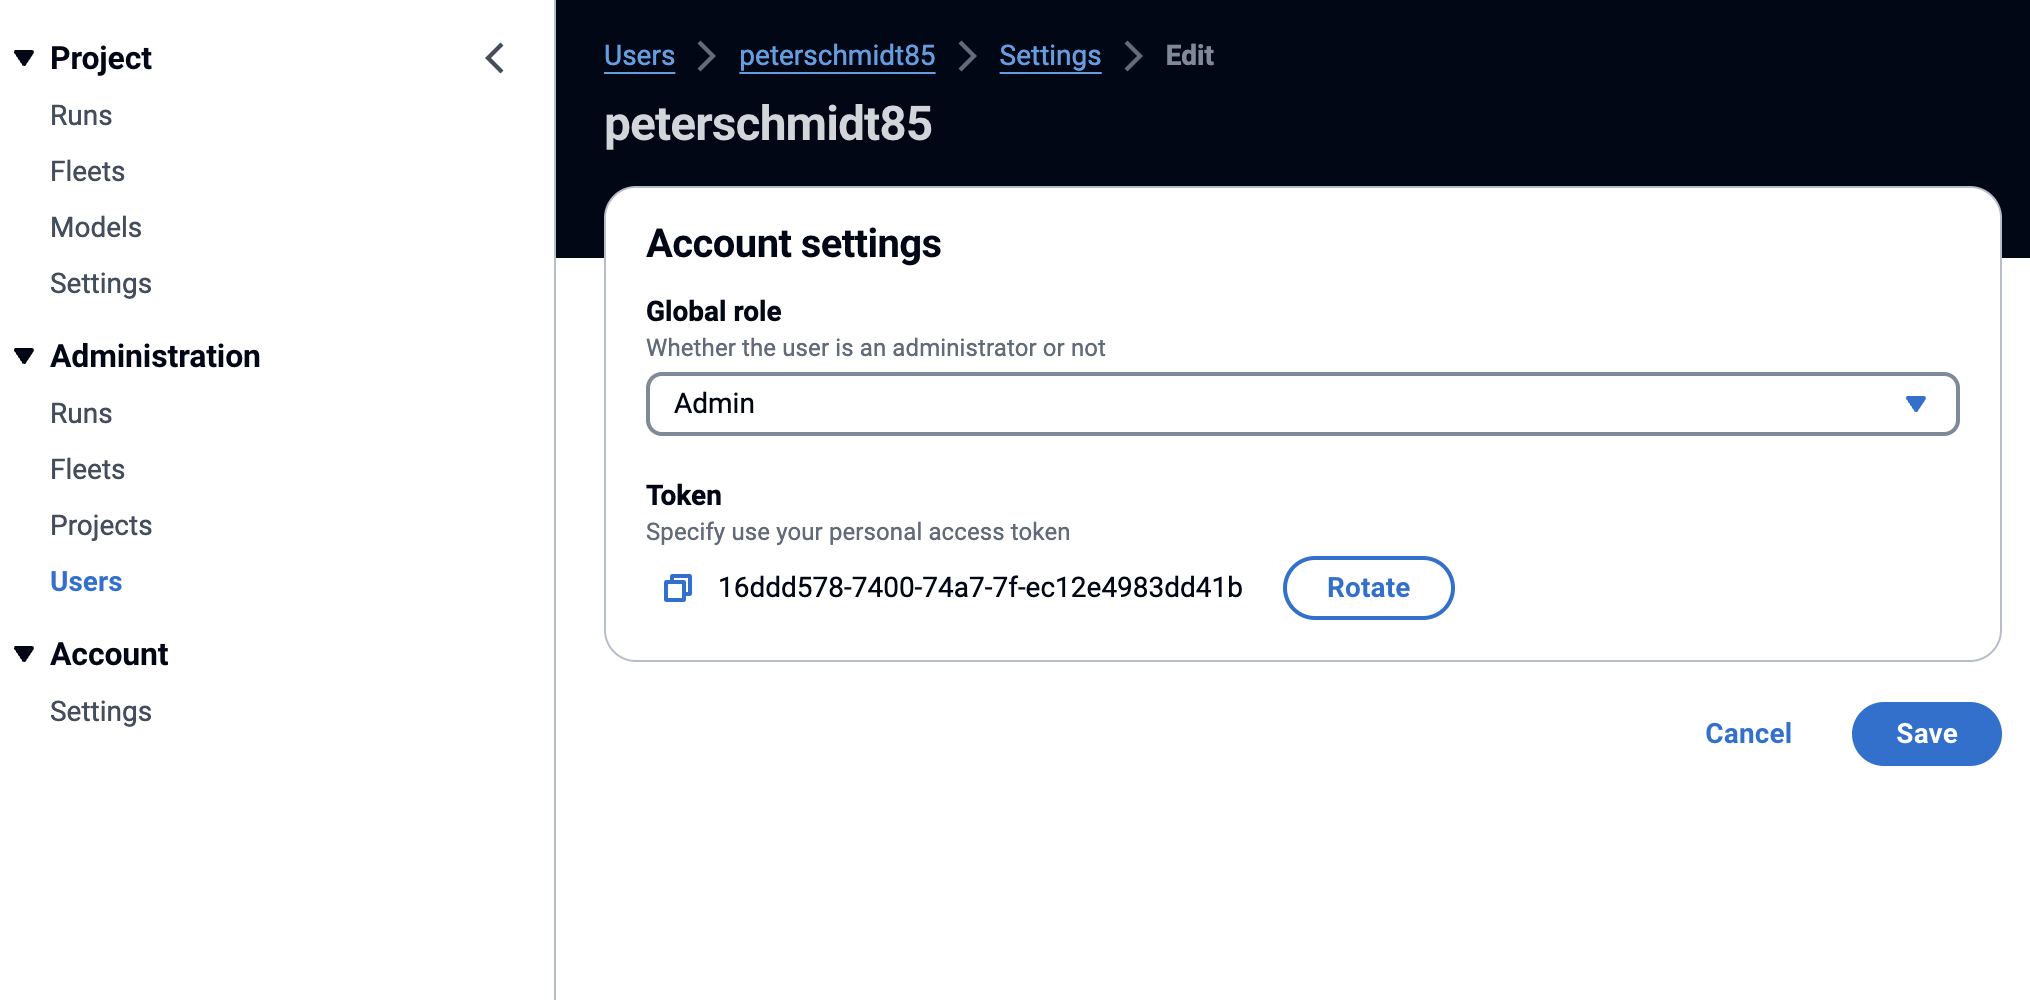 The global admin role allows a user to manage all projects and users.
## Project members
A user can be added to a project and assigned or unassigned as a project role on the project settings page.
The global admin role allows a user to manage all projects and users.
## Project members
A user can be added to a project and assigned or unassigned as a project role on the project settings page.
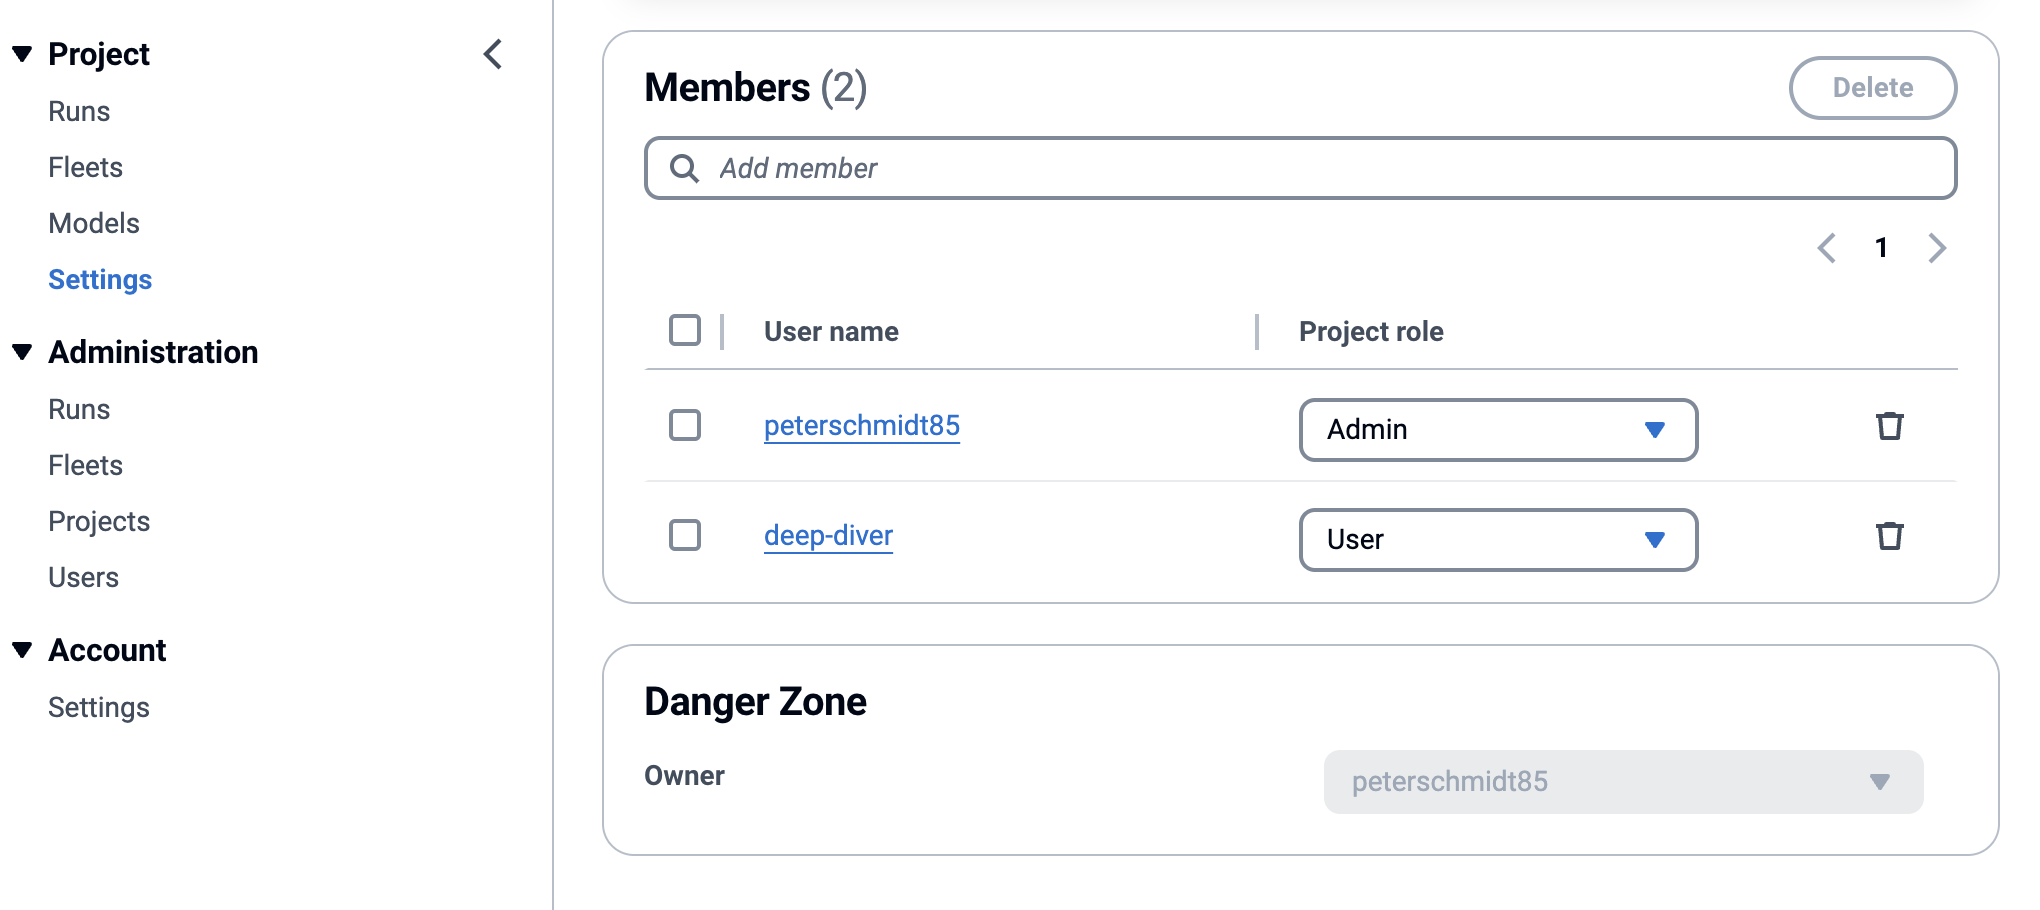 ### Project roles
* **Admin** – The project admin role allows a user to manage the project's settings,
including backends, gateways, and members.
* **Manager** – The project manager role allows a user to manage project members.
Unlike admins, managers cannot configure backends and gateways.
* **User** – A user can manage project resources including runs, fleets, and volumes.
## Authorization
### User token
Once created, a user is issued a token. This token can be found on the user account settings page.
### Project roles
* **Admin** – The project admin role allows a user to manage the project's settings,
including backends, gateways, and members.
* **Manager** – The project manager role allows a user to manage project members.
Unlike admins, managers cannot configure backends and gateways.
* **User** – A user can manage project resources including runs, fleets, and volumes.
## Authorization
### User token
Once created, a user is issued a token. This token can be found on the user account settings page.
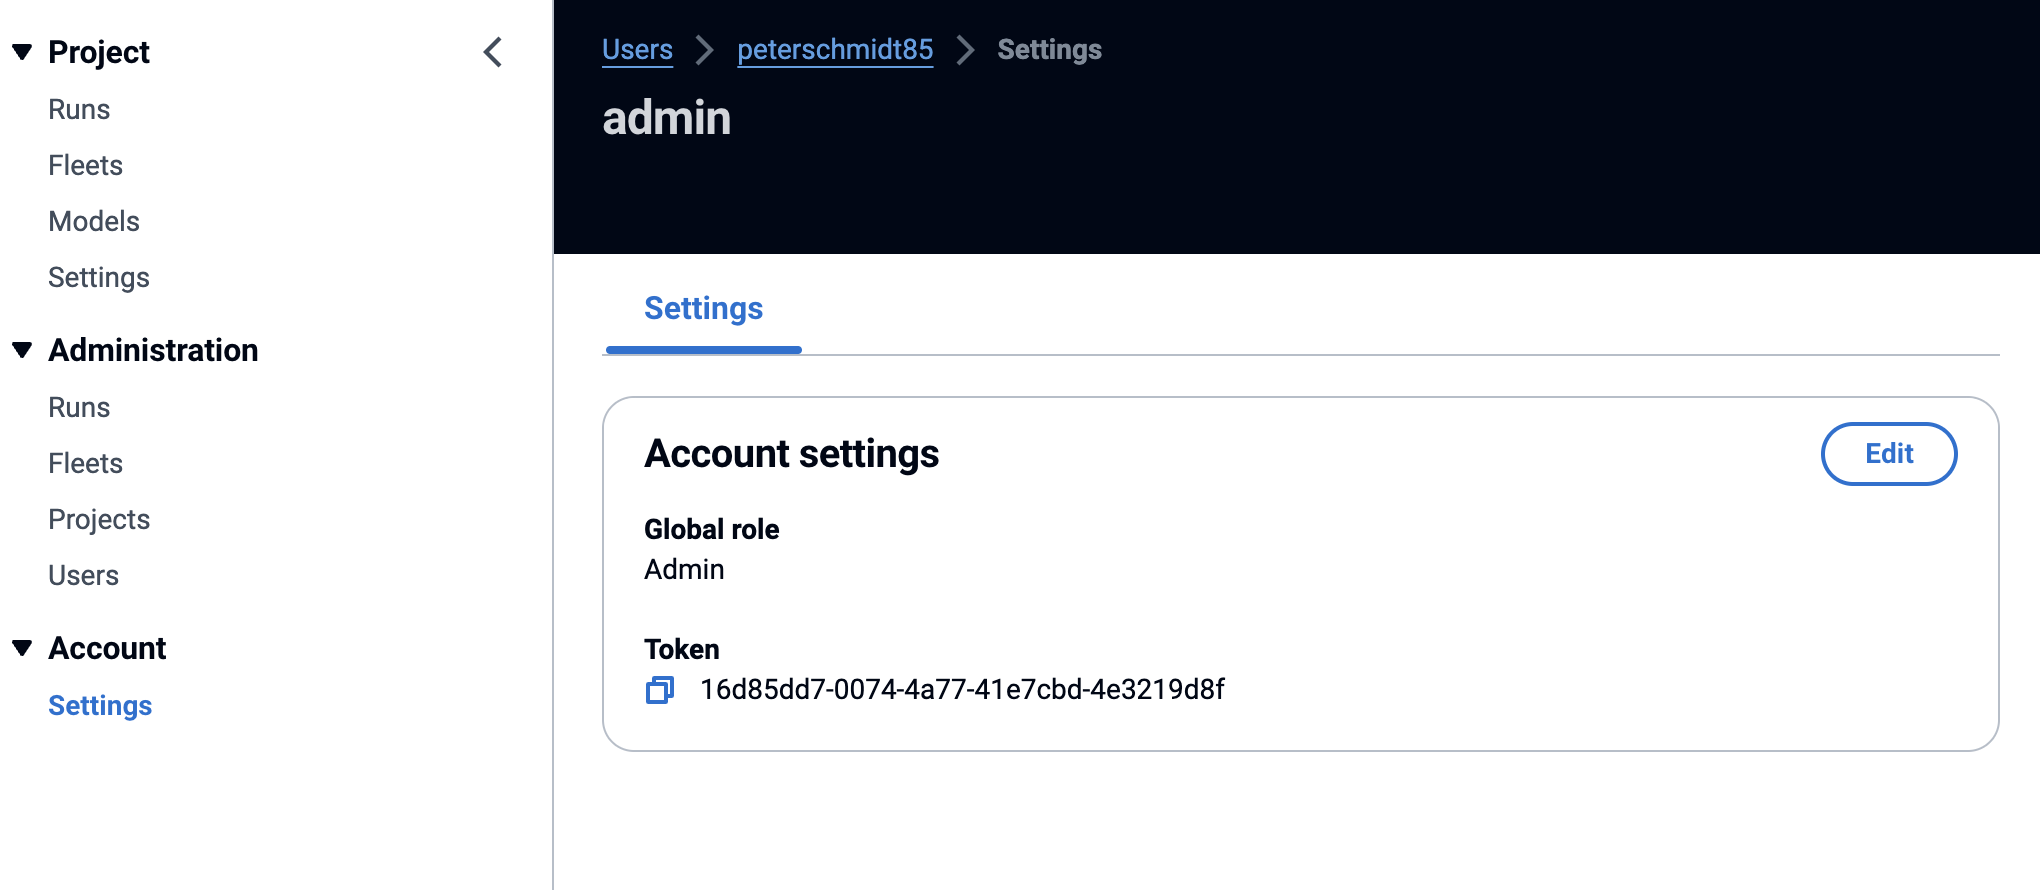 The token must be used for authentication when logging into the control plane UI
and when using the CLI or API.
### Setting up the CLI
You can configure multiple projects on the client and set the default project using the [`dstack project`](../reference/cli/dstack/project.md) CLI command.
You can find the command on the project’s settings page:
The token must be used for authentication when logging into the control plane UI
and when using the CLI or API.
### Setting up the CLI
You can configure multiple projects on the client and set the default project using the [`dstack project`](../reference/cli/dstack/project.md) CLI command.
You can find the command on the project’s settings page:
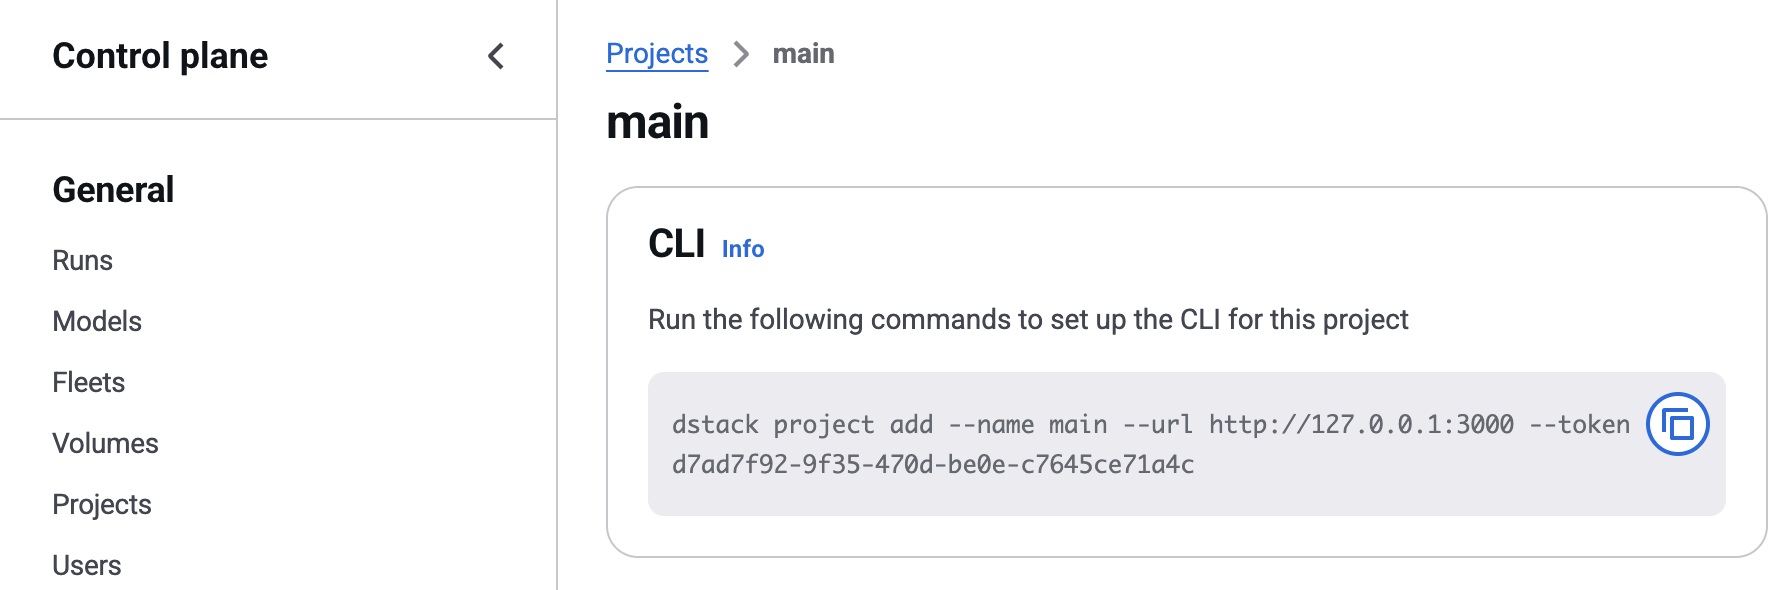 ??? info "API"
In addition to the UI, managing projects, users, and user permissions can also be done via the [REST API](../reference/api/rest/index.md).
## Gateways
# Gateways
Gateways manage ingress traffic for running [services](services.md), handle auto-scaling and rate limits, enable HTTPS, and allow you to configure a custom domain. They also support custom routers, such as the [SGLang Model Gateway :material-arrow-top-right-thin:{ .external }](https://docs.sglang.ai/advanced_features/router.html#){:target="_blank"}.
## Apply a configuration
First, define a gateway configuration as a YAML file in your project folder.
The filename must end with `.dstack.yml` (e.g. `.dstack.yml` or `gateway.dstack.yml` are both acceptable).
??? info "API"
In addition to the UI, managing projects, users, and user permissions can also be done via the [REST API](../reference/api/rest/index.md).
## Gateways
# Gateways
Gateways manage ingress traffic for running [services](services.md), handle auto-scaling and rate limits, enable HTTPS, and allow you to configure a custom domain. They also support custom routers, such as the [SGLang Model Gateway :material-arrow-top-right-thin:{ .external }](https://docs.sglang.ai/advanced_features/router.html#){:target="_blank"}.
## Apply a configuration
First, define a gateway configuration as a YAML file in your project folder.
The filename must end with `.dstack.yml` (e.g. `.dstack.yml` or `gateway.dstack.yml` are both acceptable).
```yaml
type: gateway
# A name of the gateway
name: example-gateway
# Gateways are bound to a specific backend and region
backend: aws
region: eu-west-1
# This domain will be used to access the endpoint
domain: example.com
```
A domain name is required to create a gateway.
To create or update the gateway, simply call the [`dstack apply`](../reference/cli/dstack/apply.md) command:
```shell
$ dstack apply -f gateway.dstack.yml
The example-gateway doesn't exist. Create it? [y/n]: y
Provisioning...
---> 100%
BACKEND REGION NAME HOSTNAME DOMAIN DEFAULT STATUS
aws eu-west-1 example-gateway example.com ✓ submitted
```
## Configuration options
### Backend
You can create gateways with the `aws`, `azure`, `gcp`, or `kubernetes` backends, but that does not limit where services run. A gateway can use one backend while services run on any other backend supported by dstack, including backends where gateways themselves cannot be created.
??? info "Kubernetes"
Gateways in `kubernetes` backend require an external load balancer. Managed Kubernetes solutions usually include a load balancer.
For self-hosted Kubernetes, you must provide a load balancer by yourself.
### Router
By default, the gateway uses its own load balancer to route traffic between replicas. However, you can delegate this responsibility to a specific router by setting the `router` property. Currently, the only supported external router is `sglang`.
#### SGLang
The `sglang` router delegates routing logic to the [SGLang Model Gateway :material-arrow-top-right-thin:{ .external }](https://docs.sglang.ai/advanced_features/router.html#){:target="_blank"}.
To enable it, set `type` field under `router` to `sglang`:
```yaml
type: gateway
name: sglang-gateway
backend: aws
region: eu-west-1
domain: example.com
router:
type: sglang
policy: cache_aware
```
!!! info "Policy"
The `router` property allows you to configure the routing `policy`:
* `cache_aware` — Default policy; combines cache locality with load balancing, falling back to shortest queue.
* `power_of_two` — Samples two workers and picks the lighter one.
* `random` — Uniform random selection.
* `round_robin` — Cycles through workers in order.
> Currently, services using this type of gateway must run standard SGLang workers. See the [example](../../examples/inference/sglang/index.md).
>
> Support for prefill/decode disaggregation and auto-scaling based on inter-token latency is coming soon.
### Public IP
If you don't need/want a public IP for the gateway, you can set the `public_ip` to `false` (the default value is `true`), making the gateway private.
Private gateways are currently supported in `aws` and `gcp` backends.
!!! info "Reference"
For all gateway configuration options, refer to the [reference](../reference/dstack.yml/gateway.md).
## Update DNS records
Once the gateway is assigned a hostname, go to your domain's DNS settings
and add a DNS record for `*.
```shell
$ dstack delete -f examples/inference/gateway.dstack.yml
```
Alternatively, you can delete a gateway by passing the gateway name to `dstack gateway delete`.
[//]: # (TODO: Elaborate on default)
[//]: # (TODO: ## Accessing endpoints)
!!! info "What's next?"
1. See [services](services.md) on how to run services
# Guides
## Clusters
# Clusters
A cluster is a [fleet](../concepts/fleets.md) with its `placement` set to `cluster`. This configuration ensures that the instances within the fleet are interconnected, enabling fast inter-node communication—crucial for tasks such as efficient distributed training.
## Fleets
Ensure a fleet is created before you run any distributed task. This can be either an SSH fleet or a cloud fleet.
### SSH fleets
[SSH fleets](../concepts/fleets.md#ssh-fleets) can be used to create a fleet out of existing baremetals or VMs, e.g. if they are already pre-provisioned, or set up on-premises.
> For SSH fleets, fast interconnect is supported provided that the hosts are pre-configured with the appropriate interconnect drivers.
### Cloud fleets
[Cloud fleets](../concepts/fleets.md#backend-fleets) allow to provision interconnected clusters across supported backends.
For cloud fleets, fast interconnect is currently supported only on the `aws`, `gcp`, `nebius`, and `runpod` backends.
=== "AWS"
When you create a cloud fleet with AWS, [Elastic Fabric Adapter :material-arrow-top-right-thin:{ .external }](https://docs.aws.amazon.com/AWSEC2/latest/UserGuide/efa.html){:target="_blank"} networking is automatically configured if it’s supported for the corresponding instance type.
!!! info "Backend configuration"
Note, EFA requires the `public_ips` to be set to `false` in the `aws` backend configuration.
Refer to the [EFA](../../examples/clusters/efa/index.md) example for more details.
=== "GCP"
When you create a cloud fleet with GCP, `dstack` automatically configures [GPUDirect-TCPXO and GPUDirect-TCPX :material-arrow-top-right-thin:{ .external }](https://cloud.google.com/kubernetes-engine/docs/how-to/gpu-bandwidth-gpudirect-tcpx-autopilot){:target="_blank"} networking for the A3 Mega and A3 High instance types, as well as RoCE networking for the A4 instance type.
!!! info "Backend configuration"
You may need to configure `extra_vpcs` and `roce_vpcs` in the `gcp` backend configuration.
Refer to the [A4](../../examples/clusters/a4/index.md),
[A3 Mega](../../examples/clusters/a3mega/index.md), and
[A3 High](../../examples/clusters/a3high/index.md) examples for more details.
=== "Nebius"
When you create a cloud fleet with Nebius, [InfiniBand :material-arrow-top-right-thin:{ .external }](https://docs.nebius.com/compute/clusters/gpu){:target="_blank"} networking is automatically configured if it’s supported for the corresponding instance type.
=== "Runpod"
When you run multinode tasks in a cluster cloud fleet with Runpod, `dstack` provisions [Runpod Instant Clusters](https://docs.runpod.io/instant-clusters) with InfiniBand networking configured.
> To request fast interconnect support for other backends,
file an [issue :material-arrow-top-right-thin:{ .external }](https://github.com/dstackai/dstack/issues){:target="_ blank"}.
## Distributed tasks
A distributed task is a task with `nodes` set to a value greater than `2`. In this case, `dstack` first ensures a
suitable fleet is available, then selects the master node (to obtain its IP) and finally runs jobs on each node.
Within the task's `commands`, it's possible to use `DSTACK_MASTER_NODE_IP`, `DSTACK_NODES_IPS`, `DSTACK_NODE_RANK`, and other
[system environment variables](../concepts/tasks.md#system-environment-variables) for inter-node communication.
??? info "MPI"
If want to use MPI, you can set `startup_order` to `workers-first` and `stop_criteria` to `master-done`, and use `DSTACK_MPI_HOSTFILE`.
See the [NCCL](../../examples/clusters/nccl-tests/index.md) or [RCCL](../../examples/clusters/rccl-tests/index.md) examples.
!!! info "Retry policy"
By default, if any of the nodes fails, `dstack` terminates the entire run. Configure a [retry policy](../concepts/tasks.md#retry-policy) to restart the run if any node fails.
Refer to [distributed tasks](../concepts/tasks.md#distributed-tasks) for an example.
## NCCL/RCCL tests
To test the interconnect of a created fleet, ensure you run [NCCL](../../examples/clusters/nccl-tests/index.md)
(for NVIDIA) or [RCCL](../../examples/clusters/rccl-tests/index.md) (for AMD) tests using MPI.
## Volumes
### Instance volumes
[Instance volumes](../concepts/volumes.md#instance-volumes) enable mounting any folder from the host into the container, allowing data persistence during distributed tasks.
Instance volumes can be used to mount:
* Regular folders (data persists only while the fleet exists)
* Folders that are mounts of shared filesystems (e.g., manually mounted shared filesystems).
### Network volumes
Currently, no backend supports multi-attach [network volumes](../concepts/volumes.md#network-volumes) for distributed tasks. However, single-attach volumes can be used by leveraging volume name [interpolation syntax](../concepts/volumes.md#distributed-tasks). This approach mounts a separate single-attach volume to each node.
!!! info "What's next?"
1. Read about [distributed tasks](../concepts/tasks.md#distributed-tasks), [fleets](../concepts/fleets.md), and [volumes](../concepts/volumes.md)
2. Browse the [Clusters](../../examples.md#clusters) and [Distributed training](../../examples.md#distributed-training) examples
## Kubernetes
# Kubernetes
The [kubernetes](../concepts/backends.md#kubernetes) backend enables `dstack` to run [dev environments](/docs/concepts/dev-environments), [tasks](/docs/concepts/tasks), and [services](/docs/concepts/services) directly on existing Kubernetes clusters.
If your GPUs are already deployed on Kubernetes and your team relies on its ecosystem and tooling, use this backend to integrate `dstack` with your clusters.
> If Kubernetes is not required, you can run `dstack` on clouds or on-prem clusters without Kubernetes by using [VM-based](../concepts/backends.md#vm-based), [container-based](../concepts/backends.md#container-based), or [on-prem](../concepts/backends.md#on-prem) backends.
## Setting up the backend
To use the `kubernetes` backend with `dstack`, you need to configure it with the path to the kubeconfig file, the IP address of any node in the cluster, and the port that `dstack` will use for proxying SSH traffic.
This configuration is defined in the `~/.dstack/server/config.yml` file:
```yaml
projects:
- name: main
backends:
- type: kubernetes
kubeconfig:
filename: ~/.kube/config
proxy_jump:
hostname: 204.12.171.137
port: 32000
```
### Proxy jump
To allow the `dstack` server and CLI to access runs via SSH, `dstack` requires a node that acts as a jump host to proxy SSH traffic into containers.
To configure this node, specify `hostname` and `port` under the `proxy_jump` property:
- `hostname` — the IP address of any cluster node selected as the jump host. Both the `dstack` server and CLI must be able to reach it. This node can be either a GPU node or a CPU-only node — it makes no difference.
- `port` — any accessible port on that node, which `dstack` uses to forward SSH traffic.
No additional setup is required — `dstack` configures and manages the proxy automatically.
### NVIDIA GPU Operator
> For `dstack` to correctly detect GPUs in your Kubernetes cluster, the cluster must have the
[NVIDIA GPU Operator :material-arrow-top-right-thin:{ .external }](https://docs.nvidia.com/datacenter/cloud-native/gpu-operator/latest/index.html){:target="_blank"} pre-installed.
After the backend is set up, you interact with `dstack` just as you would with other backends or SSH fleets. You can run dev environments, tasks, and services.
## Fleets
### Clusters
If you’d like to run [distributed tasks](../concepts/tasks.md#distributed-tasks) with the `kubernetes` backend, you first need to create a fleet with `placement` set to `cluster`:
```yaml
type: fleet
# The name is optional; if not specified, one is generated automatically
name: my-k8s-fleet
# For `kubernetes`, `min` should be set to `0` since it can't pre-provision VMs.
# Optionally, you can set the maximum number of nodes to limit scaling.
nodes: 0..
placement: cluster
backends: [kubernetes]
resources:
# Specify requirements to filter nodes
gpu: 1..8
```
Then, create the fleet using the `dstack apply` command:
```shell
$ dstack apply -f examples/misc/fleets/.dstack.yml
Provisioning...
---> 100%
FLEET INSTANCE BACKEND GPU PRICE STATUS CREATED
```
Once the fleet is created, you can run [distributed tasks](../concepts/tasks.md#distributed-tasks). `dstack` takes care of orchestration automatically.
For more details on clusters, see the [corresponding guide](clusters.md).
> Fleets with `placement` set to `cluster` can be used not only for distributed tasks, but also for dev environments, single-node tasks, and services.
> Since Kubernetes clusters are interconnected by default, you can always set `placement` to `cluster`.
!!! info "Fleets"
It’s generally recommended to create [fleets](../concepts/fleets.md) even if you don’t plan to run distributed tasks.
## FAQ
??? info "Is managed Kubernetes with auto-scaling supported?"
Managed Kubernetes is supported. However, the `kubernetes` backend can only run on pre-provisioned nodes.
Support for auto-scalable Kubernetes clusters is coming soon—you can track progress in the corresponding [issue :material-arrow-top-right-thin:{ .external }](https://github.com/dstackai/dstack/issues/3126){:target="_blank"}.
If on-demand provisioning is important, we recommend using [VM-based](../concepts/backends.md#vm-based) backends as they already support auto-scaling.
??? info "When should I use the Kubernetes backend?"
Choose the `kubernetes` backend if your GPUs already run on Kubernetes and your team depends on its ecosystem and tooling.
If your priority is orchestrating cloud GPUs and Kubernetes isn’t a must, [VM-based](../concepts/backends.md#vm-based) backends are a better fit thanks to their native cloud integration.
For on-prem GPUs where Kubernetes is optional, [SSH fleets](../concepts/fleets.md#ssh-fleets) provide a simpler and more lightweight alternative.
## Server deployment
The `dstack` server can run on your laptop or any environment with access to the cloud and on-prem clusters you plan to use.
The minimum hardware requirements for running the server are 1 CPU and 1GB of RAM.
=== "pip"
> The server can be set up via `pip` on Linux, macOS, and Windows (via WSL 2). It requires Git and OpenSSH.
```shell
$ pip install "dstack[all]" -U
$ dstack server
Applying ~/.dstack/server/config.yml...
The admin token is "bbae0f28-d3dd-4820-bf61-8f4bb40815da"
The server is running at http://127.0.0.1:3000/
```
=== "uv"
> The server can be set up via `uv` on Linux, macOS, and Windows (via WSL 2). It requires Git and OpenSSH.
```shell
$ uv tool install 'dstack[all]' -U
$ dstack server
Applying ~/.dstack/server/config.yml...
The admin token is "bbae0f28-d3dd-4820-bf61-8f4bb40815da"
The server is running at http://127.0.0.1:3000/
```
=== "Docker"
> To deploy the server most reliably, it's recommended to use `dstackai/dstack` Docker image.
```shell
$ docker run -p 3000:3000 \
-v $HOME/.dstack/server/:/root/.dstack/server \
dstackai/dstack
Applying ~/.dstack/server/config.yml...
The admin token is "bbae0f28-d3dd-4820-bf61-8f4bb40815da"
The server is running at http://127.0.0.1:3000/
```
??? info "AWS CloudFormation"
If you'd like to deploy the server to a private AWS VPC, you can use
our CloudFormation [template :material-arrow-top-right-thin:{ .external }](https://console.aws.amazon.com/cloudformation/home#/stacks/quickcreate?templateURL=https://get-dstack.s3.eu-west-1.amazonaws.com/cloudformation/template.yaml){:target="_blank"}.
First, ensure you've set up a private VPC with public and private subnets.
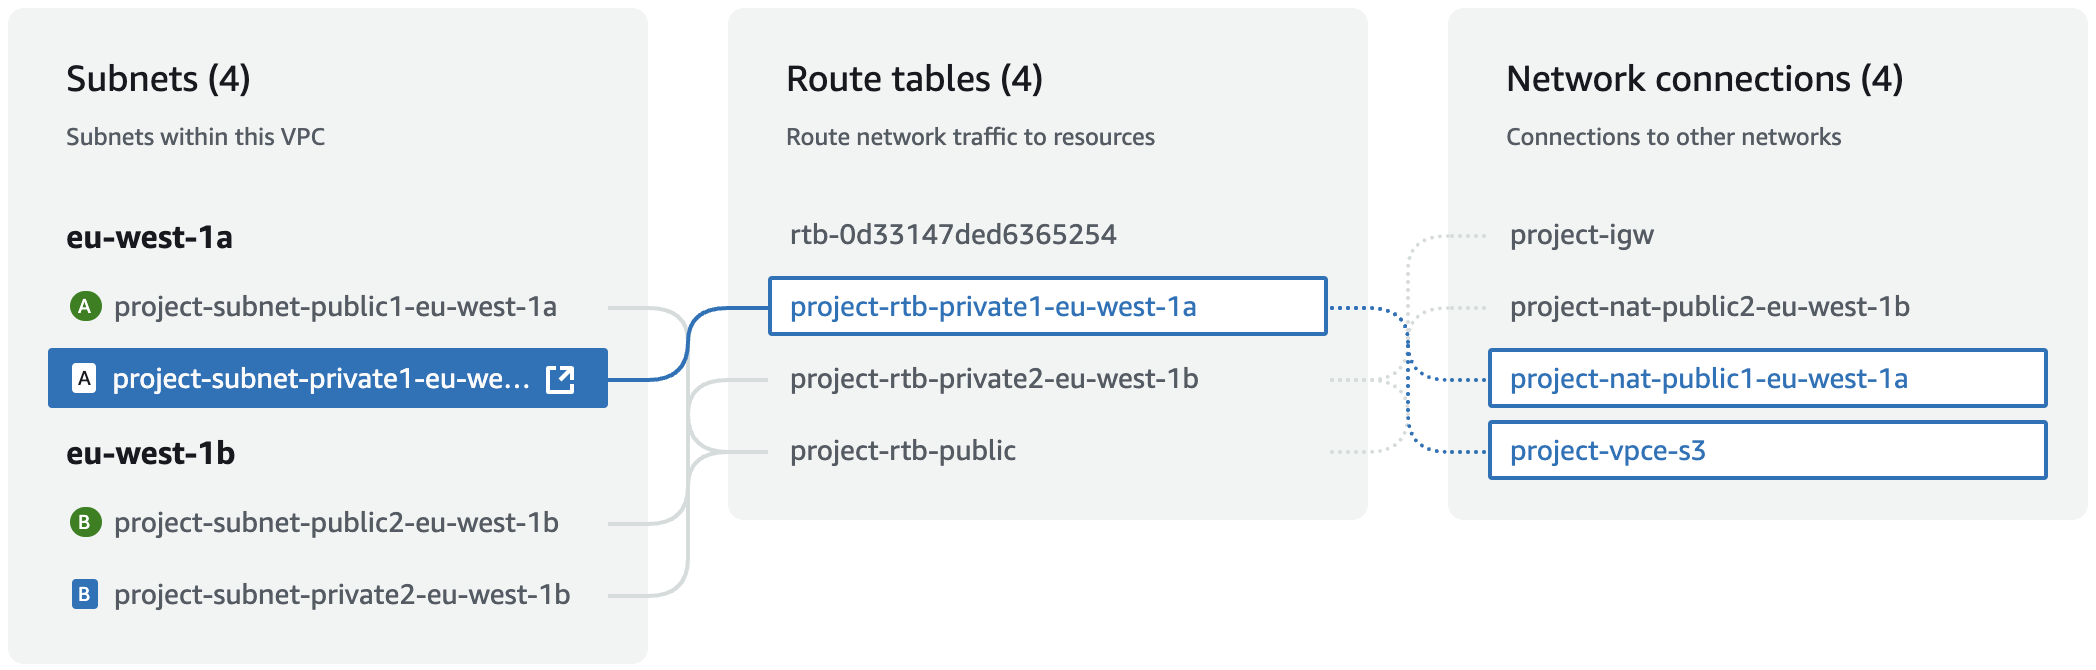
Create a stack using the template, and specify the VPC and private subnets.
Once, the stack is created, go to `Outputs` for the server URL and admin token.
To access the server URL, ensure you're connected to the VPC, e.g. via VPN client.
> If you'd like to adjust anything, the source code of the template can be found at
[`examples/server-deployment/cloudformation/template.yaml` :material-arrow-top-right-thin:{ .external }](https://github.com/dstackai/dstack/blob/master/examples/server-deployment/cloudformation/template.yaml){:target="_blank"}.
## Backend configuration
To use `dstack` with cloud providers, configure [backends](../concepts/backends.md)
via the `~/.dstack/server/config.yml` file.
The server loads this file on startup.
Alternatively, you can configure backends on the [project settings page](../concepts/projects.md#backends) via UI.
> For using `dstack` with on-prem servers, no backend configuration is required.
> Use [SSH fleets](../concepts/fleets.md#ssh-fleets) instead.
## State persistence
The `dstack` server can store its internal state in SQLite or Postgres.
By default, it stores the state locally in `~/.dstack/server` using SQLite.
With SQLite, you can run at most one server replica.
Postgres has no such limitation and is recommended for production deployment.
??? info "Replicate SQLite to cloud storage"
You can configure automatic replication of your SQLite state to a cloud object storage using Litestream.
This allows persisting the server state across re-deployments when using SQLite.
To enable Litestream replication, set the following environment variables:
- `LITESTREAM_REPLICA_URL` - The url of the cloud object storage.
Examples: `s3://
```shell
$ gcloud logging buckets create dstack-bucket \
--location=global \
--description="Bucket for storing dstack run logs" \
--retention-days=10
$ gcloud logging sinks create dstack-sink \
logging.googleapis.com/projects/[PROJECT]/locations/global/buckets/dstack-bucket \
--log-filter='logName = "projects/[PROJECT]/logs/dstack-run-logs"'
```
## File storage
When using [files](../concepts/dev-environments.md#files) or [repos](../concepts/dev-environments.md#repos), `dstack` uploads local files and diffs to the server so that you can have access to them within runs. By default, the files are stored in the DB and each upload is limited to 2MB. You can configure an object storage to be used for uploads and increase the default limit by setting the `DSTACK_SERVER_CODE_UPLOAD_LIMIT` environment variable
### S3
To use S3 for storing uploaded files, set the `DSTACK_SERVER_S3_BUCKET` and `DSTACK_SERVER_BUCKET_REGION` environment variables.
The bucket must be created beforehand. `dstack` won't try to create it.
??? info "Required permissions"
```json
{
"Version": "2012-10-17",
"Statement": [
{
"Effect": "Allow",
"Action": [
"s3:GetObject",
"s3:PutObject",
"s3:DeleteObject",
"s3:ListBucket"
],
"Resource": [
"arn:aws:s3:::
```shell
$ head -c 32 /dev/urandom | base64
opmx+r5xGJNVZeErnR0+n+ElF9ajzde37uggELxL
```
And specify it as `secret`:
```yaml
# ...
encryption:
keys:
- type: aes
name: key1
secret: opmx+r5xGJNVZeErnR0+n+ElF9ajzde37uggELxL
```
=== "Identity"
The `identity` encryption performs no encryption and stores data in plaintext.
You can specify an `identity` encryption key explicitly if you want to decrypt the data:
```yaml
# ...
encryption:
keys:
- type: identity
- type: aes
name: key1
secret: opmx+r5xGJNVZeErnR0+n+ElF9ajzde37uggELxL
```
With this configuration, the `aes` key will still be used to decrypt the old data,
but new writes will store the data in plaintext.
??? info "Key rotation"
If multiple keys are specified, the first is used for encryption, and all are tried for decryption. This enables key
rotation by specifying a new encryption key.
```yaml
# ...
encryption:
keys:
- type: aes
name: key2
secret: cR2r1JmkPyL6edBQeHKz6ZBjCfS2oWk87Gc2G3wHVoA=
- type: aes
name: key1
secret: E5yzN6V3XvBq/f085ISWFCdgnOGED0kuFaAkASlmmO4=
```
Old keys may be deleted once all existing records have been updated to re-encrypt sensitive data.
Encrypted values are prefixed with key names, allowing DB admins to identify the keys used for encryption.
## Default permissions
By default, all users can create and manage their own projects. You can specify `default_permissions`
to `false` so that only global admins can create and manage projects:
```yaml
# ...
default_permissions:
allow_non_admins_create_projects: false
```
## Backward compatibility
`dstack` follows the `{major}.{minor}.{patch}` versioning scheme.
Backward compatibility is maintained based on these principles:
* The server backward compatibility is maintained on a best-effort basis across minor and patch releases. The specific features can be removed, but the removal is preceded with deprecation warnings for several minor releases. This means you can use older client versions with newer server versions.
* The client backward compatibility is maintained across patch releases. A new minor release indicates that the release breaks client backward compatibility. This means you don't need to update the server when you update the client to a new patch release. Still, upgrading a client to a new minor version requires upgrading the server too.
## Server limits
A single `dstack` server replica can support:
* Up to 150 active runs.
* Up to 150 active jobs.
* Up to 150 active instances.
Having more active resources will work but can affect server performance.
If you hit these limits, consider using Postgres with multiple server replicas.
You can also increase processing rates of a replica by setting the `DSTACK_SERVER_BACKGROUND_PROCESSING_FACTOR` environment variable.
You should also increase `DSTACK_DB_POOL_SIZE` and `DSTACK_DB_MAX_OVERFLOW` proportionally.
For example, to increase processing rates 4 times, set:
```
export DSTACK_SERVER_BACKGROUND_PROCESSING_FACTOR=4
export DSTACK_DB_POOL_SIZE=80
export DSTACK_DB_MAX_OVERFLOW=80
```
You have to ensure your Postgres installation supports that many connections by
configuring [`max_connections`](https://www.postgresql.org/docs/current/runtime-config-connection.html#GUC-MAX-CONNECTIONS) and/or using connection pooler.
## Server upgrades
When upgrading the `dstack` server, follow these guidelines to ensure a smooth transition and minimize downtime.
### Before upgrading
1. **Check the changelog**: Review the [release notes :material-arrow-top-right-thin:{ .external }](https://github.com/dstackai/dstack/releases){:target="_blank"} for breaking changes, new features, and migration notes.
2. **Review backward compatibility**: Understand the [backward compatibility](#backward-compatibility) policy.
3. **Back up your data**: Ensure you always create a backup before upgrading.
### Best practices
- **Test in staging**: Always test upgrades in a non-production environment first.
- **Monitor logs**: Watch server logs during and after the upgrade for any errors or warnings.
- **Keep backups**: Retain backups for at least a few days after a successful upgrade.
### Troubleshooting
**Deadlock when upgrading a multi-replica PostgreSQL deployment**
If a deployment is stuck due to a deadlock when applying DB migrations, try scaling server replicas to 1 and retry the deployment multiple times. Some releases may not support rolling deployments, which is always noted in the release notes. If you think there is a bug, please [file an issue](https://github.com/dstackai/dstack/issues).
## FAQs
??? info "Can I run multiple replicas of dstack server?"
Yes, you can if you configure `dstack` to use [PostgreSQL](#postgresql) and [AWS CloudWatch](#aws-cloudwatch).
??? info "Does dstack server support blue-green or rolling deployments?"
Yes, it does if you configure `dstack` to use [PostgreSQL](#postgresql) and [AWS CloudWatch](#aws-cloudwatch).
## Troubleshooting
# Troubleshooting
## Reporting issues
When you encounter a problem, please report it as
a [GitHub issue :material-arrow-top-right-thin:{ .external }](https://github.com/dstackai/dstack/issues/new/choose){:target="_blank"}.
If you have a question or need help, feel free to ask it in our [Discord server](https://discord.gg/u8SmfwPpMd).
> When bringing up issues, always include the steps to reproduce.
### Steps to reproduce
Make sure to provide clear, detailed steps to reproduce the issue.
Include server logs, CLI outputs, and configuration samples. Avoid using screenshots for logs or errors—use text instead.
#### Server logs
To get more detailed server logs, set the `DSTACK_SERVER_LOG_LEVEL`
environment variable to `DEBUG`. By default, it is set to `INFO`.
#### CLI logs
CLI logs are located in `~/.dstack/logs/cli`, and the default log level is `DEBUG`.
> See these examples for well-reported issues: [this :material-arrow-top-right-thin:{ .external }](https://github.com/dstackai/dstack/issues/1640){:target="_blank"}
and [this :material-arrow-top-right-thin:{ .external }](https://github.com/dstackai/dstack/issues/1551){:target="_blank"}.
## Typical issues
### No instance offers { #no-offers }
[//]: # (NOTE: This section is referenced in the CLI. Do not change its URL.)
If you run `dstack apply` and don't see any instance offers, it means that
`dstack` could not find instances that match the requirements in your configuration.
Below are some of the reasons why this might happen.
#### Cause 1: No capacity providers
Before you can run any workloads, you need to configure a [backend](../concepts/backends.md),
create an [SSH fleet](../concepts/fleets.md#ssh-fleets), or sign up for
[dstack Sky :material-arrow-top-right-thin:{ .external }](https://sky.dstack.ai){:target="_blank"}.
If you have configured a backend and still can't use it, check the output of `dstack server`
for backend configuration errors.
> **Tip**: You can find a list of successfully configured backends
> on the [project settings page](../concepts/projects.md#backends) in the UI.
#### Cause 2: Requirements mismatch
When you apply a configuration, `dstack` tries to find instances that match the
[`resources`](../reference/dstack.yml/task.md#resources),
[`backends`](../reference/dstack.yml/task.md#backends),
[`regions`](../reference/dstack.yml/task.md#regions),
[`availability_zones`](../reference/dstack.yml/task.md#availability_zones),
[`instance_types`](../reference/dstack.yml/task.md#instance_types),
[`spot_policy`](../reference/dstack.yml/task.md#spot_policy),
and [`max_price`](../reference/dstack.yml/task.md#max_price)
properties from the configuration.
`dstack` will only select instances that meet all the requirements.
Make sure your configuration doesn't set any conflicting requirements, such as
`regions` that don't exist in the specified `backends`, or `instance_types` that
don't match the specified `resources`.
#### Cause 3: Too specific resources
If you set a resource requirement to an exact value, `dstack` will only select instances
that have exactly that amount of resources. For example, `cpu: 5` and `memory: 10GB` will only
match instances that have exactly 5 CPUs and exactly 10GB of memory.
Typically, you will want to set resource ranges to match more instances.
For example, `cpu: 4..8` and `memory: 10GB..` will match instances with 4 to 8 CPUs
and at least 10GB of memory.
#### Cause 4: Default resources
By default, `dstack` uses these resource requirements:
`cpu: 2..`, `memory: 8GB..`, `disk: 100GB..`.
If you want to use smaller instances, override the `cpu`, `memory`, or `disk`
properties in your configuration.
#### Cause 5: GPU requirements
By default, `dstack` only selects instances with no GPUs or a single NVIDIA GPU.
If you want to use non-NVIDIA GPUs or multi-GPU instances, set the `gpu` property
in your configuration.
Examples: `gpu: amd` (one AMD GPU), `gpu: A10:4..8` (4 to 8 A10 GPUs),
`gpu: 8:Gaudi2` (8 Gaudi2 accelerators).
> If you don't specify the number of GPUs, `dstack` will only select single-GPU instances.
#### Cause 6: Network volumes
If your run configuration uses [network volumes](../concepts/volumes.md#network-volumes),
`dstack` will only select instances from the same backend and region as the volumes.
For AWS, the availability zone of the volume and the instance should also match.
#### Cause 7: Feature support
Some `dstack` features are not supported by all backends. If your configuration uses
one of these features, `dstack` will only select offers from the backends that support it.
- [Backend fleets](../concepts/fleets.md#backend-fleets) configurations,
[Instance volumes](../concepts/volumes.md#instance-volumes),
and [Privileged containers](../reference/dstack.yml/dev-environment.md#privileged)
are supported by all backends except `runpod`, `vastai`, and `kubernetes`.
- [Clusters](../concepts/fleets.md#cloud-placement)
and [distributed tasks](../concepts/tasks.md#distributed-tasks)
are only supported by the `aws`, `azure`, `gcp`, `nebius`, `oci`, and `vultr` backends,
as well as SSH fleets.
- [Reservations](../reference/dstack.yml/fleet.md#reservation)
are only supported by the `aws` and `gcp` backends.
#### Cause 8: dstack Sky balance
If you are using
[dstack Sky :material-arrow-top-right-thin:{ .external }](https://sky.dstack.ai){:target="_blank"},
you will not see marketplace offers until you top up your balance.
Alternatively, you can configure your own cloud accounts
on the [project settings page](../concepts/projects.md#backends)
or use [SSH fleets](../concepts/fleets.md#ssh-fleets).
### Provisioning fails
In certain cases, running `dstack apply` may show instance offers,
but then produce the following output:
```shell
wet-mangust-1 provisioning completed (failed)
All provisioning attempts failed. This is likely due to cloud providers not having enough capacity. Check CLI and server logs for more details.
```
#### Cause 1: Insufficient service quotas
If some runs fail to provision, it may be due to an insufficient service quota. For cloud providers like AWS, GCP,
Azure, and OCI, you often need to request an increased [service quota](protips.md#service-quotas) before you can use
specific instances.
### Run starts but fails
There could be several reasons for a run failing after successful provisioning.
!!! info "Termination reason"
To find out why a run terminated, use `--verbose` (or `-v`) with `dstack ps`.
This will show the run's status and any failure reasons.
!!! info "Diagnostic logs"
You can get more information on why a run fails with diagnostic logs.
Pass `--diagnose` (or `-d`) to `dstack logs` and you'll see logs of the run executor.
#### Cause 1: Spot interruption
If a run fails after provisioning with the termination reason `INTERRUPTED_BY_NO_CAPACITY`, it is likely that the run
was using spot instances and was interrupted. To address this, you can either set the
[`spot_policy`](../reference/dstack.yml/task.md#spot_policy) to `on-demand` or specify the
[`retry`](../reference/dstack.yml/task.md#retry) property.
[//]: # (#### Other)
[//]: # (TODO: Explain how to get the shim logs)
### Services fail to start
#### Cause 1: Gateway misconfiguration
If all services fail to start with a specific gateway, make sure a
[correct DNS record](../concepts/gateways.md#update-dns-records)
pointing to the gateway's hostname is configured.
### Service endpoint doesn't work
#### Cause 1: Bad Authorization
If the service endpoint returns a 403 error, it is likely because the [`Authorization`](../concepts/services.md#access-the-endpoint)
header with the correct `dstack` token was not provided.
[//]: # (#### Other)
[//]: # (TODO: Explain how to get the gateway logs)
### Cannot access dev environment or task ports
#### Cause 1: Detached from run
When running a dev environment or task with configured ports, `dstack apply`
automatically forwards remote ports to `localhost` via SSH for easy and secure access.
If you interrupt the command, the port forwarding will be disconnected. To reattach, use `dstack attach
```yaml
type: task
name: streamlit-task
python: 3.12
commands:
- uv pip install streamlit
- streamlit hello
ports:
- 8501
```
While you run a task, `dstack apply` forwards the remote ports to `localhost`.
```shell
$ dstack apply -f app.dstack.yml
Welcome to Streamlit. Check out our demo in your browser.
Local URL: http://localhost:8501
```
This allows you to access the remote `8501` port on `localhost:8501` while the CLI is attached.
??? info "Port mapping"
If you want to override the local port, use the `--port` option:
```shell
$ dstack apply -f app.dstack.yml --port 3000:8501
```
This will forward the remote `8501` port to `localhost:3000`.
!!! info "Tasks vs. services"
[Services](../concepts/services.md) provide external access, `https`, replicas with autoscaling, OpenAI-compatible endpoint
and other service features. If you don't need them, you can use [tasks](../concepts/tasks.md) for running apps.
## Utilization policy
If you want your run to automatically terminate if any of GPUs are underutilized, you can specify `utilization_policy`.
Below is an example of a dev environment that auto-terminate if any GPU stays below 10% utilization for 1 hour.
```yaml
type: dev-environment
name: my-dev
python: 3.12
ide: cursor
resources:
gpu: H100:8
utilization_policy:
min_gpu_utilization: 10
time_window: 1h
```
## Docker in Docker
Set `docker` to `true` to enable the `docker` CLI in your dev environment, e.g., to run or build Docker images, or use Docker Compose.
=== "Dev environment"
```yaml
type: dev-environment
name: vscode
docker: true
ide: vscode
init:
- docker run --gpus all nvidia/cuda:12.3.0-base-ubuntu22.04 nvidia-smi
```
=== "Task"
```yaml
type: task
name: docker-nvidia-smi
docker: true
commands:
- docker run --gpus all nvidia/cuda:12.3.0-base-ubuntu22.04 nvidia-smi
resources:
gpu: 1
```
??? info "Volumes"
To persist Docker data between runs (e.g. images, containers, volumes, etc), create a `dstack` [volume](../concepts/volumes.md)
and add attach it in your run configuration.
=== "Network volums"
```yaml
type: dev-environment
name: vscode
docker: true
ide: vscode
volumes:
- name: docker-volume
path: /var/lib/docker
```
=== "Instance volumes"
```yaml
type: dev-environment
name: vscode
docker: true
ide: vscode
volumes:
- name: /docker-volume
path: /var/lib/docker
optional: true
```
See more Docker examples [here](https://github.com/dstackai/dstack/tree/master/examples/misc/docker-compose).
## Fleets
### Creation policy
By default, when you run `dstack apply` with a dev environment, task, or service,
if no `idle` instances from the available fleets meet the requirements, `dstack` provisions a new instance using configured backends.
To ensure `dstack apply` doesn't provision a new instance but reuses an existing one,
pass `-R` (or `--reuse`) to `dstack apply`.
```shell
$ dstack apply -R -f examples/.dstack.yml
```
Or, set [`creation_policy`](../reference/dstack.yml/dev-environment.md#creation_policy) to `reuse` in the run configuration.
### Idle duration
If a run provisions a new instance, the instance stays `idle` for 5 minutes by default and can be reused within that time.
If the instance is not reused within this period, it is automatically terminated.
To change the default idle duration, set
[`idle_duration`](../reference/dstack.yml/fleet.md#idle_duration) in the run configuration (e.g., `0s`, `1m`, or `off` for unlimited).
## Volumes
To persist data across runs, it is recommended to use volumes.
`dstack` supports two types of volumes: [network](../concepts/volumes.md#network-volumes)
(for persisting data even if the instance is interrupted)
and [instance](../concepts/volumes.md#instance-volumes) (useful for persisting cached data across runs while the instance remains active).
> If you use [SSH fleets](../concepts/fleets.md#ssh-fleets), you can mount network storage (e.g., NFS or SMB) to the hosts and access it in runs via instance volumes.
## Environment variables
If a configuration requires an environment variable that you don't want to hardcode in the YAML, you can define it
without assigning a value:
```yaml
type: dev-environment
name: vscode
python: 3.12
env:
- HF_TOKEN
ide: vscode
```
Then, you can pass the environment variable either via the shell:
```shell
$ HF_TOKEN=...
$ dstack apply -f .dstack.yml
```
Or via the `-e` option of the `dstack apply` command:
```shell
$ dstack apply -e HF_TOKEN=... -f .dstack.yml
```
??? info ".envrc"
A better way to configure environment variables not hardcoded in YAML is by specifying them in a `.envrc` file:
```shell
export HF_TOKEN=...
```
If you install [`direnv` :material-arrow-top-right-thin:{ .external }](https://direnv.net/){:target="_blank"},
it will automatically apply the environment variables from the `.envrc` file to the `dstack apply` command.
Remember to add `.envrc` to `.gitignore` to avoid committing it to the repo.
[//]: # (## Profiles)
[//]: # ()
[//]: # (If you don't want to specify the same parameters for each configuration, you can define them once via [profiles](../reference/profiles.yml.md))
[//]: # (and reuse them across configurations.)
[//]: # ()
[//]: # (This can be handy, for example, for configuring parameters such as `max_duration`, `max_price`, `termination_idle_time`,)
[//]: # (`regions`, etc.)
[//]: # ()
[//]: # (Set `default` to `true` in your profile, and it will be applied automatically to any run.)
## Retry policy
By default, if `dstack` can't find available capacity, the run will fail.
If you'd like `dstack` to automatically retry, configure the
[retry](../reference/dstack.yml/task.md#retry) property accordingly:
```yaml
type: task
name: train
python: 3.12
commands:
- uv pip install -r fine-tuning/qlora/requirements.txt
- python fine-tuning/qlora/train.py
retry:
on_events: [no-capacity]
# Retry for up to 1 hour
duration: 1h
```
## Profiles
Sometimes, you may want to reuse parameters across runs or set defaults so you don’t have to repeat them in every configuration. You can do this by defining a profile.
??? info ".dstack/profiles.yml"
A profile file can be created either globally in `~/.dstack/profiles.yml` or locally in `.dstack/profiles.yml`:
```yaml
profiles:
- name: my-profile
# If set to true, this profile will be applied automatically
default: true
# The spot pololicy can be "spot", "on-demand", or "auto"
spot_policy: auto
# Limit the maximum price of the instance per hour
max_price: 1.5
# Stop any run if it runs longer that this duration
max_duration: 1d
# Use only these backends
backends: [azure, lambda]
```
Check [`.dstack/profiles.yml`](../reference/profiles.yml.md) to see what properties can be defined there.
A profile can be set as `default` to apply automatically to any run, or specified with `--profile NAME` in `dstack apply`.
## Projects
If you're using multiple `dstack` projects (e.g., from different `dstack` servers),
you can switch between them using the [`dstack project`](../reference/cli/dstack/project.md) command.
??? info ".envrc"
Alternatively, you can install [`direnv` :material-arrow-top-right-thin:{ .external }](https://direnv.net/){:target="_blank"}
to automatically apply environment variables from the `.envrc` file in your project directory.
```shell
export DSTACK_PROJECT=main
```
Now, `dstack` will always use this project within this directory.
Remember to add `.envrc` to `.gitignore` to avoid committing it to the repo.
## Attached mode
By default, `dstack apply` runs in attached mode.
This means it streams the logs as they come in and, in the case of a task, forwards its ports to `localhost`.
To run in detached mode, use `-d` with `dstack apply`.
> If you detached the CLI, you can always re-attach to a run via [`dstack attach`](../reference/cli/dstack/attach.md).
## GPU specification
`dstack` natively supports NVIDIA GPU, AMD GPU, and Google Cloud TPU accelerator chips.
The `gpu` property within [`resources`](../reference/dstack.yml/dev-environment.md#resources) (or the `--gpu` option with [`dstack apply`](../reference/cli/dstack/apply.md) or
[`dstack offer`](../reference/cli/dstack/offer.md))
allows specifying not only memory size but also GPU vendor, names, their memory, and quantity.
The general format is: `
```shell
$ dstack offer --gpu H100 --max-offers 10
Getting offers...
---> 100%
# BACKEND REGION INSTANCE TYPE RESOURCES SPOT PRICE
1 datacrunch FIN-01 1H100.80S.30V 30xCPU, 120GB, 1xH100 (80GB), 100.0GB (disk) no $2.19
2 datacrunch FIN-02 1H100.80S.30V 30xCPU, 120GB, 1xH100 (80GB), 100.0GB (disk) no $2.19
3 datacrunch FIN-02 1H100.80S.32V 32xCPU, 185GB, 1xH100 (80GB), 100.0GB (disk) no $2.19
4 datacrunch ICE-01 1H100.80S.32V 32xCPU, 185GB, 1xH100 (80GB), 100.0GB (disk) no $2.19
5 runpod US-KS-2 NVIDIA H100 PCIe 16xCPU, 251GB, 1xH100 (80GB), 100.0GB (disk) no $2.39
6 runpod CA NVIDIA H100 80GB HBM3 24xCPU, 251GB, 1xH100 (80GB), 100.0GB (disk) no $2.69
7 nebius eu-north1 gpu-h100-sxm 16xCPU, 200GB, 1xH100 (80GB), 100.0GB (disk) no $2.95
8 runpod AP-JP-1 NVIDIA H100 80GB HBM3 20xCPU, 251GB, 1xH100 (80GB), 100.0GB (disk) no $2.99
9 runpod CA-MTL-1 NVIDIA H100 80GB HBM3 28xCPU, 251GB, 1xH100 (80GB), 100.0GB (disk) no $2.99
10 runpod CA-MTL-2 NVIDIA H100 80GB HBM3 26xCPU, 125GB, 1xH100 (80GB), 100.0GB (disk) no $2.99
...
Shown 10 of 99 offers, $127.816 max
```
??? info "Grouping offers"
Use `--group-by` to aggregate offers. Accepted values: `gpu`, `backend`, `region`, and `count`.
```shell
dstack offer --gpu b200 --group-by gpu,backend,region
Project main
User admin
Resources cpu=2.. mem=8GB.. disk=100GB.. b200:1..
Spot policy auto
Max price -
Reservation -
Group by gpu, backend, region
# GPU SPOT $/GPU BACKEND REGION
1 B200:180GB:1..8 spot, on-demand 3.59..5.99 runpod EU-RO-1
2 B200:180GB:1..8 spot, on-demand 3.59..5.99 runpod US-CA-2
3 B200:180GB:8 on-demand 4.99 lambda us-east-1
4 B200:180GB:8 on-demand 5.5 nebius us-central1
```
When using `--group-by`, `gpu` must always be `included`.
The `region` value can only be used together with `backend`.
The `offer` command allows you to filter and group offers with various [advanced options](../reference/cli/dstack/offer.md#usage).
## Metrics
`dstack` tracks essential metrics accessible via the CLI and UI. To access advanced metrics like DCGM, configure the server to export metrics to Prometheus. See [Metrics](metrics.md) for details.
## Service quotas
If you're using your own AWS, GCP, Azure, or OCI accounts, before you can use GPUs or spot instances, you have to request the
corresponding service quotas for each type of instance in each region.
??? info "AWS"
Check this [guide :material-arrow-top-right-thin:{ .external }](https://docs.aws.amazon.com/AWSEC2/latest/UserGuide/ec2-resource-limits.html){:target="_blank"} on EC2 service quotas.
The relevant service quotas include:
- `Running On-Demand P instances` (on-demand V100, A100 80GB x8)
- `All P4, P3 and P2 Spot Instance Requests` (spot V100, A100 80GB x8)
- `Running On-Demand G and VT instances` (on-demand T4, A10G, L4)
- `All G and VT Spot Instance Requests` (spot T4, A10G, L4)
- `Running Dedicated p5 Hosts` (on-demand H100)
- `All P5 Spot Instance Requests` (spot H100)
??? info "GCP"
Check this [guide :material-arrow-top-right-thin:{ .external }](https://cloud.google.com/compute/resource-usage){:target="_blank"} on Compute Engine service quotas.
The relevant service quotas include:
- `NVIDIA V100 GPUs` (on-demand V100)
- `Preemtible V100 GPUs` (spot V100)
- `NVIDIA T4 GPUs` (on-demand T4)
- `Preemtible T4 GPUs` (spot T4)
- `NVIDIA L4 GPUs` (on-demand L4)
- `Preemtible L4 GPUs` (spot L4)
- `NVIDIA A100 GPUs` (on-demand A100)
- `Preemtible A100 GPUs` (spot A100)
- `NVIDIA A100 80GB GPUs` (on-demand A100 80GB)
- `Preemtible A100 80GB GPUs` (spot A100 80GB)
- `NVIDIA H100 GPUs` (on-demand H100)
- `Preemtible H100 GPUs` (spot H100)
??? info "Azure"
Check this [guide :material-arrow-top-right-thin:{ .external }](https://learn.microsoft.com/en-us/azure/quotas/quickstart-increase-quota-portal){:target="_blank"} on Azure service quotas.
The relevant service quotas include:
- `Total Regional Spot vCPUs` (any spot instances)
- `Standard NCASv3_T4 Family vCPUs` (on-demand T4)
- `Standard NVADSA10v5 Family vCPUs` (on-demand A10)
- `Standard NCADS_A100_v4 Family vCPUs` (on-demand A100 80GB)
- `Standard NDASv4_A100 Family vCPUs` (on-demand A100 40GB x8)
- `Standard NDAMSv4_A100Family vCPUs` (on-demand A100 80GB x8)
- `Standard NCadsH100v5 Family vCPUs` (on-demand H100)
- `Standard NDSH100v5 Family vCPUs` (on-demand H100 x8)
??? info "OCI"
Check this [guide :material-arrow-top-right-thin:{ .external }](https://docs.oracle.com/en-us/iaas/Content/General/Concepts/servicelimits.htm#Requesti){:target="_blank"} on requesting OCI service limits increase.
The relevant service category is compute. The relevant resources include:
- `GPUs for GPU.A10 based VM and BM instances` (on-demand A10)
- `GPUs for GPU2 based VM and BM instances` (on-demand P100)
- `GPUs for GPU3 based VM and BM instances` (on-demand V100)
Note, for AWS, GCP, and Azure, service quota values are measured with the number of CPUs rather than GPUs.
[//]: # (TODO: Mention spot policy)
# Examples
## TRL
# TRL
This example walks you through how to use [TRL :material-arrow-top-right-thin:{ .external }](https://github.com/huggingface/trl){:target="_blank"} to fine-tune `Llama-3.1-8B` with `dstack` using SFT with QLoRA.
## Define a configuration
Below is a task configuration that does fine-tuning.
```yaml
type: task
name: trl-train
python: 3.12
# Ensure nvcc is installed (req. for Flash Attention)
nvcc: true
env:
- HF_TOKEN
- WANDB_API_KEY
- HUB_MODEL_ID
commands:
# Pin torch==2.6.0 to avoid building Flash Attention from source.
# Prebuilt Flash Attention wheels are not available for the latest torch==2.7.0.
- uv pip install torch==2.6.0
- uv pip install transformers bitsandbytes peft wandb
- uv pip install flash_attn --no-build-isolation
- git clone https://github.com/huggingface/trl
- cd trl
- uv pip install .
- |
accelerate launch \
--config_file=examples/accelerate_configs/multi_gpu.yaml \
--num_processes $DSTACK_GPUS_PER_NODE \
trl/scripts/sft.py \
--model_name meta-llama/Meta-Llama-3.1-8B \
--dataset_name OpenAssistant/oasst_top1_2023-08-25 \
--dataset_text_field="text" \
--per_device_train_batch_size 1 \
--per_device_eval_batch_size 1 \
--gradient_accumulation_steps 4 \
--learning_rate 2e-4 \
--report_to wandb \
--bf16 \
--max_seq_length 1024 \
--lora_r 16 \
--lora_alpha 32 \
--lora_target_modules q_proj k_proj v_proj o_proj \
--load_in_4bit \
--use_peft \
--attn_implementation "flash_attention_2" \
--logging_steps=10 \
--output_dir models/llama31 \
--hub_model_id peterschmidt85/FineLlama-3.1-8B
resources:
gpu:
# 24GB or more VRAM
memory: 24GB..
# One or more GPU
count: 1..
# Shared memory (for multi-gpu)
shm_size: 24GB
```
Change the `resources` property to specify more GPUs.
!!! info "AMD"
The example above uses NVIDIA accelerators. To use it with AMD, check out [AMD](https://dstack.ai/examples/accelerators/amd#trl).
??? info "DeepSpeed"
For more memory-efficient use of multiple GPUs, consider using DeepSpeed and ZeRO Stage 3.
To do this, use the `examples/accelerate_configs/deepspeed_zero3.yaml` configuration file instead of
`examples/accelerate_configs/multi_gpu.yaml`.
## Run the configuration
Once the configuration is ready, run `dstack apply -f
```shell
$ HF_TOKEN=...
$ WANDB_API_KEY=...
$ HUB_MODEL_ID=...
$ dstack apply -f examples/single-node-training/trl/train.dstack.yml
# BACKEND RESOURCES INSTANCE TYPE PRICE
1 vastai (cz-czechia) cpu=64 mem=128GB H100:80GB:2 18794506 $3.8907
2 vastai (us-texas) cpu=52 mem=64GB H100:80GB:2 20442365 $3.6926
3 vastai (fr-france) cpu=64 mem=96GB H100:80GB:2 20379984 $3.7389
Submit the run trl-train? [y/n]:
Provisioning...
---> 100%
```
## Source code
The source-code of this example can be found in
[`examples/llms/llama31` :material-arrow-top-right-thin:{ .external }](https://github.com/dstackai/dstack/blob/master/examples/llms/llama31){:target="_blank"} and [`examples/single-node-training/trl` :material-arrow-top-right-thin:{ .external }](https://github.com/dstackai/dstack/blob/master/examples/single-node-training/trl){:target="_blank"}.
## What's next?
1. Browse the [TRL distributed training](https://dstack.ai/docs/examples/distributed-training/trl) example
2. Check [dev environments](https://dstack.ai/docs/dev-environments), [tasks](https://dstack.ai/docs/tasks),
[services](https://dstack.ai/docs/services), and [fleets](https://dstack.ai/docs/fleets)
3. See the [AMD](https://dstack.ai/examples/accelerators/amd#trl) example
## Axolotl
# Axolotl
This example shows how to use [Axolotl :material-arrow-top-right-thin:{ .external }](https://github.com/OpenAccess-AI-Collective/axolotl){:target="_blank"} with `dstack` to fine-tune 4-bit Quantized `Llama-4-Scout-17B-16E` using SFT with FSDP and QLoRA.
??? info "Prerequisites"
Once `dstack` is [installed](https://dstack.ai/docs/installation), clone the repo with examples.
```shell
$ git clone https://github.com/dstackai/dstack
$ cd dstack
```
## Define a configuration
Axolotl reads the model, QLoRA, and dataset arguments, as well as trainer configuration from a [`scout-qlora-flexattn-fsdp2.yaml` :material-arrow-top-right-thin:{ .external }](https://github.com/axolotl-ai-cloud/axolotl/blob/main/examples/llama-4/scout-qlora-flexattn-fsdp2.yaml){:target="_blank"} file. The configuration uses 4-bit axolotl quantized version of `meta-llama/Llama-4-Scout-17B-16E`, requiring only ~43GB VRAM/GPU with 4K context length.
Below is a task configuration that does fine-tuning.
```yaml
type: task
# The name is optional, if not specified, generated randomly
name: axolotl-nvidia-llama-scout-train
# Using the official Axolotl's Docker image
image: axolotlai/axolotl:main-latest
# Required environment variables
env:
- HF_TOKEN
- WANDB_API_KEY
- WANDB_PROJECT
- HUB_MODEL_ID
# Commands of the task
commands:
- wget https://raw.githubusercontent.com/axolotl-ai-cloud/axolotl/main/examples/llama-4/scout-qlora-flexattn-fsdp2.yaml
- |
axolotl train scout-qlora-flexattn-fsdp2.yaml \
--wandb-project $WANDB_PROJECT \
--wandb-name $DSTACK_RUN_NAME \
--hub-model-id $HUB_MODEL_ID
resources:
# Four GPU (required by FSDP)
gpu: H100:4
# Shared memory size for inter-process communication
shm_size: 64GB
disk: 500GB..
```
The task uses Axolotl's Docker image, where Axolotl is already pre-installed.
!!! info "AMD"
The example above uses NVIDIA accelerators. To use it with AMD, check out [AMD](https://dstack.ai/examples/accelerators/amd#axolotl).
## Run the configuration
Once the configuration is ready, run `dstack apply -f
```shell
$ HF_TOKEN=...
$ WANDB_API_KEY=...
$ WANDB_PROJECT=...
$ HUB_MODEL_ID=...
$ dstack apply -f examples/single-node-training/axolotl/.dstack.yml
# BACKEND RESOURCES INSTANCE TYPE PRICE
1 vastai (cz-czechia) cpu=64 mem=128GB H100:80GB:2 18794506 $3.8907
2 vastai (us-texas) cpu=52 mem=64GB H100:80GB:2 20442365 $3.6926
3 vastai (fr-france) cpu=64 mem=96GB H100:80GB:2 20379984 $3.7389
Submit the run axolotl-nvidia-llama-scout-train? [y/n]:
Provisioning...
---> 100%
```
## Source code
The source-code of this example can be found in
[`examples/single-node-training/axolotl` :material-arrow-top-right-thin:{ .external }](https://github.com/dstackai/dstack/blob/master/examples/single-node-training/axolotl){:target="_blank"} and [`examples/distributed-training/axolotl` :material-arrow-top-right-thin:{ .external }](https://github.com/dstackai/dstack/blob/master/examples/distributed-training/axolotl){:target="_blank"}.
## What's next?
1. Browse the [Axolotl distributed training](https://dstack.ai/docs/examples/distributed-training/axolotl) example
2. Check [dev environments](https://dstack.ai/docs/dev-environments), [tasks](https://dstack.ai/docs/tasks),
[services](https://dstack.ai/docs/services), [fleets](https://dstack.ai/docs/concepts/fleets)
3. See the [AMD](https://dstack.ai/examples/accelerators/amd#axolotl) example
## TRL
# TRL
This example walks you through how to run distributed fine-tune using [TRL :material-arrow-top-right-thin:{ .external }](https://github.com/huggingface/trl){:target="_blank"}, [Accelerate :material-arrow-top-right-thin:{ .external }](https://github.com/huggingface/accelerate){:target="_blank"} and [Deepspeed :material-arrow-top-right-thin:{ .external }](https://github.com/deepspeedai/DeepSpeed){:target="_blank"}.
!!! info "Prerequisites"
Before running a distributed task, make sure to create a fleet with `placement` set to `cluster` (can be a [managed fleet](https://dstack.ai/docs/concepts/fleets#backend-placement) or an [SSH fleet](https://dstack.ai/docs/concepts/fleets#ssh-placement)).
## Define a configuration
Once the fleet is created, define a distributed task configuration. Here's an example of such a task.
=== "FSDP"
```yaml
type: task
name: trl-train-fsdp-distrib
nodes: 2
image: nvcr.io/nvidia/pytorch:25.01-py3
env:
- HF_TOKEN
- ACCELERATE_LOG_LEVEL=info
- WANDB_API_KEY
- MODEL_ID=meta-llama/Llama-3.1-8B
- HUB_MODEL_ID
commands:
- pip install transformers bitsandbytes peft wandb
- git clone https://github.com/huggingface/trl
- cd trl
- pip install .
- |
accelerate launch \
--config_file=examples/accelerate_configs/fsdp1.yaml \
--main_process_ip=$DSTACK_MASTER_NODE_IP \
--main_process_port=8008 \
--machine_rank=$DSTACK_NODE_RANK \
--num_processes=$DSTACK_GPUS_NUM \
--num_machines=$DSTACK_NODES_NUM \
trl/scripts/sft.py \
--model_name $MODEL_ID \
--dataset_name OpenAssistant/oasst_top1_2023-08-25 \
--dataset_text_field="text" \
--per_device_train_batch_size 1 \
--per_device_eval_batch_size 1 \
--gradient_accumulation_steps 4 \
--learning_rate 2e-4 \
--report_to wandb \
--bf16 \
--max_seq_length 1024 \
--attn_implementation flash_attention_2 \
--logging_steps=10 \
--output_dir /checkpoints/llama31-ft \
--hub_model_id $HUB_MODEL_ID \
--torch_dtype bfloat16
resources:
gpu: 80GB:8
shm_size: 128GB
volumes:
- /checkpoints:/checkpoints
```
=== "Deepseed ZeRO-3"
```yaml
type: task
name: trl-train-deepspeed-distrib
nodes: 2
image: nvcr.io/nvidia/pytorch:25.01-py3
env:
- HF_TOKEN
- WANDB_API_KEY
- HUB_MODEL_ID
- MODEL_ID=meta-llama/Llama-3.1-8B
- ACCELERATE_LOG_LEVEL=info
commands:
- pip install transformers bitsandbytes peft wandb deepspeed
- git clone https://github.com/huggingface/trl
- cd trl
- pip install .
- |
accelerate launch \
--config_file=examples/accelerate_configs/deepspeed_zero3.yaml \
--main_process_ip=$DSTACK_MASTER_NODE_IP \
--main_process_port=8008 \
--machine_rank=$DSTACK_NODE_RANK \
--num_processes=$DSTACK_GPUS_NUM \
--num_machines=$DSTACK_NODES_NUM \
trl/scripts/sft.py \
--model_name $MODEL_ID \
--dataset_name OpenAssistant/oasst_top1_2023-08-25 \
--dataset_text_field="text" \
--per_device_train_batch_size 1 \
--per_device_eval_batch_size 1 \
--gradient_accumulation_steps 4 \
--learning_rate 2e-4 \
--report_to wandb \
--bf16 \
--max_seq_length 1024 \
--attn_implementation flash_attention_2 \
--logging_steps=10 \
--output_dir /checkpoints/llama31-ft \
--hub_model_id $HUB_MODEL_ID \
--torch_dtype bfloat16
resources:
gpu: 80GB:8
shm_size: 128GB
volumes:
- /checkpoints:/checkpoints
```
!!! info "Docker image"
We are using `nvcr.io/nvidia/pytorch:25.01-py3` from NGC because it includes the necessary libraries and packages for RDMA and InfiniBand support.
### Apply the configuration
To run a configuration, use the [`dstack apply`](https://dstack.ai/docs/reference/cli/dstack/apply.md) command.
```shell
$ HF_TOKEN=...
$ WANDB_API_KEY=...
$ HUB_MODEL_ID=...
$ dstack apply -f examples/distributed-training/trl/fsdp.dstack.yml
# BACKEND RESOURCES INSTANCE TYPE PRICE
1 ssh (remote) cpu=208 mem=1772GB H100:80GB:8 instance $0 idle
2 ssh (remote) cpu=208 mem=1772GB H100:80GB:8 instance $0 idle
Submit the run trl-train-fsdp-distrib? [y/n]: y
Provisioning...
---> 100%
```
## Source code
The source-code of this example can be found in
[`examples/distributed-training/trl` :material-arrow-top-right-thin:{ .external }](https://github.com/dstackai/dstack/blob/master/examples/distributed-training/trl){:target="_blank"}.
!!! info "What's next?"
1. Read the [clusters](https://dstack.ai/docs/guides/clusters) guide
2. Check [dev environments](https://dstack.ai/docs/concepts/dev-environments), [tasks](https://dstack.ai/docs/concepts/tasks),
[services](https://dstack.ai/docs/concepts/services), and [fleets](https://dstack.ai/docs/concepts/fleets)
## Axolotl
# Axolotl
This example walks you through how to run distributed fine-tune using [Axolotl :material-arrow-top-right-thin:{ .external }](https://github.com/axolotl-ai-cloud/axolotl){:target="_blank"} and [distributed tasks](https://dstack.ai/docs/concepts/tasks#distributed-tasks).
!!! info "Prerequisites"
Before running a distributed task, make sure to create a fleet with `placement` set to `cluster` (can be a [managed fleet](https://dstack.ai/docs/concepts/fleets#backend-placement) or an [SSH fleet](https://dstack.ai/docs/concepts/fleets#ssh-placement)).
## Define a configuration
Once the fleet is created, define a distributed task configuration. Here's an example of distributed `QLORA` task using `FSDP`.
```yaml
type: task
name: axolotl-multi-node-qlora-llama3-70b
nodes: 2
image: nvcr.io/nvidia/pytorch:25.01-py3
env:
- HF_TOKEN
- WANDB_API_KEY
- WANDB_PROJECT
- HUB_MODEL_ID
- CUDA_VISIBLE_DEVICES=0,1,2,3,4,5,6,7
- NCCL_DEBUG=INFO
- ACCELERATE_LOG_LEVEL=info
commands:
# Replacing the default Torch and FlashAttention in the NCG container with Axolotl-compatible versions.
# The preinstalled versions are incompatible with Axolotl.
- pip uninstall -y torch flash-attn
- pip install torch==2.6.0 torchvision==0.21.0 torchaudio==2.6.0 --index-url https://download.pytorch.org/whl/test/cu124
- pip install --no-build-isolation axolotl[flash-attn,deepspeed]
- wget https://raw.githubusercontent.com/huggingface/trl/main/examples/accelerate_configs/fsdp1.yaml
- wget https://raw.githubusercontent.com/axolotl-ai-cloud/axolotl/main/examples/llama-3/qlora-fsdp-70b.yaml
# Axolotl includes hf-xet version 1.1.0, which fails during downloads. Replacing it with the latest version (1.1.2).
- pip uninstall -y hf-xet
- pip install hf-xet --no-cache-dir
- |
accelerate launch \
--config_file=fsdp1.yaml \
-m axolotl.cli.train qlora-fsdp-70b.yaml \
--hub-model-id $HUB_MODEL_ID \
--output-dir /checkpoints/qlora-llama3-70b \
--wandb-project $WANDB_PROJECT \
--wandb-name $DSTACK_RUN_NAME \
--main_process_ip=$DSTACK_MASTER_NODE_IP \
--main_process_port=8008 \
--machine_rank=$DSTACK_NODE_RANK \
--num_processes=$DSTACK_GPUS_NUM \
--num_machines=$DSTACK_NODES_NUM
resources:
gpu: 80GB:8
shm_size: 128GB
volumes:
- /checkpoints:/checkpoints
```
!!! info "Docker image"
We are using `nvcr.io/nvidia/pytorch:25.01-py3` from NGC because it includes the necessary libraries and packages for RDMA and InfiniBand support.
### Apply the configuration
To run a configuration, use the [`dstack apply`](https://dstack.ai/docs/reference/cli/dstack/apply.md) command.
```shell
$ HF_TOKEN=...
$ WANDB_API_KEY=...
$ WANDB_PROJECT=...
$ HUB_MODEL_ID=...
$ dstack apply -f examples/distributed-training/trl/fsdp.dstack.yml
# BACKEND RESOURCES INSTANCE TYPE PRICE
1 ssh (remote) cpu=208 mem=1772GB H100:80GB:8 instance $0 idle
2 ssh (remote) cpu=208 mem=1772GB H100:80GB:8 instance $0 idle
Submit the run trl-train-fsdp-distrib? [y/n]: y
Provisioning...
---> 100%
```
## Source code
The source-code of this example can be found in
[`examples/distributed-training/axolotl` :material-arrow-top-right-thin:{ .external }](https://github.com/dstackai/dstack/blob/master/examples/distributed-training/axolotl).
!!! info "What's next?"
1. Read the [clusters](https://dstack.ai/docs/guides/clusters) guide
2. Check [dev environments](https://dstack.ai/docs/dev-environments), [tasks](https://dstack.ai/docs/concepts/tasks),
[services](https://dstack.ai/docs/concepts/services), and [fleets](https://dstack.ai/docs/concepts/fleets)
## Ray+RAGEN
# Ray + RAGEN
This example shows how use `dstack` and [RAGEN :material-arrow-top-right-thin:{ .external }](https://github.com/RAGEN-AI/RAGEN){:target="_blank"}
to fine-tune an agent on multiple nodes.
Under the hood `RAGEN` uses [verl :material-arrow-top-right-thin:{ .external }](https://github.com/volcengine/verl){:target="_blank"} for Reinforcement Learning and [Ray :material-arrow-top-right-thin:{ .external }](https://docs.ray.io/en/latest/){:target="_blank"} for distributed training.
!!! info "Prerequisites"
Before running a distributed task, make sure to create a fleet with `placement` set to `cluster` (can be a [managed fleet](https://dstack.ai/docs/concepts/fleets#backend-placement) or an [SSH fleet](https://dstack.ai/docs/concepts/fleets#ssh-placement)).
## Run a Ray cluster
If you want to use Ray with `dstack`, you have to first run a Ray cluster.
The task below runs a Ray cluster on an existing fleet:
```yaml
type: task
name: ray-ragen-cluster
nodes: 2
env:
- WANDB_API_KEY
image: whatcanyousee/verl:ngc-cu124-vllm0.8.5-sglang0.4.6-mcore0.12.0-te2.2
commands:
- wget -O miniconda.sh https://repo.anaconda.com/miniconda/Miniconda3-latest-Linux-x86_64.sh
- bash miniconda.sh -b -p /workflow/miniconda
- eval "$(/workflow/miniconda/bin/conda shell.bash hook)"
- git clone https://github.com/RAGEN-AI/RAGEN.git
- cd RAGEN
- bash scripts/setup_ragen.sh
- conda activate ragen
- cd verl
- pip install --no-deps -e .
- pip install hf_transfer hf_xet
- pip uninstall -y ray
- pip install -U "ray[default]"
- |
if [ $DSTACK_NODE_RANK = 0 ]; then
ray start --head --port=6379;
else
ray start --address=$DSTACK_MASTER_NODE_IP:6379
fi
# Expose Ray dashboard port
ports:
- 8265
resources:
gpu: 80GB:8
shm_size: 128GB
# Save checkpoints on the instance
volumes:
- /checkpoints:/checkpoints
```
We are using verl's docker image for vLLM with FSDP. See [Installation :material-arrow-top-right-thin:{ .external }](https://verl.readthedocs.io/en/latest/start/install.html){:target="_blank"} for more.
The `RAGEN` setup script `scripts/setup_ragen.sh` isolates dependencies within Conda environment.
Note that the Ray setup in the RAGEN environment is missing the dashboard, so we reinstall it using `ray[default]`.
Now, if you run this task via `dstack apply`, it will automatically forward the Ray's dashboard port to `localhost:8265`.
```shell
$ dstack apply -f examples/distributed-training/ray-ragen/.dstack.yml
```
As long as the `dstack apply` is attached, you can use `localhost:8265` to submit Ray jobs for execution.
If `dstack apply` is detached, you can use `dstack attach` to re-attach.
## Submit Ray jobs
Before you can submit Ray jobs, ensure to install `ray` locally:
```shell
$ pip install ray
```
Now you can submit the training job to the Ray cluster which is available at `localhost:8265`:
```shell
$ RAY_ADDRESS=http://localhost:8265
$ ray job submit \
-- bash -c "\
export PYTHONPATH=/workflow/RAGEN; \
cd /workflow/RAGEN; \
/workflow/miniconda/envs/ragen/bin/python train.py \
--config-name base \
system.CUDA_VISIBLE_DEVICES=[0,1,2,3,4,5,6,7] \
model_path=Qwen/Qwen2.5-7B-Instruct \
trainer.experiment_name=agent-fine-tuning-Qwen2.5-7B \
trainer.n_gpus_per_node=8 \
trainer.nnodes=2 \
micro_batch_size_per_gpu=2 \
trainer.default_local_dir=/checkpoints \
trainer.save_freq=50 \
actor_rollout_ref.rollout.tp_size_check=False \
actor_rollout_ref.rollout.tensor_model_parallel_size=4"
```
!!! info "Training parameters"
1. `actor_rollout_ref.rollout.tensor_model_parallel_size=4`, because `Qwen/Qwen2.5-7B-Instruct` has 28 attention heads and number of attention heads should be divisible by `tensor_model_parallel_size`
2. `actor_rollout_ref.rollout.tp_size_check=False`, if True `tensor_model_parallel_size` should be equal to `trainer.n_gpus_per_node`
3. `micro_batch_size_per_gpu=2`, to keep the RAGEN-paper's `rollout_filter_ratio` and `es_manager` settings as it is for world size `16`
Using Ray via `dstack` is a powerful way to get access to the rich Ray ecosystem while benefiting from `dstack`'s provisioning capabilities.
!!! info "What's next"
1. Check the [Clusters](https://dstack.ai/docs/guides/clusters) guide
2. Read about [distributed tasks](https://dstack.ai/docs/concepts/tasks#distributed-tasks) and [fleets](https://dstack.ai/docs/concepts/fleets)
3. Browse Ray's [docs :material-arrow-top-right-thin:{ .external }](https://docs.ray.io/en/latest/train/examples.html){:target="_blank"} for other examples.
## NCCL tests
# NCCL tests
This example shows how to run [NCCL tests :material-arrow-top-right-thin:{ .external }](https://github.com/NVIDIA/nccl-tests){:target="_blank"} on a cluster using [distributed tasks](https://dstack.ai/docs/concepts/tasks#distributed-tasks).
!!! info "Prerequisites"
Before running a distributed task, make sure to create a fleet with `placement` set to `cluster` (can be a [managed fleet](https://dstack.ai/docs/concepts/fleets#backend-placement) or an [SSH fleet](https://dstack.ai/docs/concepts/fleets#ssh-placement)).
## Running as a task
Here's an example of a task that runs AllReduce test on 2 nodes, each with 4 GPUs (8 processes in total).
```yaml
type: task
name: nccl-tests
nodes: 2
startup_order: workers-first
stop_criteria: master-done
env:
- NCCL_DEBUG=INFO
commands:
- |
if [ $DSTACK_NODE_RANK -eq 0 ]; then
mpirun \
--allow-run-as-root \
--hostfile $DSTACK_MPI_HOSTFILE \
-n $DSTACK_GPUS_NUM \
-N $DSTACK_GPUS_PER_NODE \
--bind-to none \
/opt/nccl-tests/build/all_reduce_perf -b 8 -e 8G -f 2 -g 1
else
sleep infinity
fi
# Uncomment if the `kubernetes` backend requires it for `/dev/infiniband` access
#privileged: true
resources:
gpu: nvidia:1..8
shm_size: 16GB
```
!!! info "Default image"
If you don't specify `image`, `dstack` uses its [base :material-arrow-top-right-thin:{ .external }](https://github.com/dstackai/dstack/tree/master/docker/base){:target="_blank"} Docker image pre-configured with
`uv`, `python`, `pip`, essential CUDA drivers, `mpirun`, and NCCL tests (under `/opt/nccl-tests/build`).
!!! info "Privileged"
In some cases, the backend (e.g., `kubernetes`) may require `privileged: true` to access the high-speed interconnect (e.g., InfiniBand).
### Apply a configuration
To run a configuration, use the [`dstack apply`](https://dstack.ai/docs/reference/cli/dstack/apply/) command.
```shell
$ dstack apply -f examples/clusters/nccl-tests/.dstack.yml
# BACKEND REGION INSTANCE RESOURCES SPOT PRICE
1 aws us-east-1 g4dn.12xlarge 48xCPU, 192GB, 4xT4 (16GB), 100.0GB (disk) no $3.912
2 aws us-west-2 g4dn.12xlarge 48xCPU, 192GB, 4xT4 (16GB), 100.0GB (disk) no $3.912
3 aws us-east-2 g4dn.12xlarge 48xCPU, 192GB, 4xT4 (16GB), 100.0GB (disk) no $3.912
Submit the run nccl-tests? [y/n]: y
```
## Source code
The source-code of this example can be found in
[`examples/clusters/nccl-tests` :material-arrow-top-right-thin:{ .external }](https://github.com/dstackai/dstack/blob/master/examples/clusters/nccl-tests).
## What's next?
1. Check [dev environments](https://dstack.ai/docs/concepts/dev-environments), [tasks](https://dstack.ai/docs/concepts/tasks),
[services](https://dstack.ai/docsconcepts/services), and [fleets](https://dstack.ai/docs/concepts/fleets).
## RCCL tests
# RCCL tests
This example shows how to run distributed [RCCL tests :material-arrow-top-right-thin:{ .external }](https://github.com/ROCm/rccl-tests){:target="_blank"} using [distributed tasks](https://dstack.ai/docs/concepts/tasks#distributed-tasks).
!!! info "Prerequisites"
Before running a distributed task, make sure to create a fleet with `placement` set to `cluster` (can be a [managed fleet](https://dstack.ai/docs/concepts/fleets#backend-placement) or an [SSH fleet](https://dstack.ai/docs/concepts/fleets#ssh-placement)).
## Running as a task
Here's an example of a task that runs AllReduce test on 2 nodes, each with 8 `Mi300x` GPUs (16 processes in total).
```yaml
type: task
name: rccl-tests
nodes: 2
startup_order: workers-first
stop_criteria: master-done
# Mount the system libraries folder from the host
volumes:
- /usr/local/lib:/mnt/lib
image: rocm/dev-ubuntu-22.04:6.4-complete
env:
- NCCL_DEBUG=INFO
- OPEN_MPI_HOME=/usr/lib/x86_64-linux-gnu/openmpi
commands:
# Setup MPI and build RCCL tests
- apt-get install -y git libopenmpi-dev openmpi-bin
- git clone https://github.com/ROCm/rccl-tests.git
- cd rccl-tests
- make MPI=1 MPI_HOME=$OPEN_MPI_HOME
# Preload the RoCE driver library from the host (for Broadcom driver compatibility)
- export LD_PRELOAD=/mnt/lib/libbnxt_re-rdmav34.so
# Run RCCL tests via MPI
- |
if [ $DSTACK_NODE_RANK -eq 0 ]; then
mpirun --allow-run-as-root \
--hostfile $DSTACK_MPI_HOSTFILE \
-n $DSTACK_GPUS_NUM \
-N $DSTACK_GPUS_PER_NODE \
--mca btl_tcp_if_include ens41np0 \
-x LD_PRELOAD \
-x NCCL_IB_HCA=mlx5_0/1,bnxt_re0,bnxt_re1,bnxt_re2,bnxt_re3,bnxt_re4,bnxt_re5,bnxt_re6,bnxt_re7 \
-x NCCL_IB_GID_INDEX=3 \
-x NCCL_IB_DISABLE=0 \
./build/all_reduce_perf -b 8M -e 8G -f 2 -g 1 -w 5 --iters 20 -c 0;
else
sleep infinity
fi
resources:
gpu: MI300X:8
```
!!! info "MPI"
RCCL tests rely on MPI to run on multiple processes. The master node (`DSTACK_NODE_RANK=0`) generates `hostfile` (using `DSTACK_NODES_IPS`)
and waits until other nodes are accessible via MPI.
Then, it executes `/rccl-tests/build/all_reduce_perf` across all GPUs.
Other nodes use a `FIFO` pipe to wait for until the MPI run is finished.
There is an open [issue :material-arrow-top-right-thin:{ .external }](https://github.com/dstackai/dstack/issues/2467){:target="_blank"} to simplify the use of MPI with distributed tasks.
!!! info "RoCE library"
Broadcom RoCE drivers require the `libbnxt_re` userspace library inside the container to be compatible with the host’s Broadcom
kernel driver `bnxt_re`. To ensure this compatibility, we mount `libbnxt_re-rdmav34.so` from the host and preload it
using `LD_PRELOAD` when running MPI.
### Creating a fleet
Define an SSH fleet configuration by listing the IP addresses of each node in the cluster, along with the SSH user and SSH key configured for each host.
```yaml
type: fleet
# The name is optional, if not specified, generated randomly
name: mi300x-fleet
# SSH credentials for the on-prem servers
ssh_config:
user: root
identity_file: ~/.ssh/id_rsa
hosts:
- 144.202.58.28
- 137.220.58.52
```
### Apply a configuration
To run a configuration, use the [`dstack apply`](https://dstack.ai/docs/reference/cli/dstack/apply/) command.
```shell
$ dstack apply -f examples/distributed-training/rccl-tests/.dstack.yml
# BACKEND RESOURCES INSTANCE TYPE PRICE
1 ssh (remote) cpu=256 mem=2268GB disk=752GB instance $0 idle
MI300X:192GB:8
2 ssh (remote) cpu=256 mem=2268GB disk=752GB instance $0 idle
MI300X:192GB:8
Submit the run rccl-tests? [y/n]: y
```
## Source code
The source-code of this example can be found in
[`examples/distributed-training/rccl-tests` :material-arrow-top-right-thin:{ .external }](https://github.com/dstackai/dstack/blob/master/examples/distributed-training/rccl-tests).
## What's next?
1. Check [dev environments](https://dstack.ai/docs/dev-environments), [tasks](https://dstack.ai/docs/tasks),
[services](https://dstack.ai/docs/services), and [fleets](https://dstack.ai/docs/concepts/fleets).
## SGLang
# SGLang
This example shows how to deploy DeepSeek-R1-Distill-Llama 8B and 70B using [SGLang :material-arrow-top-right-thin:{ .external }](https://github.com/sgl-project/sglang){:target="_blank"} and `dstack`.
## Apply a configuration
Here's an example of a service that deploys DeepSeek-R1-Distill-Llama 8B and 70B using SgLang.
=== "NVIDIA"
```yaml
type: service
name: deepseek-r1-nvidia
image: lmsysorg/sglang:latest
env:
- MODEL_ID=deepseek-ai/DeepSeek-R1-Distill-Llama-8B
commands:
- python3 -m sglang.launch_server
--model-path $MODEL_ID
--port 8000
--trust-remote-code
port: 8000
model: deepseek-ai/DeepSeek-R1-Distill-Llama-8B
resources:
gpu: 24GB
```
=== "AMD"
```yaml
type: service
name: deepseek-r1-amd
image: lmsysorg/sglang:v0.4.1.post4-rocm620
env:
- MODEL_ID=deepseek-ai/DeepSeek-R1-Distill-Llama-70B
commands:
- python3 -m sglang.launch_server
--model-path $MODEL_ID
--port 8000
--trust-remote-code
port: 8000
model: deepseek-ai/DeepSeek-R1-Distill-Llama-70B
resources:
gpu: MI300x
disk: 300GB
```
To run a configuration, use the [`dstack apply`](https://dstack.ai/docs/reference/cli/dstack/apply.md) command.
```shell
$ dstack apply -f examples/llms/deepseek/sglang/amd/.dstack.yml
# BACKEND REGION RESOURCES SPOT PRICE
1 runpod EU-RO-1 24xCPU, 283GB, 1xMI300X (192GB) no $2.49
Submit the run deepseek-r1-amd? [y/n]: y
Provisioning...
---> 100%
```
Once the service is up, the model will be available via the OpenAI-compatible endpoint
at `
```shell
curl http://127.0.0.1:3000/proxy/models/main/chat/completions \
-X POST \
-H 'Authorization: Bearer <dstack token>' \
-H 'Content-Type: application/json' \
-d '{
"model": "deepseek-ai/DeepSeek-R1-Distill-Llama-70B",
"messages": [
{
"role": "system",
"content": "You are a helpful assistant."
},
{
"role": "user",
"content": "What is Deep Learning?"
}
],
"stream": true,
"max_tokens": 512
}'
```
!!! info "SGLang Model Gateway"
If you'd like to use a custom routing policy, e.g. by leveraging the [SGLang Model Gateway :material-arrow-top-right-thin:{ .external }](https://docs.sglang.ai/advanced_features/router.html#){:target="_blank"}, create a gateway with `router` set to `sglang`. Check out [gateways](https://dstack.ai/docs/concepts/gateways#router) for more details.
> If a [gateway](https://dstack.ai/docs/concepts/gateways/) is configured (e.g. to enable auto-scaling or HTTPs, rate-limits, etc), the OpenAI-compatible endpoint is available at `https://gateway.
```shell
$ git clone https://github.com/dstackai/dstack
$ cd dstack
```
## Deployment
Here's an example of a service that deploys Llama 3.1 8B using vLLM.
```yaml
type: service
name: llama31
python: "3.11"
env:
- HF_TOKEN
- MODEL_ID=meta-llama/Meta-Llama-3.1-8B-Instruct
- MAX_MODEL_LEN=4096
commands:
- pip install vllm
- vllm serve $MODEL_ID
--max-model-len $MAX_MODEL_LEN
--tensor-parallel-size $DSTACK_GPUS_NUM
port: 8000
# Register the model
model: meta-llama/Meta-Llama-3.1-8B-Instruct
# Uncomment to leverage spot instances
#spot_policy: auto
# Uncomment to cache downloaded models
#volumes:
# - /root/.cache/huggingface/hub:/root/.cache/huggingface/hub
resources:
gpu: 24GB
# Uncomment if using multiple GPUs
#shm_size: 24GB
```
### Running a configuration
To run a configuration, use the [`dstack apply`](https://dstack.ai/docs/reference/cli/dstack/apply.md) command.
```shell
$ dstack apply -f examples/inference/vllm/.dstack.yml
# BACKEND REGION RESOURCES SPOT PRICE
1 runpod CA-MTL-1 18xCPU, 100GB, A5000:24GB yes $0.12
2 runpod EU-SE-1 18xCPU, 100GB, A5000:24GB yes $0.12
3 gcp us-west4 27xCPU, 150GB, A5000:24GB:2 yes $0.23
Submit a new run? [y/n]: y
Provisioning...
---> 100%
```
If no gateway is created, the model will be available via the OpenAI-compatible endpoint
at `
```shell
$ curl http://127.0.0.1:3000/proxy/models/main/chat/completions \
-X POST \
-H 'Authorization: Bearer <dstack token>' \
-H 'Content-Type: application/json' \
-d '{
"model": "meta-llama/Meta-Llama-3.1-8B-Instruct",
"messages": [
{
"role": "system",
"content": "You are a helpful assistant."
},
{
"role": "user",
"content": "What is Deep Learning?"
}
],
"max_tokens": 128
}'
```
When a [gateway](https://dstack.ai/docs/concepts/gateways/) is configured, the OpenAI-compatible endpoint
is available at `https://gateway.
```shell
$ git clone https://github.com/dstackai/dstack
$ cd dstack
```
## Deployment
Here's an example of a service that deploys DeepSeek-R1-Distill-Llama-8B using NIM.
```yaml
type: service
name: serve-distill-deepseek
image: nvcr.io/nim/deepseek-ai/deepseek-r1-distill-llama-8b
env:
- NGC_API_KEY
- NIM_MAX_MODEL_LEN=4096
registry_auth:
username: $oauthtoken
password: ${{ env.NGC_API_KEY }}
port: 8000
# Register the model
model: deepseek-ai/deepseek-r1-distill-llama-8b
# Uncomment to leverage spot instances
#spot_policy: auto
# Cache downloaded models
volumes:
- instance_path: /root/.cache/nim
path: /opt/nim/.cache
optional: true
resources:
gpu: A100:40GB
# Uncomment if using multiple GPUs
#shm_size: 16GB
```
### Running a configuration
To run a configuration, use the [`dstack apply`](https://dstack.ai/docs/reference/cli/dstack/apply.md) command.
```shell
$ NGC_API_KEY=...
$ dstack apply -f examples/inference/nim/.dstack.yml
# BACKEND REGION RESOURCES SPOT PRICE
1 vultr ewr 6xCPU, 60GB, 1xA100 (40GB) no $1.199
2 vultr ewr 6xCPU, 60GB, 1xA100 (40GB) no $1.199
3 vultr nrt 6xCPU, 60GB, 1xA100 (40GB) no $1.199
Submit the run serve-distill-deepseek? [y/n]: y
Provisioning...
---> 100%
```
If no gateway is created, the model will be available via the OpenAI-compatible endpoint
at `
```shell
$ curl http://127.0.0.1:3000/proxy/models/main/chat/completions \
-X POST \
-H 'Authorization: Bearer <dstack token>' \
-H 'Content-Type: application/json' \
-d '{
"model": "meta/llama3-8b-instruct",
"messages": [
{
"role": "system",
"content": "You are a helpful assistant."
},
{
"role": "user",
"content": "What is Deep Learning?"
}
],
"max_tokens": 128
}'
```
When a [gateway](https://dstack.ai/docs/concepts/gateways/) is configured, the OpenAI-compatible endpoint
is available at `https://gateway.
```shell
$ git clone https://github.com/dstackai/dstack
$ cd dstack
```
## Deployment
### DeepSeek R1
We normally use Triton with the TensorRT-LLM backend to serve models. While this works for the distilled Llama-based
version, DeepSeek R1 isn’t yet compatible. So, for DeepSeek R1, we’ll use `trtllm-serve` with the PyTorch backend instead.
To use `trtllm-serve`, we first need to build the TensorRT-LLM Docker image from the `main` branch.
#### Build a Docker image
Here’s the task config that builds the image and pushes it using the provided Docker credentials.
```yaml
type: task
name: build-image
privileged: true
image: dstackai/dind
env:
- DOCKER_USERNAME
- DOCKER_PASSWORD
commands:
- start-dockerd
- apt update && apt-get install -y build-essential make git git-lfs
- git lfs install
- git clone https://github.com/NVIDIA/TensorRT-LLM.git
- cd TensorRT-LLM
- git submodule update --init --recursive
- git lfs pull
# Limit compilation to Hopper for a smaller image
- make -C docker release_build CUDA_ARCHS="90-real"
- docker tag tensorrt_llm/release:latest $DOCKER_USERNAME/tensorrt_llm:latest
- echo "$DOCKER_PASSWORD" | docker login -u "$DOCKER_USERNAME" --password-stdin
- docker push "$DOCKER_USERNAME/tensorrt_llm:latest"
resources:
cpu: 8
disk: 500GB..
```
To run it, pass the task configuration to `dstack apply`.
```shell
$ dstack apply -f examples/inference/trtllm/build-image.dstack.yml
# BACKEND REGION RESOURCES SPOT PRICE
1 cudo ca-montreal-2 8xCPU, 25GB, (500.0GB) yes $0.1073
Submit the run build-image? [y/n]: y
Provisioning...
---> 100%
```
#### Deploy the model
Below is the service configuration that deploys DeepSeek R1 using the built TensorRT-LLM image.
```yaml
type: service
name: serve-r1
# Specify the image built with `examples/inference/trtllm/build-image.dstack.yml`
image: dstackai/tensorrt_llm:9b931c0f6305aefa3660e6fb84a76a42c0eef167
env:
- MAX_BATCH_SIZE=256
- MAX_NUM_TOKENS=16384
- MAX_SEQ_LENGTH=16384
- EXPERT_PARALLEL=4
- PIPELINE_PARALLEL=1
- HF_HUB_ENABLE_HF_TRANSFER=1
commands:
- pip install -U "huggingface_hub[cli]"
- pip install hf_transfer
- huggingface-cli download deepseek-ai/DeepSeek-R1 --local-dir DeepSeek-R1
- trtllm-serve
--backend pytorch
--max_batch_size $MAX_BATCH_SIZE
--max_num_tokens $MAX_NUM_TOKENS
--max_seq_len $MAX_SEQ_LENGTH
--tp_size $DSTACK_GPUS_NUM
--ep_size $EXPERT_PARALLEL
--pp_size $PIPELINE_PARALLEL
DeepSeek-R1
port: 8000
model: deepseek-ai/DeepSeek-R1
resources:
gpu: 8:H200
shm_size: 32GB
disk: 2000GB..
```
To run it, pass the configuration to `dstack apply`.
```shell
$ dstack apply -f examples/inference/trtllm/serve-r1.dstack.yml
# BACKEND REGION RESOURCES SPOT PRICE
1 vastai is-iceland 192xCPU, 2063GB, 8xH200 (141GB) yes $25.62
Submit the run serve-r1? [y/n]: y
Provisioning...
---> 100%
```
### DeepSeek R1 Distill Llama 8B
To deploy DeepSeek R1 Distill Llama 8B, follow the steps below.
#### Convert and upload checkpoints
Here’s the task config that converts a Hugging Face model to a TensorRT-LLM checkpoint format
and uploads it to S3 using the provided AWS credentials.
```yaml
type: task
name: convert-model
image: nvcr.io/nvidia/tritonserver:25.01-trtllm-python-py3
env:
- HF_TOKEN
- MODEL_REPO=https://huggingface.co/deepseek-ai/DeepSeek-R1-Distill-Llama-8B
- S3_BUCKET_NAME
- AWS_ACCESS_KEY_ID
- AWS_SECRET_ACCESS_KEY
- AWS_DEFAULT_REGION
commands:
# nvcr.io/nvidia/tritonserver:25.01-trtllm-python-py3 container uses TensorRT-LLM version 0.17.0,
# therefore we are using branch v0.17.0
- git clone --branch v0.17.0 --depth 1 https://github.com/triton-inference-server/tensorrtllm_backend.git
- git clone --branch v0.17.0 --single-branch https://github.com/NVIDIA/TensorRT-LLM.git
- git clone https://github.com/triton-inference-server/server.git
- cd TensorRT-LLM/examples/llama
- apt-get -y install git git-lfs
- git lfs install
- git config --global credential.helper store
- huggingface-cli login --token $HF_TOKEN --add-to-git-credential
- git clone $MODEL_REPO
- python3 convert_checkpoint.py --model_dir DeepSeek-R1-Distill-Llama-8B --output_dir tllm_checkpoint_${DSTACK_GPUS_NUM}gpu_bf16 --dtype bfloat16 --tp_size $DSTACK_GPUS_NUM
# Download the AWS CLI
- curl "https://awscli.amazonaws.com/awscli-exe-linux-x86_64.zip" -o "awscliv2.zip"
- unzip awscliv2.zip
- ./aws/install
- aws s3 sync tllm_checkpoint_${DSTACK_GPUS_NUM}gpu_bf16 s3://${S3_BUCKET_NAME}/tllm_checkpoint_${DSTACK_GPUS_NUM}gpu_bf16 --acl public-read
resources:
gpu: A100:40GB
```
To run it, pass the configuration to `dstack apply`.
```shell
$ dstack apply -f examples/inference/trtllm/convert-model.dstack.yml
# BACKEND REGION RESOURCES SPOT PRICE
1 vastai us-iowa 12xCPU, 85GB, 1xA100 (40GB) yes $0.66904
Submit the run convert-model? [y/n]: y
Provisioning...
---> 100%
```
#### Build and upload the model
Here’s the task config that builds a TensorRT-LLM model and uploads it to S3 with the provided AWS credentials.
```yaml
type: task
name: build-model
image: nvcr.io/nvidia/tritonserver:25.01-trtllm-python-py3
env:
- MODEL=deepseek-ai/DeepSeek-R1-Distill-Llama-8B
- S3_BUCKET_NAME
- AWS_ACCESS_KEY_ID
- AWS_SECRET_ACCESS_KEY
- AWS_DEFAULT_REGION
- MAX_SEQ_LEN=8192 # Sum of Max Input Length & Max Output Length
- MAX_INPUT_LEN=4096
- MAX_BATCH_SIZE=256
- TRITON_MAX_BATCH_SIZE=1
- INSTANCE_COUNT=1
- MAX_QUEUE_DELAY_MS=0
- MAX_QUEUE_SIZE=0
- DECOUPLED_MODE=true # Set true for streaming
commands:
- huggingface-cli download $MODEL --exclude '*.safetensors' --local-dir tokenizer_dir
- curl "https://awscli.amazonaws.com/awscli-exe-linux-x86_64.zip" -o "awscliv2.zip"
- unzip awscliv2.zip
- ./aws/install
- aws s3 sync s3://${S3_BUCKET_NAME}/tllm_checkpoint_${DSTACK_GPUS_NUM}gpu_bf16 ./tllm_checkpoint_${DSTACK_GPUS_NUM}gpu_bf16
- trtllm-build --checkpoint_dir tllm_checkpoint_${DSTACK_GPUS_NUM}gpu_bf16 --gemm_plugin bfloat16 --output_dir tllm_engine_${DSTACK_GPUS_NUM}gpu_bf16 --max_seq_len $MAX_SEQ_LEN --max_input_len $MAX_INPUT_LEN --max_batch_size $MAX_BATCH_SIZE --gpt_attention_plugin bfloat16 --use_paged_context_fmha enable
- git clone --branch v0.17.0 --single-branch https://github.com/NVIDIA/TensorRT-LLM.git
- python3 TensorRT-LLM/examples/run.py --engine_dir tllm_engine_${DSTACK_GPUS_NUM}gpu_bf16 --max_output_len 40 --tokenizer_dir tokenizer_dir --input_text "What is Deep Learning?"
- git clone --branch v0.17.0 --depth 1 https://github.com/triton-inference-server/tensorrtllm_backend.git
- mkdir triton_model_repo
- cp -r tensorrtllm_backend/all_models/inflight_batcher_llm/* triton_model_repo/
- python3 tensorrtllm_backend/tools/fill_template.py -i triton_model_repo/ensemble/config.pbtxt triton_max_batch_size:${TRITON_MAX_BATCH_SIZE},logits_datatype:TYPE_BF16
- python3 tensorrtllm_backend/tools/fill_template.py -i triton_model_repo/preprocessing/config.pbtxt tokenizer_dir:tokenizer_dir,triton_max_batch_size:${TRITON_MAX_BATCH_SIZE},preprocessing_instance_count:${INSTANCE_COUNT}
- python3 tensorrtllm_backend/tools/fill_template.py -i triton_model_repo/tensorrt_llm/config.pbtxt triton_backend:tensorrtllm,triton_max_batch_size:${TRITON_MAX_BATCH_SIZE},decoupled_mode:${DECOUPLED_MODE},engine_dir:tllm_engine_${DSTACK_GPUS_NUM}gpu_bf16,max_queue_delay_microseconds:${MAX_QUEUE_DELAY_MS},batching_strategy:inflight_fused_batching,max_queue_size:${MAX_QUEUE_SIZE},encoder_input_features_data_type:TYPE_BF16,logits_datatype:TYPE_BF16
- python3 tensorrtllm_backend/tools/fill_template.py -i triton_model_repo/postprocessing/config.pbtxt tokenizer_dir:tokenizer_dir,triton_max_batch_size:${TRITON_MAX_BATCH_SIZE},postprocessing_instance_count:${INSTANCE_COUNT},max_queue_size:${MAX_QUEUE_SIZE}
- python3 tensorrtllm_backend/tools/fill_template.py -i triton_model_repo/tensorrt_llm_bls/config.pbtxt triton_max_batch_size:${TRITON_MAX_BATCH_SIZE},decoupled_mode:${DECOUPLED_MODE},bls_instance_count:${INSTANCE_COUNT},logits_datatype:TYPE_BF16
- aws s3 sync triton_model_repo s3://${S3_BUCKET_NAME}/triton_model_repo --acl public-read
- aws s3 sync tllm_engine_${DSTACK_GPUS_NUM}gpu_bf16 s3://${S3_BUCKET_NAME}/tllm_engine_${DSTACK_GPUS_NUM}gpu_bf16 --acl public-read
resources:
gpu: A100:40GB
```
To run it, pass the configuration to `dstack apply`.
```shell
$ dstack apply -f examples/inference/trtllm/build-model.dstack.yml
# BACKEND REGION RESOURCES SPOT PRICE
1 vastai us-iowa 12xCPU, 85GB, 1xA100 (40GB) yes $0.66904
Submit the run build-model? [y/n]: y
Provisioning...
---> 100%
```
#### Deploy the model
Below is the service configuration that deploys DeepSeek R1 Distill Llama 8B.
```yaml
type: service
name: serve-distill
image: nvcr.io/nvidia/tritonserver:25.01-trtllm-python-py3
env:
- MODEL=deepseek-ai/DeepSeek-R1-Distill-Llama-8B
- S3_BUCKET_NAME
- AWS_ACCESS_KEY_ID
- AWS_SECRET_ACCESS_KEY
- AWS_DEFAULT_REGION
commands:
- huggingface-cli download $MODEL --exclude '*.safetensors' --local-dir tokenizer_dir
- curl "https://awscli.amazonaws.com/awscli-exe-linux-x86_64.zip" -o "awscliv2.zip"
- unzip awscliv2.zip
- ./aws/install
- aws s3 sync s3://${S3_BUCKET_NAME}/tllm_engine_1gpu_bf16 ./tllm_engine_1gpu_bf16
- git clone https://github.com/triton-inference-server/server.git
- python3 server/python/openai/openai_frontend/main.py --model-repository s3://${S3_BUCKET_NAME}/triton_model_repo --tokenizer tokenizer_dir --openai-port 8000
port: 8000
model: ensemble
resources:
gpu: A100:40GB
```
To run it, pass the configuration to `dstack apply`.
```shell
$ dstack apply -f examples/inference/trtllm/serve-distill.dstack.yml
# BACKEND REGION RESOURCES SPOT PRICE
1 vastai us-iowa 12xCPU, 85GB, 1xA100 (40GB) yes $0.66904
Submit the run serve-distill? [y/n]: y
Provisioning...
---> 100%
```
## Access the endpoint
If no gateway is created, the model will be available via the OpenAI-compatible endpoint
at `
```shell
$ curl http://127.0.0.1:3000/proxy/models/main/chat/completions \
-X POST \
-H 'Authorization: Bearer <dstack token>' \
-H 'Content-Type: application/json' \
-d '{
"model": "deepseek-ai/DeepSeek-R1",
"messages": [
{
"role": "system",
"content": "You are a helpful assistant."
},
{
"role": "user",
"content": "What is Deep Learning?"
}
],
"stream": true,
"max_tokens": 128
}'
```
When a [gateway](https://dstack.ai/docs/concepts/gateways/) is configured, the OpenAI-compatible endpoint
is available at `https://gateway.
```yaml
type: service
name: amd-service-tgi
# Using the official TGI's ROCm Docker image
image: ghcr.io/huggingface/text-generation-inference:sha-a379d55-rocm
env:
- HF_TOKEN
- MODEL_ID=meta-llama/Meta-Llama-3.1-70B-Instruct
- TRUST_REMOTE_CODE=true
- ROCM_USE_FLASH_ATTN_V2_TRITON=true
commands:
- text-generation-launcher --port 8000
port: 8000
# Register the model
model: meta-llama/Meta-Llama-3.1-70B-Instruct
# Uncomment to leverage spot instances
#spot_policy: auto
resources:
gpu: MI300X
disk: 150GB
```
=== "vLLM"
```yaml
type: service
name: llama31-service-vllm-amd
# Using RunPod's ROCm Docker image
image: runpod/pytorch:2.4.0-py3.10-rocm6.1.0-ubuntu22.04
# Required environment variables
env:
- HF_TOKEN
- MODEL_ID=meta-llama/Meta-Llama-3.1-70B-Instruct
- MAX_MODEL_LEN=126192
# Commands of the task
commands:
- export PATH=/opt/conda/envs/py_3.10/bin:$PATH
- wget https://github.com/ROCm/hipBLAS/archive/refs/tags/rocm-6.1.0.zip
- unzip rocm-6.1.0.zip
- cd hipBLAS-rocm-6.1.0
- python rmake.py
- cd ..
- git clone https://github.com/vllm-project/vllm.git
- cd vllm
- pip install triton
- pip uninstall torch -y
- pip install torch torchvision torchaudio --index-url https://download.pytorch.org/whl/rocm6.1
- pip install /opt/rocm/share/amd_smi
- pip install --upgrade numba scipy huggingface-hub[cli]
- pip install "numpy<2"
- pip install -r requirements-rocm.txt
- wget -N https://github.com/ROCm/vllm/raw/fa78403/rocm_patch/libamdhip64.so.6 -P /opt/rocm/lib
- rm -f "$(python3 -c 'import torch; print(torch.__path__[0])')"/lib/libamdhip64.so*
- export PYTORCH_ROCM_ARCH="gfx90a;gfx942"
- wget https://dstack-binaries.s3.amazonaws.com/vllm-0.6.0%2Brocm614-cp310-cp310-linux_x86_64.whl
- pip install vllm-0.6.0+rocm614-cp310-cp310-linux_x86_64.whl
- vllm serve $MODEL_ID --max-model-len $MAX_MODEL_LEN --port 8000
# Service port
port: 8000
# Register the model
model: meta-llama/Meta-Llama-3.1-70B-Instruct
# Uncomment to leverage spot instances
#spot_policy: auto
resources:
gpu: MI300X
disk: 200GB
```
Note, maximum size of vLLM’s `KV cache` is 126192, consequently we must set `MAX_MODEL_LEN` to 126192. Adding `/opt/conda/envs/py_3.10/bin` to PATH ensures we use the Python 3.10 environment necessary for the pre-built binaries compiled specifically for this version.
> To speed up the `vLLM-ROCm` installation, we use a pre-built binary from S3.
> You can find the task to build and upload the binary in
> [`examples/inference/vllm/amd/` :material-arrow-top-right-thin:{ .external }](https://github.com/dstackai/dstack/blob/master/examples/inference/vllm/amd/){:target="_blank"}.
!!! info "Docker image"
If you want to use AMD, specifying `image` is currently required. This must be an image that includes
ROCm drivers.
To request multiple GPUs, specify the quantity after the GPU name, separated by a colon, e.g., `MI300X:4`.
## Fine-tuning
=== "TRL"
Below is an example of LoRA fine-tuning Llama 3.1 8B using [TRL :material-arrow-top-right-thin:{ .external }](https://rocm.docs.amd.com/en/latest/how-to/llm-fine-tuning-optimization/single-gpu-fine-tuning-and-inference.html){:target="_blank"}
and the [`mlabonne/guanaco-llama2-1k` :material-arrow-top-right-thin:{ .external }](https://huggingface.co/datasets/mlabonne/guanaco-llama2-1k){:target="_blank"}
dataset.
```yaml
type: task
name: trl-amd-llama31-train
# Using RunPod's ROCm Docker image
image: runpod/pytorch:2.1.2-py3.10-rocm6.1-ubuntu22.04
# Required environment variables
env:
- HF_TOKEN
# Mount files
files:
- train.py
# Commands of the task
commands:
- export PATH=/opt/conda/envs/py_3.10/bin:$PATH
- git clone https://github.com/ROCm/bitsandbytes
- cd bitsandbytes
- git checkout rocm_enabled
- pip install -r requirements-dev.txt
- cmake -DBNB_ROCM_ARCH="gfx942" -DCOMPUTE_BACKEND=hip -S .
- make
- pip install .
- pip install trl
- pip install peft
- pip install transformers datasets huggingface-hub scipy
- cd ..
- python train.py
# Uncomment to leverage spot instances
#spot_policy: auto
resources:
gpu: MI300X
disk: 150GB
```
=== "Axolotl"
Below is an example of fine-tuning Llama 3.1 8B using [Axolotl :material-arrow-top-right-thin:{ .external }](https://rocm.blogs.amd.com/artificial-intelligence/axolotl/README.html){:target="_blank"}
and the [tatsu-lab/alpaca :material-arrow-top-right-thin:{ .external }](https://huggingface.co/datasets/tatsu-lab/alpaca){:target="_blank"}
dataset.
```yaml
type: task
# The name is optional, if not specified, generated randomly
name: axolotl-amd-llama31-train
# Using RunPod's ROCm Docker image
image: runpod/pytorch:2.1.2-py3.10-rocm6.0.2-ubuntu22.04
# Required environment variables
env:
- HF_TOKEN
- WANDB_API_KEY
- WANDB_PROJECT
- WANDB_NAME=axolotl-amd-llama31-train
- HUB_MODEL_ID
# Commands of the task
commands:
- export PATH=/opt/conda/envs/py_3.10/bin:$PATH
- pip uninstall torch torchvision torchaudio -y
- python3 -m pip install --pre torch==2.3.0 torchvision torchaudio --index-url https://download.pytorch.org/whl/rocm6.0/
- git clone https://github.com/OpenAccess-AI-Collective/axolotl
- cd axolotl
- git checkout d4f6c65
- pip install -e .
# Latest pynvml is not compatible with axolotl commit d4f6c65, so we need to fall back to version 11.5.3
- pip uninstall pynvml -y
- pip install pynvml==11.5.3
- cd ..
- wget https://dstack-binaries.s3.amazonaws.com/flash_attn-2.0.4-cp310-cp310-linux_x86_64.whl
- pip install flash_attn-2.0.4-cp310-cp310-linux_x86_64.whl
- wget https://dstack-binaries.s3.amazonaws.com/xformers-0.0.26-cp310-cp310-linux_x86_64.whl
- pip install xformers-0.0.26-cp310-cp310-linux_x86_64.whl
- git clone --recurse https://github.com/ROCm/bitsandbytes
- cd bitsandbytes
- git checkout rocm_enabled
- pip install -r requirements-dev.txt
- cmake -DBNB_ROCM_ARCH="gfx942" -DCOMPUTE_BACKEND=hip -S .
- make
- pip install .
- cd ..
- accelerate launch -m axolotl.cli.train -- axolotl/examples/llama-3/fft-8b.yaml
--wandb-project "$WANDB_PROJECT"
--wandb-name "$WANDB_NAME"
--hub-model-id "$HUB_MODEL_ID"
resources:
gpu: MI300X
disk: 150GB
```
Note, to support ROCm, we need to checkout to commit `d4f6c65`. This commit eliminates the need to manually modify the Axolotl source code to make xformers compatible with ROCm, as described in the [xformers workaround :material-arrow-top-right-thin:{ .external }](https://docs.axolotl.ai/docs/amd_hpc.html#apply-xformers-workaround). This installation approach is also followed for building Axolotl ROCm docker image. [(See Dockerfile) :material-arrow-top-right-thin:{ .external }](https://github.com/ROCm/rocm-blogs/blob/release/blogs/artificial-intelligence/axolotl/src/Dockerfile.rocm){:target="_blank"}.
> To speed up installation of `flash-attention` and `xformers `, we use pre-built binaries uploaded to S3.
> You can find the tasks that build and upload the binaries
> in [`examples/single-node-training/axolotl/amd/` :material-arrow-top-right-thin:{ .external }](https://github.com/dstackai/dstack/blob/master/examples/single-node-training/axolotl/amd/){:target="_blank"}.
## Running a configuration
Once the configuration is ready, run `dstack apply -f
```shell
$ HF_TOKEN=...
$ WANDB_API_KEY=...
$ WANDB_PROJECT=...
$ WANDB_NAME=axolotl-amd-llama31-train
$ HUB_MODEL_ID=...
$ dstack apply -f examples/inference/vllm/amd/.dstack.yml
```
## Source code
The source-code of this example can be found in
[`examples/inference/tgi/amd` :material-arrow-top-right-thin:{ .external }](https://github.com/dstackai/dstack/blob/master/examples/inference/tgi/amd){:target="_blank"},
[`examples/inference/vllm/amd` :material-arrow-top-right-thin:{ .external }](https://github.com/dstackai/dstack/blob/master/examples/inference/vllm/amd){:target="_blank"},
[`examples/single-node-training/axolotl/amd` :material-arrow-top-right-thin:{ .external }](https://github.com/dstackai/dstack/blob/master/examples/single-node-training/axolotl/amd){:target="_blank"} and
[`examples/single-node-training/trl/amd` :material-arrow-top-right-thin:{ .external }](https://github.com/dstackai/dstack/blob/master/examples/single-node-training/trl/amd){:target="_blank"}
## What's next?
1. Browse [TGI :material-arrow-top-right-thin:{ .external }](https://rocm.docs.amd.com/en/latest/how-to/rocm-for-ai/deploy-your-model.html#serving-using-hugging-face-tgi),
[vLLM :material-arrow-top-right-thin:{ .external }](https://docs.vllm.ai/en/latest/getting_started/amd-installation.html#build-from-source-rocm),
[Axolotl :material-arrow-top-right-thin:{ .external }](https://github.com/ROCm/rocm-blogs/tree/release/blogs/artificial-intelligence/axolotl),
[TRL :material-arrow-top-right-thin:{ .external }](https://rocm.docs.amd.com/en/latest/how-to/llm-fine-tuning-optimization/fine-tuning-and-inference.html) and
[ROCm Bitsandbytes :material-arrow-top-right-thin:{ .external }](https://github.com/ROCm/bitsandbytes)
2. Check [dev environments](https://dstack.ai/docs/dev-environments), [tasks](https://dstack.ai/docs/tasks), and
[services](https://dstack.ai/docs/services).
## TPU
# TPU
If you've configured the `gcp` backend in `dstack`, you can run dev environments, tasks, and services on [TPUs](https://cloud.google.com/tpu/docs/intro-to-tpu).
Choose a TPU instance by specifying the TPU version and the number of cores (e.g. `v5litepod-8`) in the `gpu` property under `resources`,
or request TPUs by specifying `tpu` as `vendor` ([see examples](https://dstack.ai/docs/guides/protips/#gpu)).
Below are a few examples on using TPUs for deployment and fine-tuning.
!!! info "Multi-host TPUs"
Currently, `dstack` supports only single-host TPUs, which means that
the maximum supported number of cores is `8` (e.g. `v2-8`, `v3-8`, `v5litepod-8`, `v5p-8`, `v6e-8`).
Multi-host TPU support is on the roadmap.
!!! info "TPU storage"
By default, each TPU VM contains a 100GB boot disk and its size cannot be changed.
If you need more storage, attach additional disks using [Volumes](https://dstack.ai/docs/concepts/volumes/).
## Deployment
Many serving frameworks including vLLM and TGI have TPU support.
Here's an example of a [service](https://dstack.ai/docs/services) that deploys Llama 3.1 8B using
[Optimum TPU :material-arrow-top-right-thin:{ .external }](https://github.com/huggingface/optimum-tpu){:target="_blank"}
and [vLLM :material-arrow-top-right-thin:{ .external }](https://github.com/vllm-project/vllm){:target="_blank"}.
=== "Optimum TPU"
```yaml
type: service
name: llama31-service-optimum-tpu
image: dstackai/optimum-tpu:llama31
env:
- HF_TOKEN
- MODEL_ID=meta-llama/Meta-Llama-3.1-8B-Instruct
- MAX_TOTAL_TOKENS=4096
- MAX_BATCH_PREFILL_TOKENS=4095
commands:
- text-generation-launcher --port 8000
port: 8000
# Register the model
model: meta-llama/Meta-Llama-3.1-8B-Instruct
resources:
gpu: v5litepod-4
```
Note that for Optimum TPU `MAX_INPUT_TOKEN` is set to 4095 by default. We must also set `MAX_BATCH_PREFILL_TOKENS` to 4095.
??? info "Docker image"
The official Docker image `huggingface/optimum-tpu:latest` doesn’t support Llama 3.1-8B.
We’ve created a custom image with the fix: `dstackai/optimum-tpu:llama31`.
Once the [pull request :material-arrow-top-right-thin:{ .external }](https://github.com/huggingface/optimum-tpu/pull/92){:target="_blank"} is merged,
the official Docker image can be used.
=== "vLLM"
```yaml
type: service
name: llama31-service-vllm-tpu
env:
- MODEL_ID=meta-llama/Meta-Llama-3.1-8B-Instruct
- HF_TOKEN
- DATE=20240828
- TORCH_VERSION=2.5.0
- VLLM_TARGET_DEVICE=tpu
- MAX_MODEL_LEN=4096
commands:
- pip install https://storage.googleapis.com/pytorch-xla-releases/wheels/tpuvm/torch-${TORCH_VERSION}.dev${DATE}-cp311-cp311-linux_x86_64.whl
- pip3 install https://storage.googleapis.com/pytorch-xla-releases/wheels/tpuvm/torch_xla-${TORCH_VERSION}.dev${DATE}-cp311-cp311-linux_x86_64.whl
- pip install torch_xla[tpu] -f https://storage.googleapis.com/libtpu-releases/index.html
- pip install torch_xla[pallas] -f https://storage.googleapis.com/jax-releases/jax_nightly_releases.html -f https://storage.googleapis.com/jax-releases/jaxlib_nightly_releases.html
- git clone https://github.com/vllm-project/vllm.git
- cd vllm
- pip install -r requirements-tpu.txt
- apt-get install -y libopenblas-base libopenmpi-dev libomp-dev
- python setup.py develop
- vllm serve $MODEL_ID
--tensor-parallel-size 4
--max-model-len $MAX_MODEL_LEN
--port 8000
port: 8000
# Register the model
model: meta-llama/Meta-Llama-3.1-8B-Instruct
# Uncomment to leverage spot instances
#spot_policy: auto
resources:
gpu: v5litepod-4
```
Note, when using Llama 3.1 8B with a `v5litepod` which has 16GB memory per core, we must limit the context size to 4096 tokens to fit the memory.
### Memory requirements
Below are the approximate memory requirements for serving LLMs with the minimal required TPU configuration:
| Model size | bfloat16 | TPU | int8 | TPU |
|------------|----------|--------------|-------|----------------|
| **8B** | 16GB | v5litepod-4 | 8GB | v5litepod-4 |
| **70B** | 140GB | v5litepod-16 | 70GB | v5litepod-16 |
| **405B** | 810GB | v5litepod-64 | 405GB | v5litepod-64 |
Note, `v5litepod` is optimized for serving transformer-based models. Each core is equipped with 16GB of memory.
### Supported frameworks
| Framework | Quantization | Note |
|-----------|----------------|--------------------------------------------------------------------------------------------------------------------------------------------------------------------------------------------------------------------------------------------------------------------------------------------------|
| **TGI** | bfloat16 | To deploy with TGI, Optimum TPU must be used. |
| **vLLM** | int8, bfloat16 | int8 quantization still requires the same memory because the weights are first moved to the TPU in bfloat16, and then converted to int8. See the [pull request :material-arrow-top-right-thin:{ .external }](https://github.com/vllm-project/vllm/pull/7005){:target="_blank"} for more details. |
### Running a configuration
Once the configuration is ready, run `dstack apply -f
```yaml
type: task
name: optimum-tpu-llama-train
python: "3.11"
env:
- HF_TOKEN
files:
- train.py
- config.yaml
commands:
- git clone -b add_llama_31_support https://github.com/dstackai/optimum-tpu.git
- mkdir -p optimum-tpu/examples/custom/
- cp train.py optimum-tpu/examples/custom/train.py
- cp config.yaml optimum-tpu/examples/custom/config.yaml
- cd optimum-tpu
- pip install -e . -f https://storage.googleapis.com/libtpu-releases/index.html
- pip install datasets evaluate
- pip install accelerate -U
- pip install peft
- python examples/custom/train.py examples/custom/config.yaml
resources:
gpu: v5litepod-8
```
[//]: # (### Fine-Tuning with TRL)
[//]: # (Use the example `examples/single-node-training/optimum-tpu/gemma/train.dstack.yml` to Finetune `Gemma-2B` model using `trl` with `dstack` and `optimum-tpu`. )
### Memory requirements
Below are the approximate memory requirements for fine-tuning LLMs with the minimal required TPU configuration:
| Model size | LoRA | TPU |
|------------|-------|--------------|
| **8B** | 16GB | v5litepod-8 |
| **70B** | 160GB | v5litepod-16 |
| **405B** | 950GB | v5litepod-64 |
Note, `v5litepod` is optimized for fine-tuning transformer-based models. Each core is equipped with 16GB of memory.
### Supported frameworks
| Framework | Quantization | Note |
|-----------------|--------------|---------------------------------------------------------------------------------------------------|
| **TRL** | bfloat16 | To fine-tune using TRL, Optimum TPU is recommended. TRL doesn't support Llama 3.1 out of the box. |
| **Pytorch XLA** | bfloat16 | |
## Source code
The source-code of this example can be found in
[`examples/inference/tgi/tpu` :material-arrow-top-right-thin:{ .external }](https://github.com/dstackai/dstack/blob/master/examples/inference/tgi/tpu){:target="_blank"},
[`examples/inference/vllm/tpu` :material-arrow-top-right-thin:{ .external }](https://github.com/dstackai/dstack/blob/master/examples/inference/vllm/tpu){:target="_blank"},
and [`examples/single-node-training/optimum-tpu` :material-arrow-top-right-thin:{ .external }](https://github.com/dstackai/dstack/blob/master/examples/single-node-training/trl){:target="_blank"}.
## What's next?
1. Browse [Optimum TPU :material-arrow-top-right-thin:{ .external }](https://github.com/huggingface/optimum-tpu),
[Optimum TPU TGI :material-arrow-top-right-thin:{ .external }](https://github.com/huggingface/optimum-tpu/tree/main/text-generation-inference) and
[vLLM :material-arrow-top-right-thin:{ .external }](https://docs.vllm.ai/en/latest/getting_started/tpu-installation.html).
2. Check [dev environments](https://dstack.ai/docs/dev-environments), [tasks](https://dstack.ai/docs/tasks),
[services](https://dstack.ai/docs/services), and [fleets](https://dstack.ai/docs/concepts/fleets).
## Tenstorrent
# Tenstorrent
`dstack` supports running dev environments, tasks, and services on Tenstorrent
[Wormwhole :material-arrow-top-right-thin:{ .external }](https://tenstorrent.com/en/hardware/wormhole){:target="_blank"} accelerators via SSH fleets.
??? info "SSH fleets"
```yaml
type: fleet
name: wormwhole-fleet
ssh_config:
user: root
identity_file: ~/.ssh/id_rsa
# Configure any number of hosts with n150 or n300 PCEe boards
hosts:
- 192.168.2.108
```
> Hosts should be pre-installed with [Tenstorrent software](https://docs.tenstorrent.com/getting-started/README.html#software-installation).
This should include the drivers, `tt-smi`, and HugePages.
To apply the fleet configuration, run:
```bash
$ dstack apply -f examples/acceleators/tenstorrent/fleet.dstack.yml
FLEET RESOURCES PRICE STATUS CREATED
wormwhole-fleet cpu=12 mem=32GB disk=243GB n150:12GB $0 idle 18 sec ago
```
For more details on fleet configuration, refer to [SSH fleets](https://dstack.ai/docs/concepts/fleets#ssh-fleets).
## Services
Here's an example of a service that deploys
[`Llama-3.2-1B-Instruct` :material-arrow-top-right-thin:{ .external }](https://huggingface.co/meta-llama/Llama-3.2-1B){:target="_blank"}
using [Tenstorrent Inference Service :material-arrow-top-right-thin:{ .external }](https://github.com/tenstorrent/tt-inference-server){:target="_blank"}.
```yaml
type: service
name: tt-inference-server
env:
- HF_TOKEN
- HF_MODEL_REPO_ID=meta-llama/Llama-3.2-1B-Instruct
image: ghcr.io/tenstorrent/tt-inference-server/vllm-tt-metal-src-release-ubuntu-20.04-amd64:0.0.4-v0.56.0-rc47-e2e0002ac7dc
commands:
- |
. ${PYTHON_ENV_DIR}/bin/activate
pip install "huggingface_hub[cli]"
export LLAMA_DIR="/data/models--$(echo "$HF_MODEL_REPO_ID" | sed 's/\//--/g')/"
huggingface-cli download $HF_MODEL_REPO_ID --local-dir $LLAMA_DIR
python /home/container_app_user/app/src/run_vllm_api_server.py
port: 7000
model: meta-llama/Llama-3.2-1B-Instruct
# Cache downloaded model
volumes:
- /mnt/data/tt-inference-server/data:/data
resources:
gpu: n150:1
```
Go ahead and run configuration using `dstack apply`:
```bash
$ dstack apply -f examples/acceleators/tenstorrent/tt-inference-server.dstack.yml
```
Once the service is up, it will be available via the service endpoint
at `
```shell
$ curl http://127.0.0.1:3000/proxy/models/main/chat/completions \
-X POST \
-H 'Authorization: Bearer <dstack token>' \
-H 'Content-Type: application/json' \
-d '{
"model": "meta-llama/Llama-3.2-1B-Instruct",
"messages": [
{
"role": "system",
"content": "You are a helpful assistant."
},
{
"role": "user",
"content": "What is Deep Learning?"
}
],
"stream": true,
"max_tokens": 512
}'
```
Additionally, the model is available via `dstack`'s control plane UI:
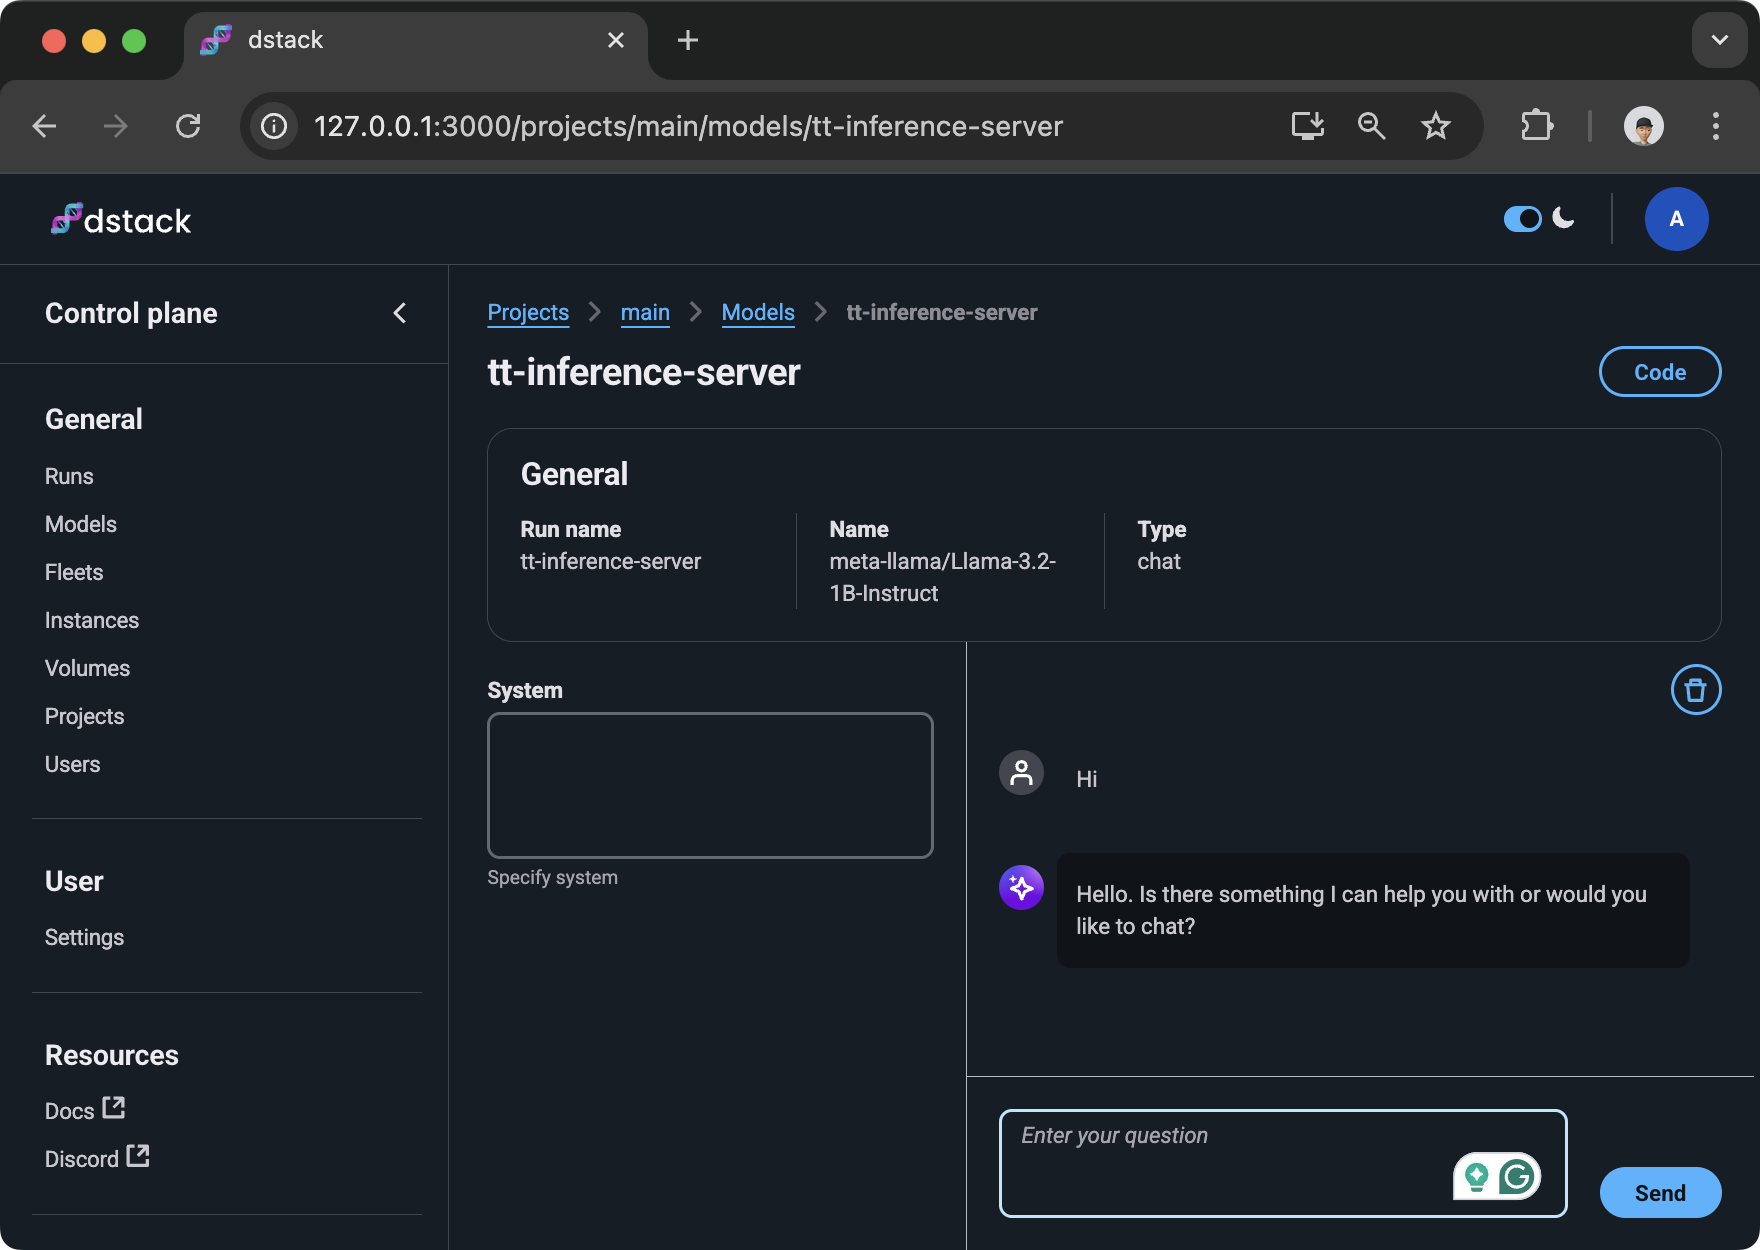{ width=800 }
When a [gateway](https://dstack.ai/docs/concepts/gateways/) is configured, the service endpoint
is available at `https://
```yaml
type: task
# The name is optional, if not specified, generated randomly
name: tt-smi
env:
- HF_TOKEN
# (Required) Use any image with TT drivers
image: dstackai/tt-smi:latest
# Use any commands
commands:
- tt-smi -s
# Specify the number of accelerators, model, etc
resources:
gpu: n150:1
# Uncomment if you want to run on a cluster of nodes
#nodes: 2
```
> Tasks support many options, including multi-node configuration, max duration, etc. To learn more, refer to [Tasks](https://dstack.ai/docs/concepts/tasks).
## Dev environments
Below is an example of a dev environment configuration. It can be used to provision a dev environemnt that can be accessed via your desktop IDE.
```yaml
type: dev-environment
# The name is optional, if not specified, generated randomly
name: cursor
# (Optional) List required env variables
env:
- HF_TOKEN
image: dstackai/tt-smi:latest
# Can be `vscode` or `cursor`
ide: cursor
resources:
gpu: n150:1
```
If you run it via `dstack apply`, it will output the URL to access it via your desktop IDE.
{ width=800 }
> Dev nevironments support many options, including inactivity and max duration, IDE configuration, etc. To learn more, refer to [Dev environments](https://dstack.ai/docs/concepts/tasks).
??? info "Feedback"
Found a bug, or want to request a feature? File it in the [issue tracker :material-arrow-top-right-thin:{ .external }](https://github.com/dstackai/dstack/issues){:target="_blank"},
or share via [Discord :material-arrow-top-right-thin:{ .external }](https://discord.gg/u8SmfwPpMd){:target="_blank"}.